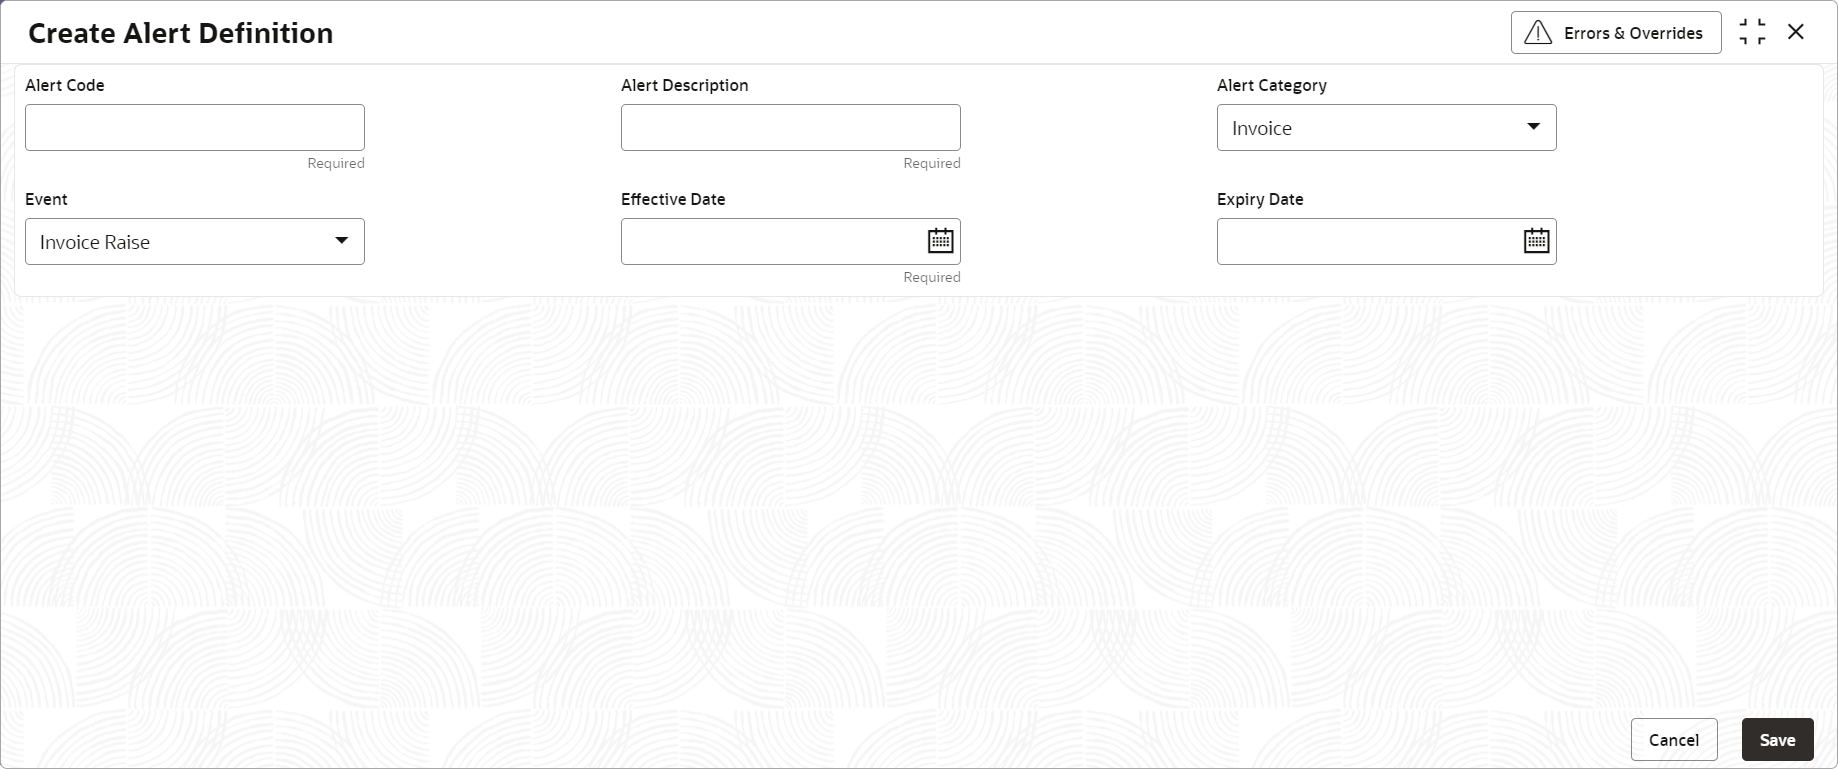
3.2.2.1 Create Alert Definition
This topic describes the systematic instruction to configure and manage various types of alerts.
Newly created alert types take effect once authorized and cannot be modified thereafter.
Specify User ID and Password, and login to Home screen.
- On Home screen, click Receivables And Payables. Under Receivables And Payables, click Maintenance.
- Under Maintenance, click Alerts. Under Alerts, click Alert Definition.
- Under Alert Definition, click Create Alert Definition.The Create Alert Definition screen displays.
- Specify the fields on Create Alert Definition screen.For more information on fields, refer to the field description table.
Note:
The fields marked as Required are mandatory.Table 3-7 Create Alert Definition - Field Description
Field Description Alert Code Specify the unique alert code to be maintained in the system. Alert Description Specify the description of the alert. Alert Category Select the category of the alert. The available options are: - Counterparty Disassociate
- Credit Note
- File Upload
- Invoice
- Payment
- Purchase Order
Event Select the event for which the alert should be used. The list of events are displayed based on the selected category. If the Category is selected as Counterparty Disassociate, the following events are displayed in the drop-down list:- Counterparty Onboard
- Counterparty disassociate
If the Category is selected as Credit Note, the following event is displayed in the drop-down list:- Raise
If the Category is selected as File Upload, the following events are displayed in the drop-down list:- Invoice
- Payment
- Credit Note
- Debit Note
- Purchase Order
If the Category is selected as Invoice, the following events are displayed in the drop-down list:- Raise
- Accept
- Dispute
- Modify
- Cancel
- Raise In Progress
- Accept In Progress
- Dispute In Progress
- Modify In Progress
- Cancel In Progress
If the Category is selected as Payment, the following event is displayed in the drop-down list:- Create Payment
If the Category is selected as Purchase Order, the following events are displayed in the drop-down list:- Raise
- Accept
- Modify
- Cancel
- Invoice Overdue
Effective Date Click the calendar icon and select the date from which the alert is effective in the system. Expiry Date Click the calendar icon and select the date up to which the alert can be used in the system. - Click Save to save the record and send it for authorization.
Parent topic: Alert Definition
