3.1.6 System Configuration -Third Party Configuration – View and Edit

This topic describes the systematic instruction to System Configuration -Third Party Configuration – View and Edit option.

Using this option, system administrator can edit the third party configurations details.

To view and edit the third party configuration details:

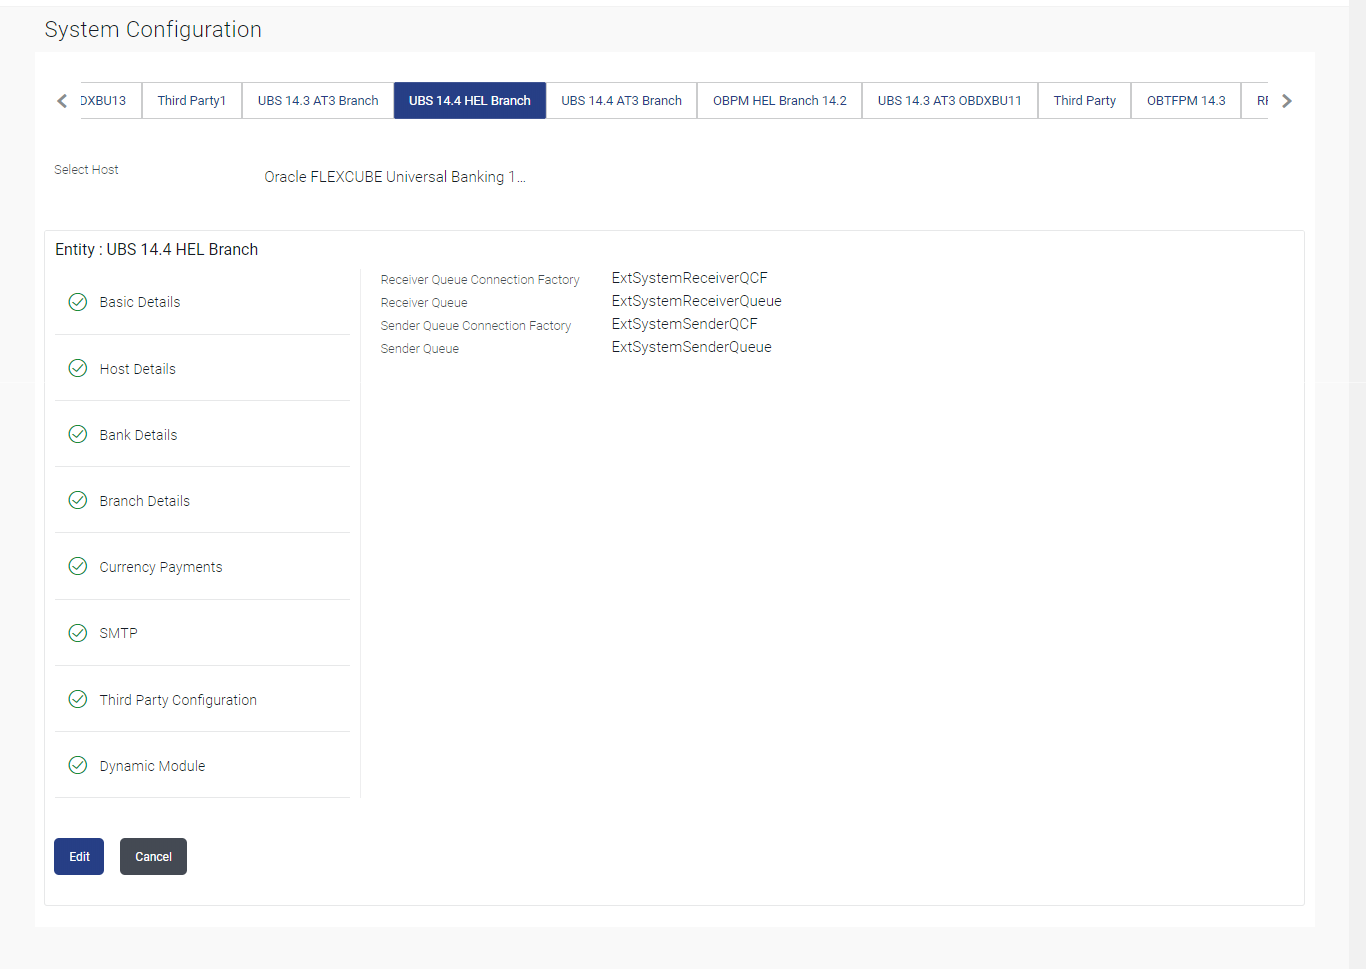
  1. Click on System Configuration option on the dashboard and navigate to the Third Party Configurations tab.
    The default option is View.

    Figure 3-27 System Configuration –Third Party Configurations – View


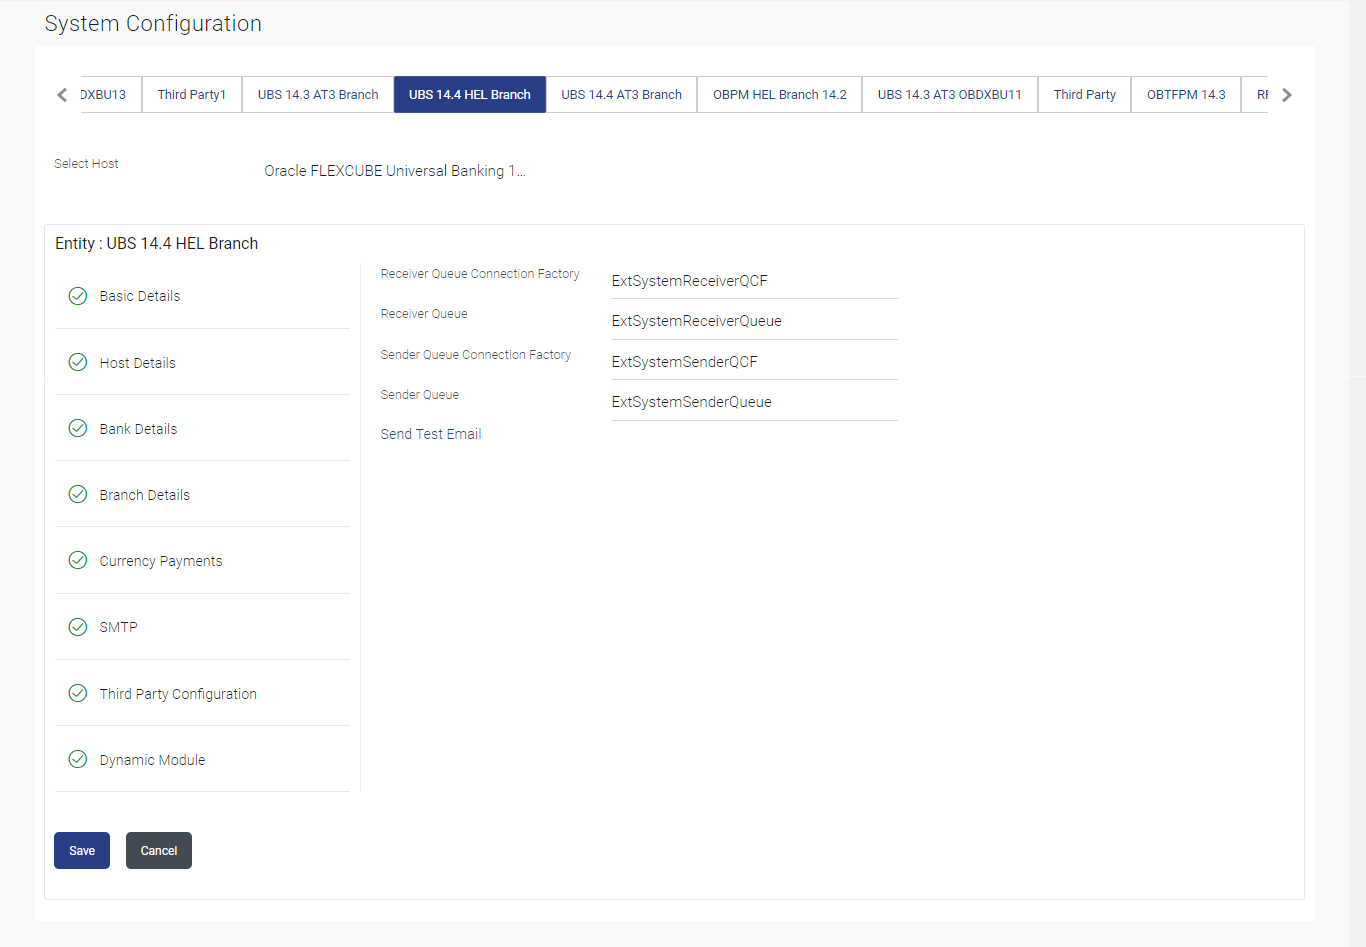
  2. Click Edit to edit the Third Party Configuration.
    The System Configuration –Third Party Configuration screen appears in editable form.

    Figure 3-28 System Configuration –Third Party Configuration – Edit


    Note:

    The fields which are marked as Required are mandatory.

    For more information on fields, refer to the field description table.

    Table 3-21 System Configuration –Third Party Configuration – Edit - Field Description

    Field Name Description
    Receiver Queue Connection Factory Displays the JNDI name of the receiver connection factory which is created inside Receiver JMS module and available for edit.
    Receiver Queue Displays the JNDI name of the receiver queue (destination used for receiving the message from external host) created in the receiver JMS module and available for edit.
    Sender Queue Connection Factory Displays the JNDI name of the sender connection factory, which is created inside Sender JMS module and available for edit
    Sender Queue Displays the JNDI name of the sender queue created in the Sender JMS module and available for edit.
  3. In the Receiver Queue Connection Factory field, edit the value if required.
  4. In the Receiver Queue field, edit the value if required.
  5. In the Sender Queue Connection Factory field, edit the value if required
  6. In the Sender Queue field, edit the value if required.
  7. Perform anyone of the following actions:
    • Click Save to save the changes.
    • Click Cancel to cancel the transaction.
  8. Perform anyone of the following actions:
    • The System Configuration - Third Party Configuration - Review screen appears. Verify the details, and click Confirm.
    • Click Cancel to cancel the transaction.
    • Click the Basic Details, Host Details, Bank Details, SMTP, Third Party Configuration or Dynamic Module tabs to view and edit the respective details if required.

    The screen with success message along with the reference number and status appears.

  9. Click OK to complete the transaction.