16.2.1 Edit Custom Workflow

This topic describes the systematic instruction to Edit Custom Workflow option. Using this option, the bank administrator can choose to create a new application workflow if required for the specific product category.

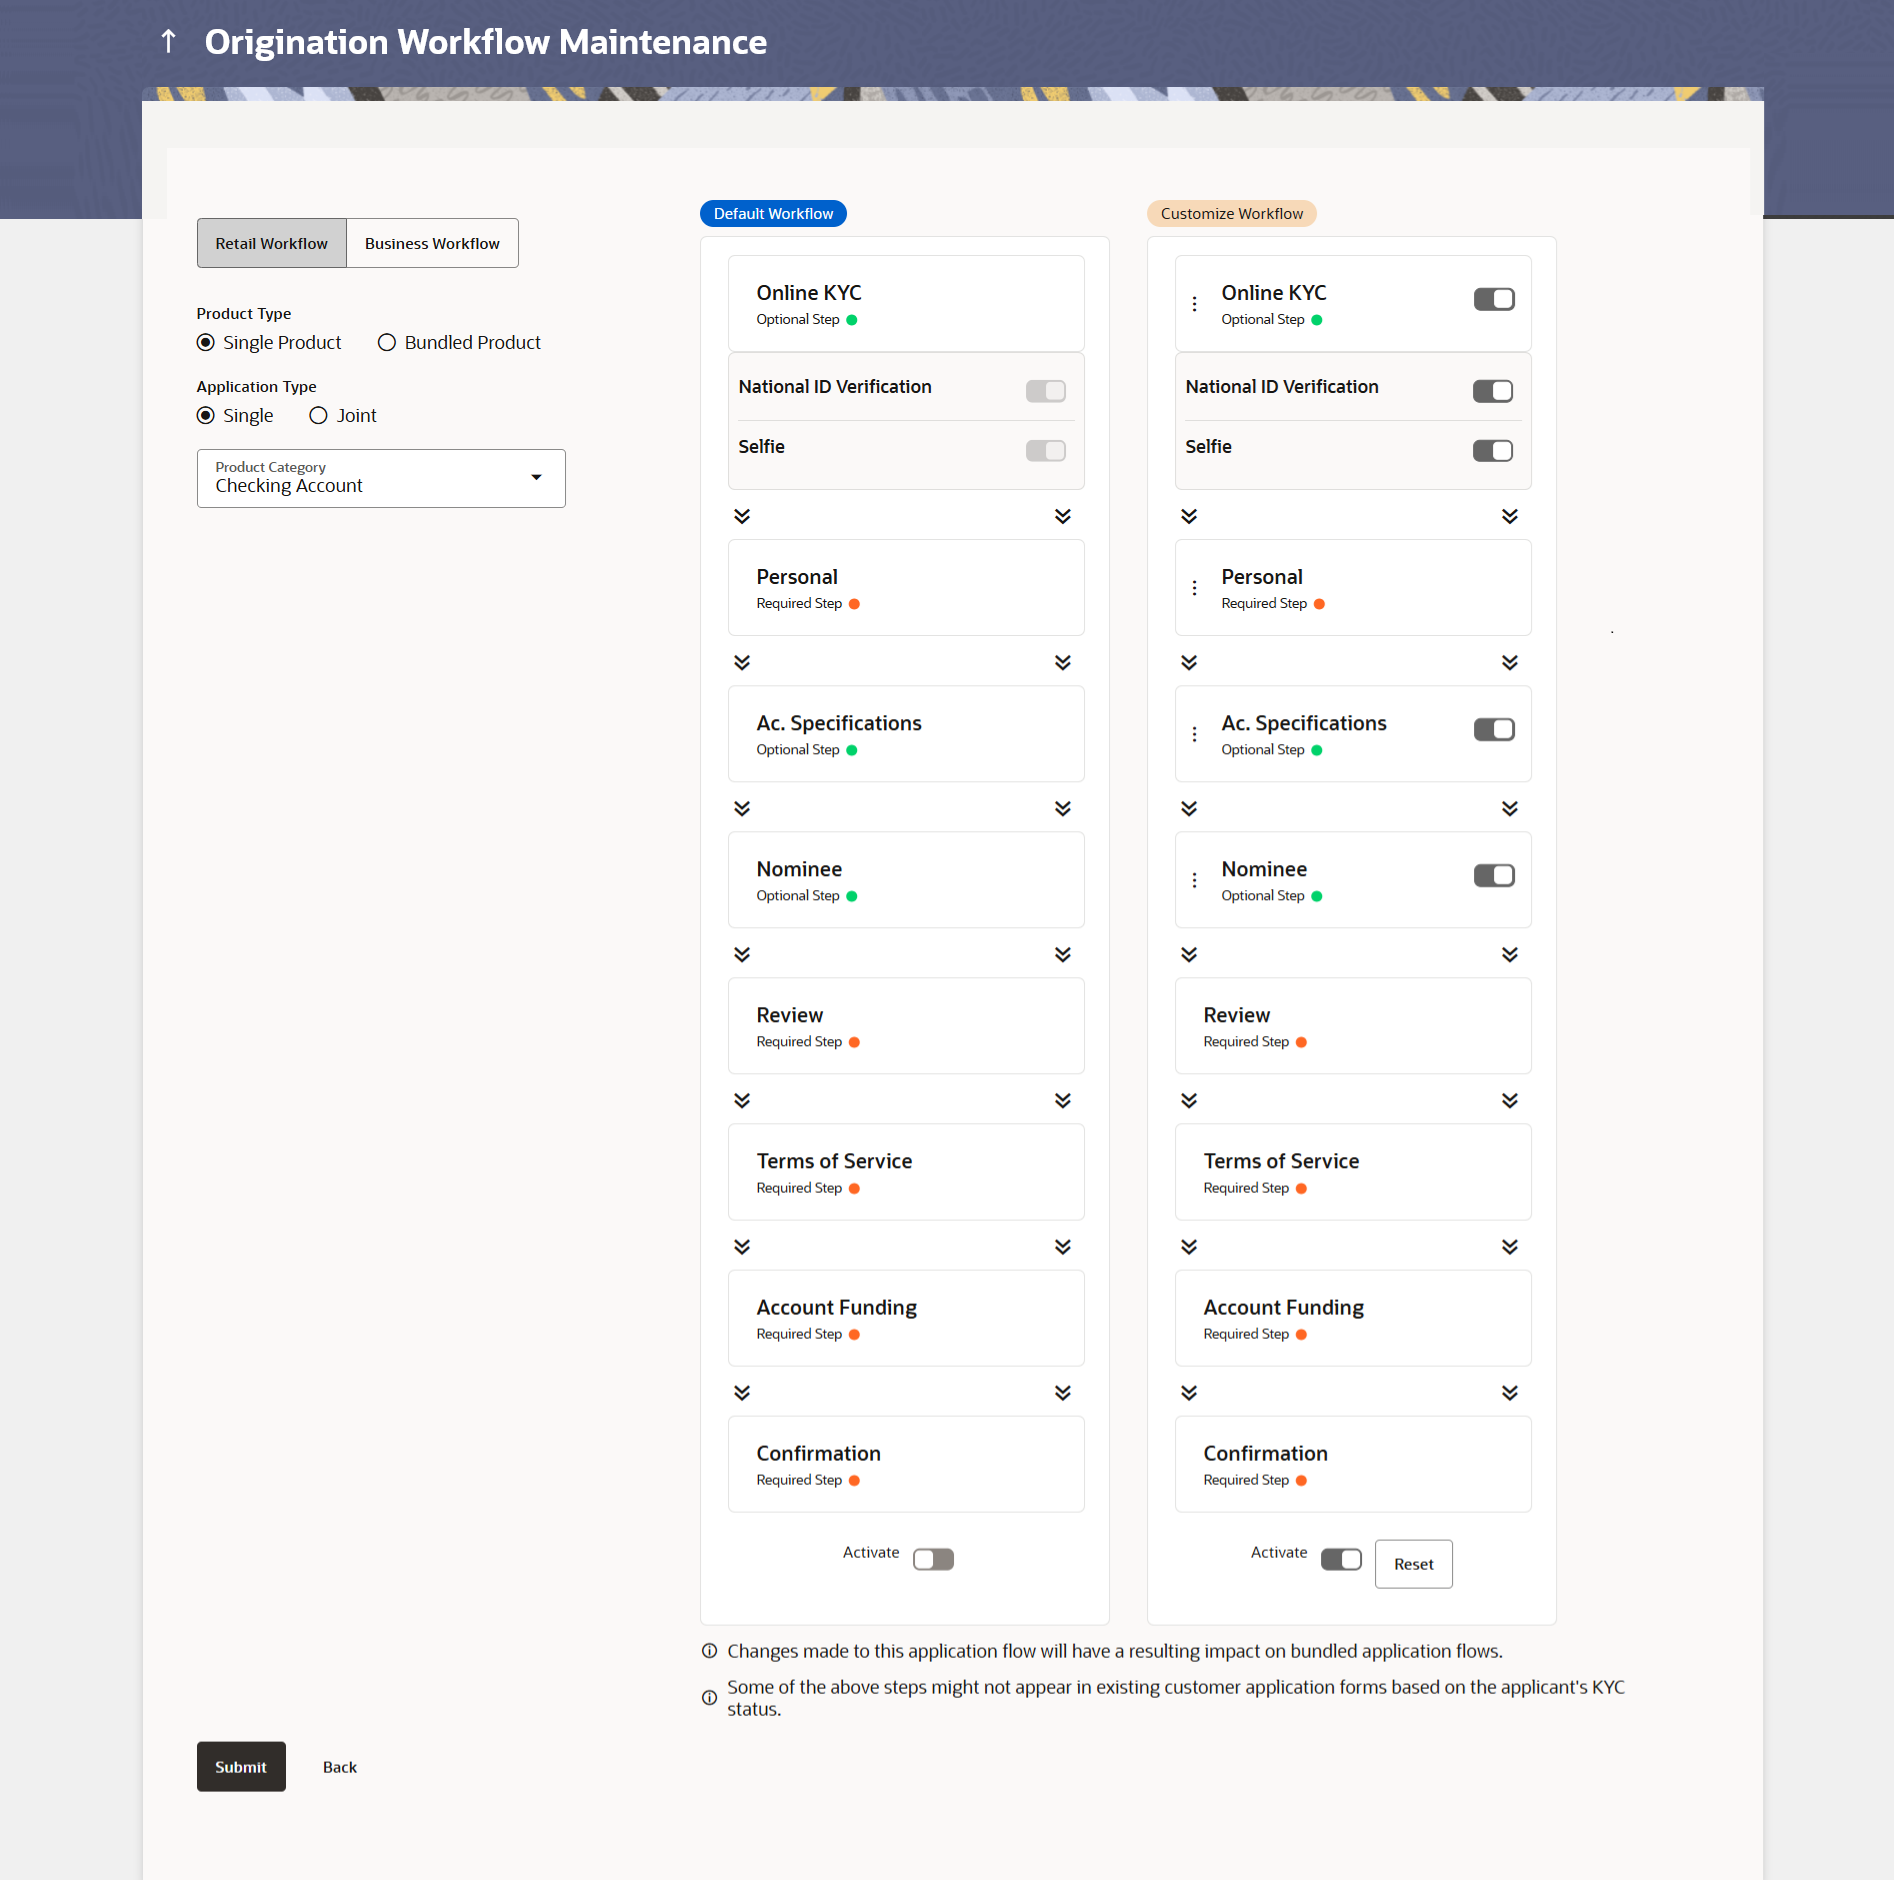
Using this option, the bank administrator can choose to edit the custom application workflow, if required, for the specific product category. The administrator can simply drag and drop the steps to change the sequence. Additionally, the administrator can also choose to enable/disable Online KYC for product applications belonging to that product category. If enabling Online KYC, the administrator can specify which mode of Online KYC to enable. It is to be noted, that the sequence of certain steps, such as Review, Terms of Service and Confirm cannot be changed.

The administrator can even view and compare the custom workflow with the default workflow set for the selected product category and make changes accordingly. Any optional step can be disabled, in which case that step will not appear in the application form.

The custom workflow is automatically activated upon creation. All the steps configured in the product origination workflow will be part of the application form in the sequence defined.

The sequence, defined in the workflow that is active, will have an impact on bundled applications.

To edit the origination workflows:

  1. Navigate to the above paths.
    The Origination Workflow Configuration screen appears.
  2. The custom workflow is visible on the main screen adjacent to the default workflow.
    Click Reset to edit the workflow.

    The workflow becomes editable and the administrator can rearrange the steps in the order as
          required and can also enable or disable Online KYC and if enabling Online KYC, can also define
          the mode to be enabled.

    Figure 16-2 Origination Workflow Configuration - Customize Workflow


    Note:

    The fields which are marked as Required are mandatory.

    For more information on fields, refer to the field description table.

    Table 16-2 Origination Workflow Configuration - Edit Customize Workflow - Field Description

    Field Name Description
    Workflow Details Information specified in below fields are related to workflow details.
    Default Workflow Default application workflow defined for the selected product category is displayed on the screen It depicts the sequence in which the sections of the application form will flow, if the default workflow is enabled.
    Custom Workflow

    Displays the customized application workflow for the selected product. Drag and drop blocks to customize the application workflow. The user can change the sequence of the steps and can also delete optional steps.

    Additionally the user can select the mode of Online KYC to be enabled or can also disabled Online KYC completely, if desired.
    Activate An activate button is present at the bottom of both the default and custom workflows. User can select to activate one of the workflows.
    Reset A reset button is provided below the custom workflow. This button resets all the changes to the custom workflow including re-ordering and deletion of steps and makes the custom workflow similar to the default workflow.
  3. Click any cards marked with drop icon icon and move the card to the position of choice.

    Note:

    You can click delete icon to and enable or disable the an optional step from the application flow if not required.
  4. Perform anyone of the following actions:
    • Click Submit to save the transaction.
    • Click Back to navigate to the previous screen.
  5. Perform anyone of the following actions:
    • The Review screen appears. Verify the details, and click Confirm.
    • Click Cancel to cancel the transaction.
    • Click Back to navigate to the previous screen.
  6. Click OK to complete the transaction.