- Core User Manual
- Group Corporate Onboarding
- Step 3: User Onboarding
- User Management - Search and View
16.4.1 User Management - Search and View
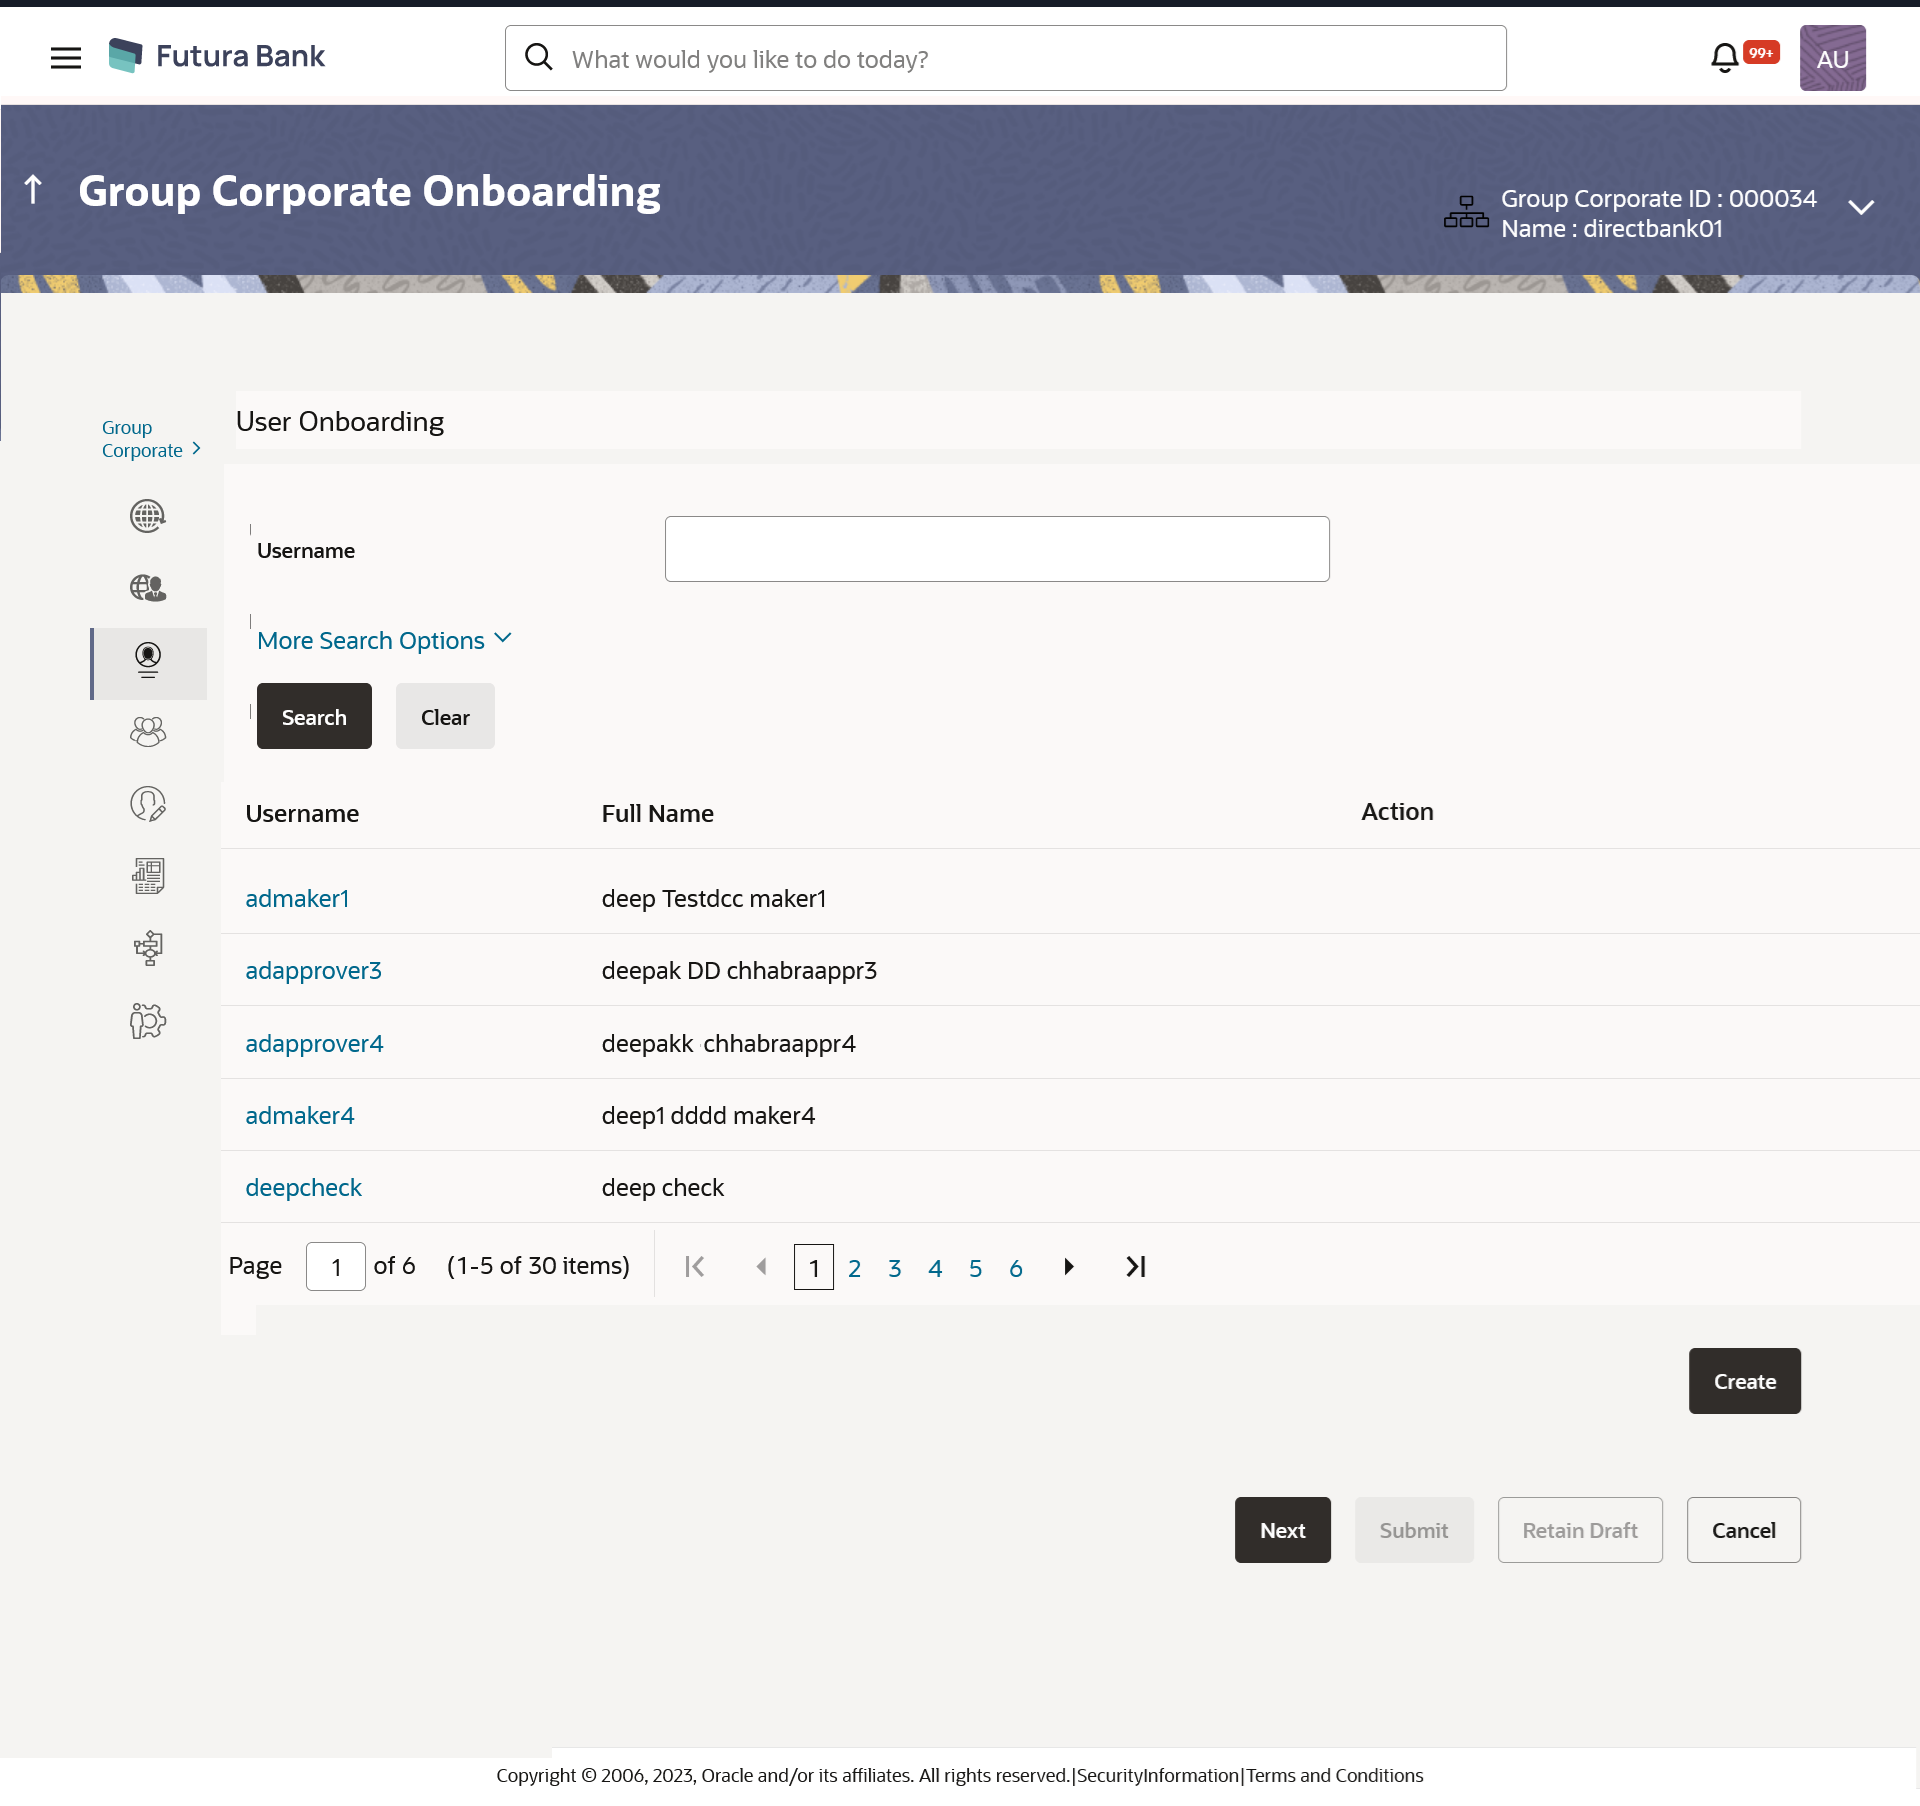
Default search is available with User Name, but the user can also be searched by providing other details like First Name, Last Name, Party ID. Email ID and Mobile Number.
To search for a user:
- Navigate to one of the above paths.The User Onboarding screen appears.
- Enter the search criteria, click Search.The search results appear on the User Management screen based on the search parameters.
OR
Click Cancel if you want to cancel the transaction.
OR
Click Clear if you want to reset the search parameters.
OR
Click Create to create the to create internal and external users.
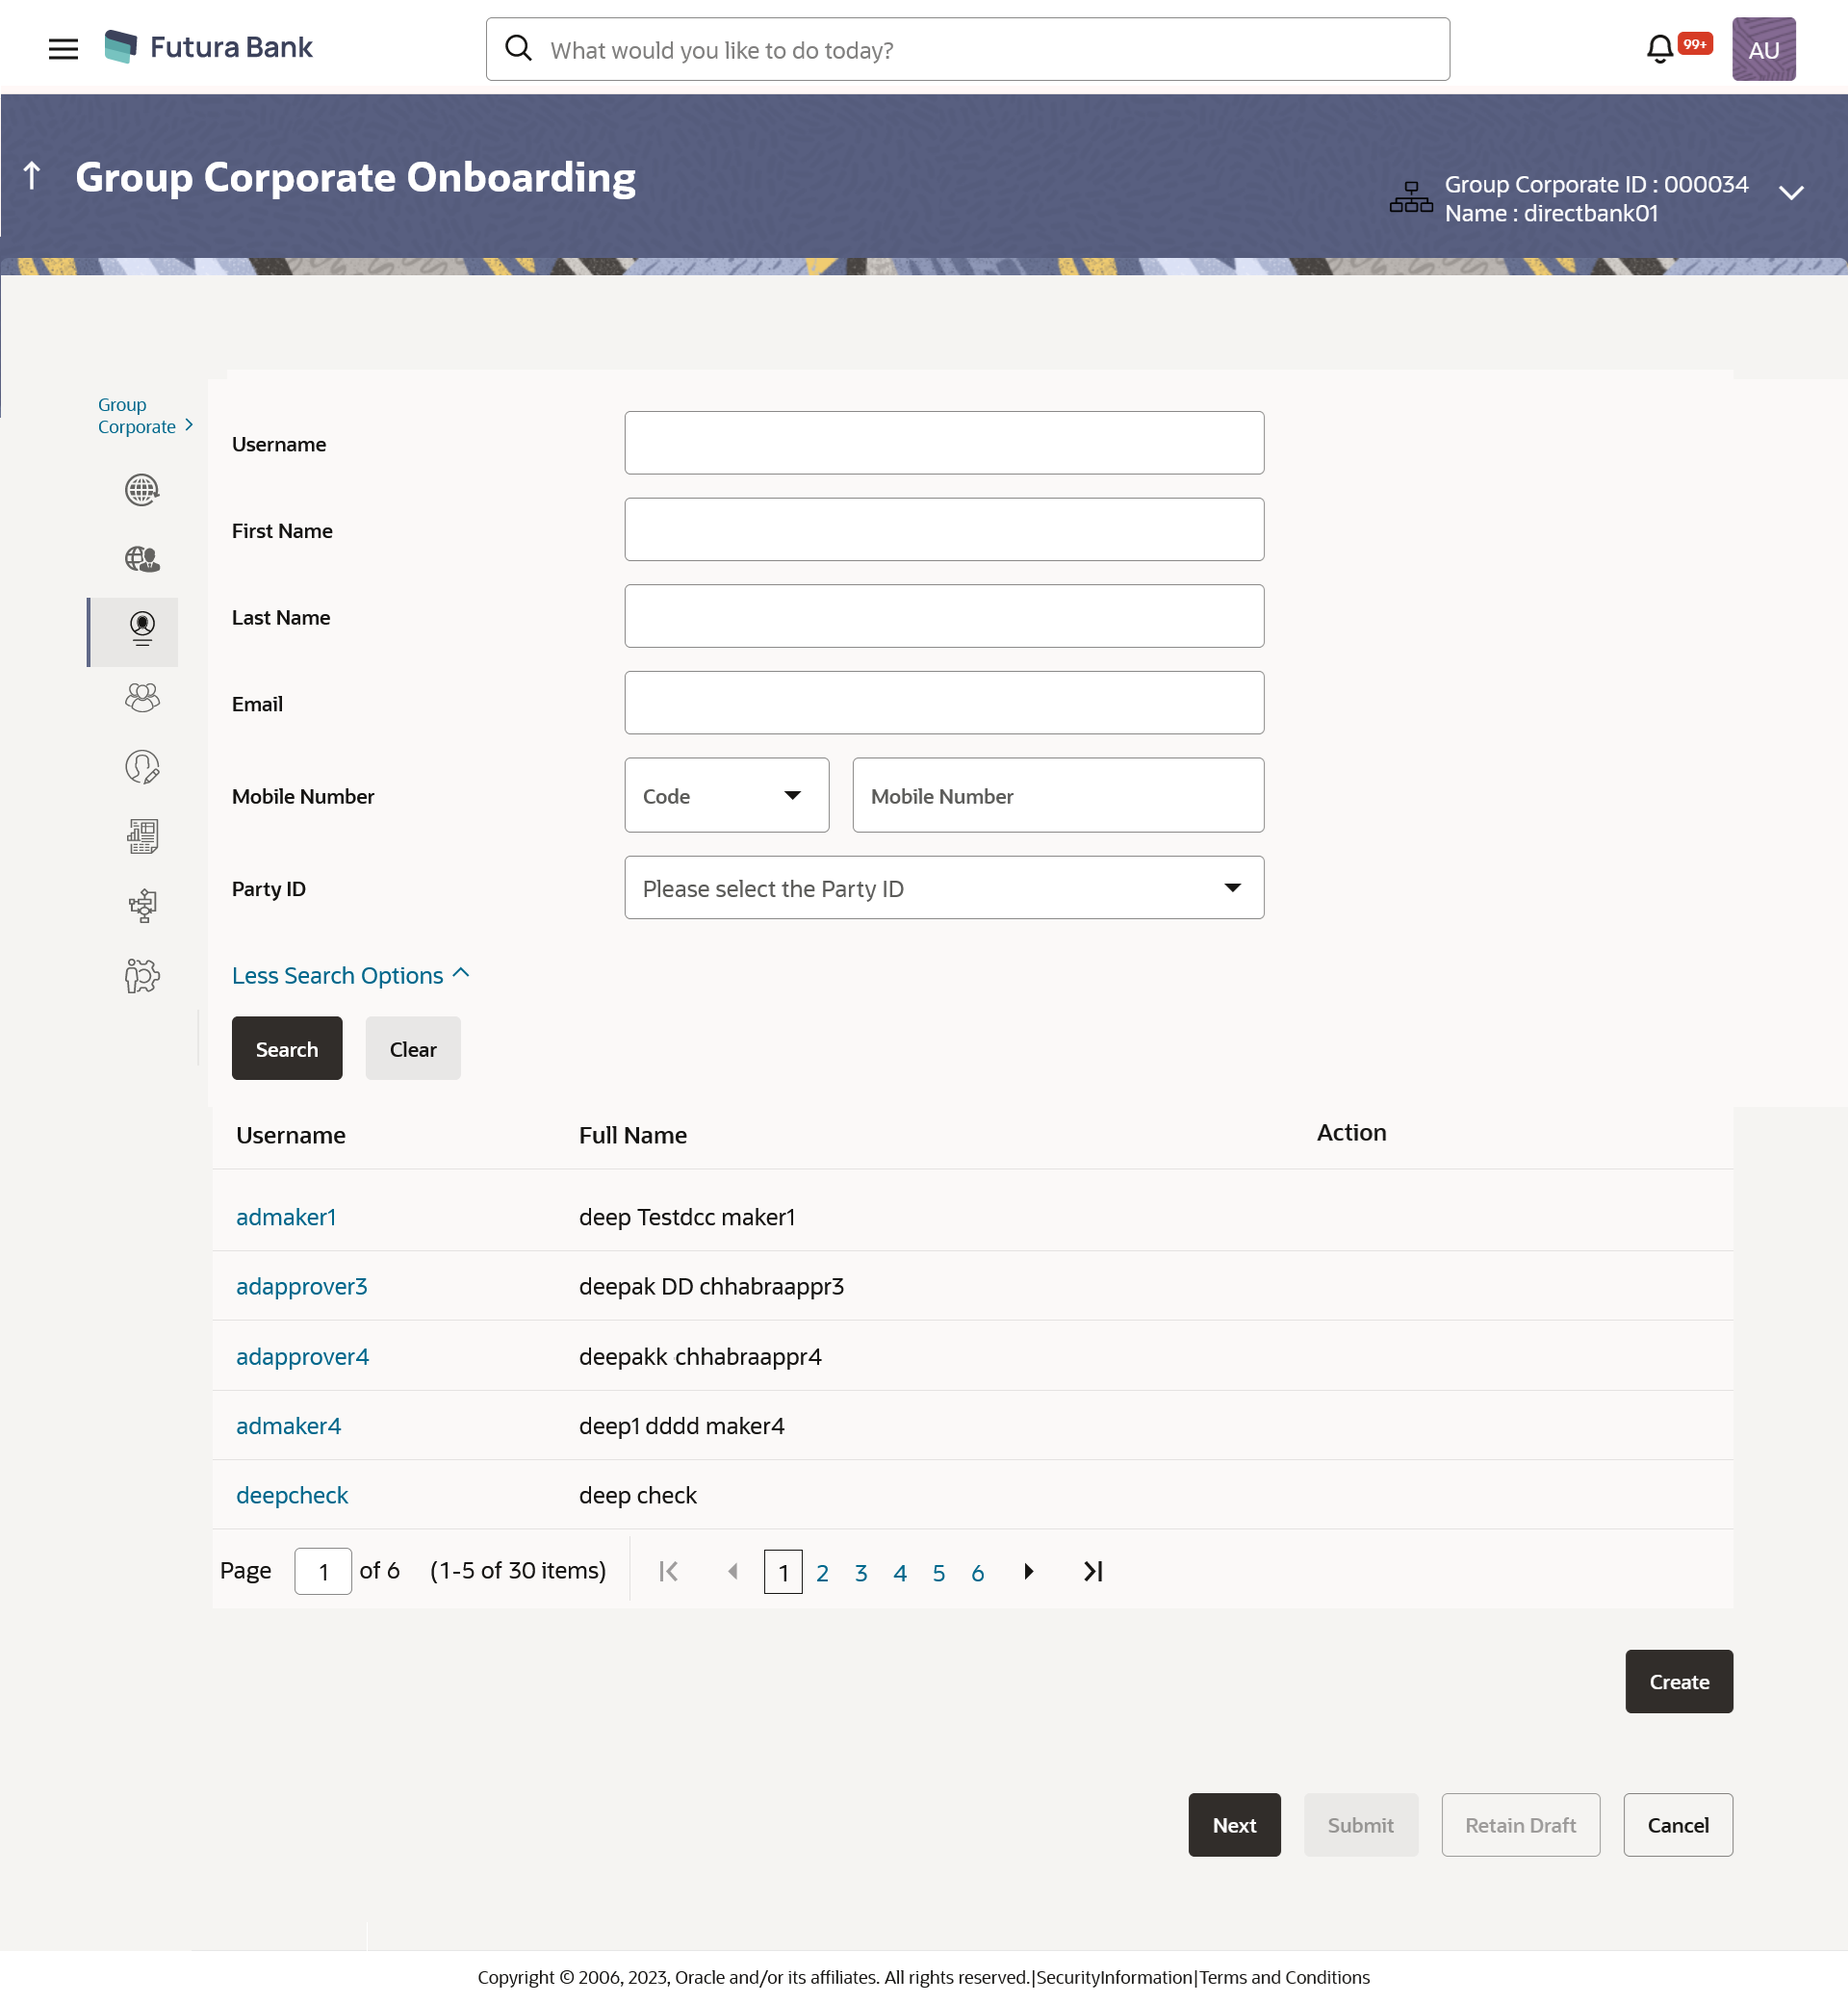
Figure 16-30 User Management - More Search Options
Table 16-14 Field Description
Field Name Description User Name To search the user with the user name. Partial search is allowed. More Search Options Below fields appears if you click the More Search Options link.
First Name Allows to search based on first name or given name of the user. Last Name Allows to search based on last name/ surname of the user. Email Allows to search based on email id of the user. Mobile Number Allows to search based on mobile number of the user. Note:
Select international subscriber dialing (ISD) code along with the mobile number to search the user.Party ID Allows to search based on Party id.
To view the user details:
- Enter the search criteria and click Search in the
User Management screen.The search results appear based on the search parameters.
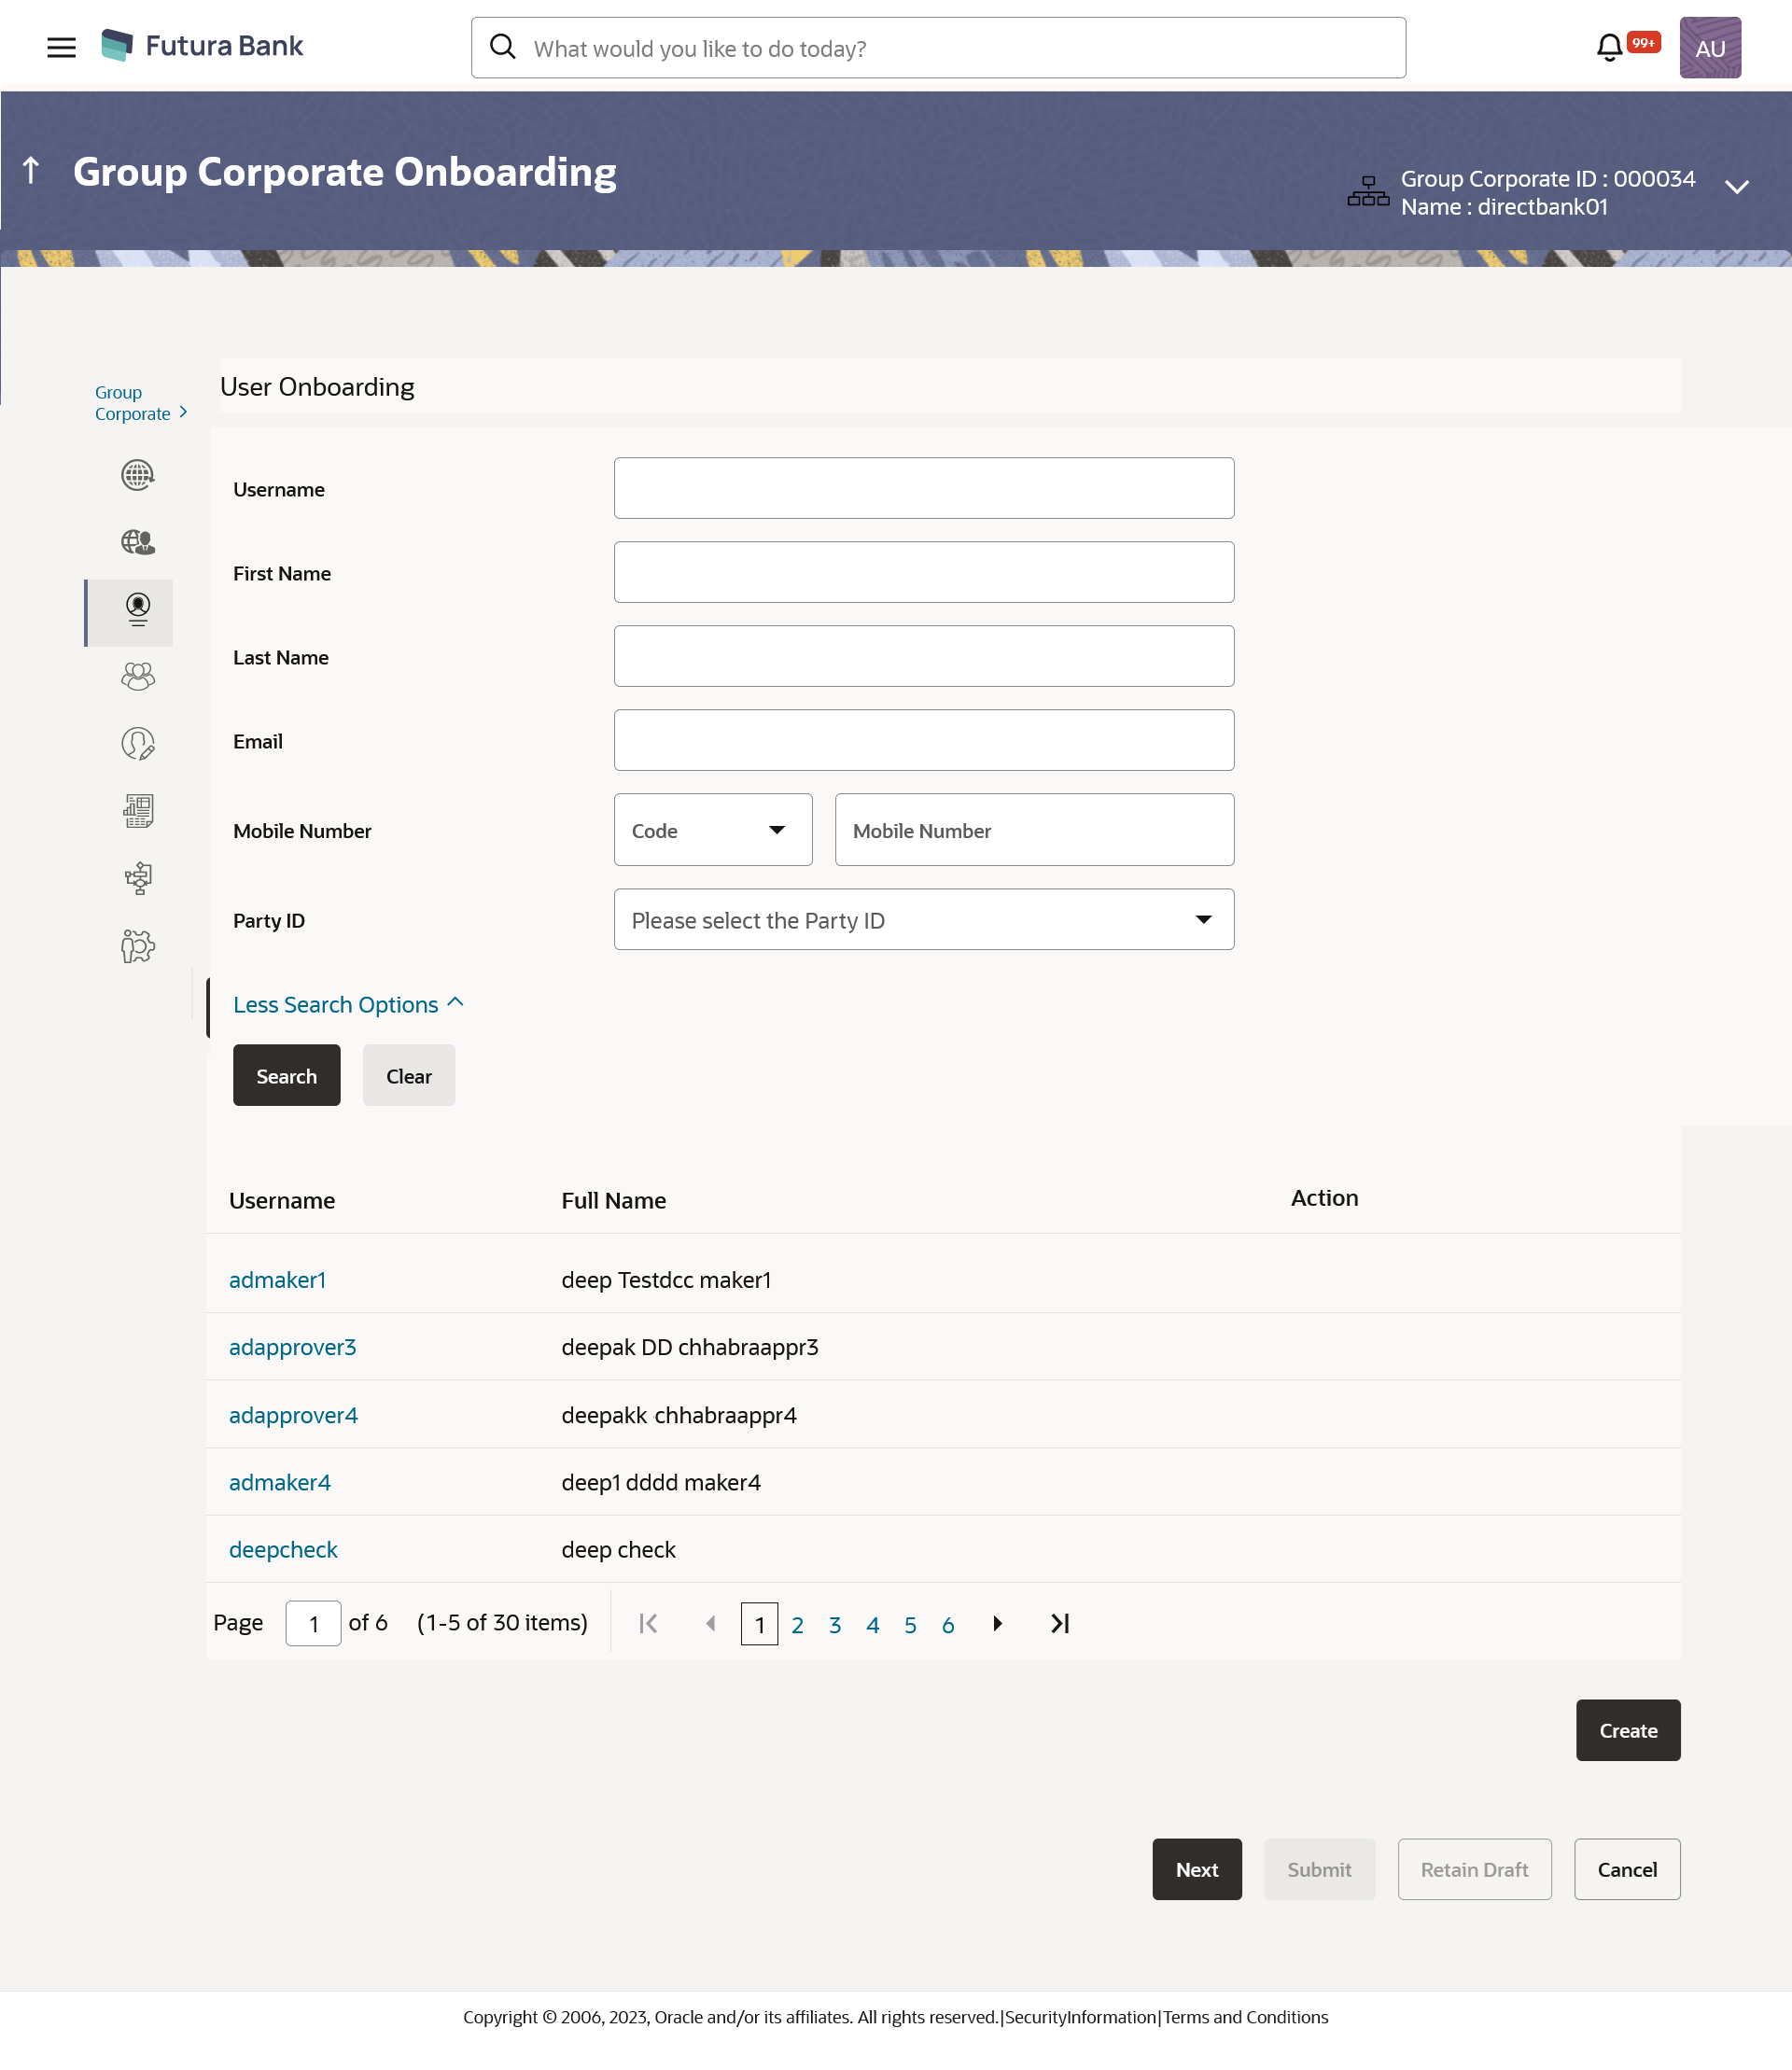
Figure 16-31 User Management - Search Results
Table 16-15 Field Description
Field Name Description Search Results User Name User Name of the user. Full Name First name and last name of the user. Action Status of the user. - Click the User Name link of the record for which you
want to view the user details.The User Management - View screen appears.
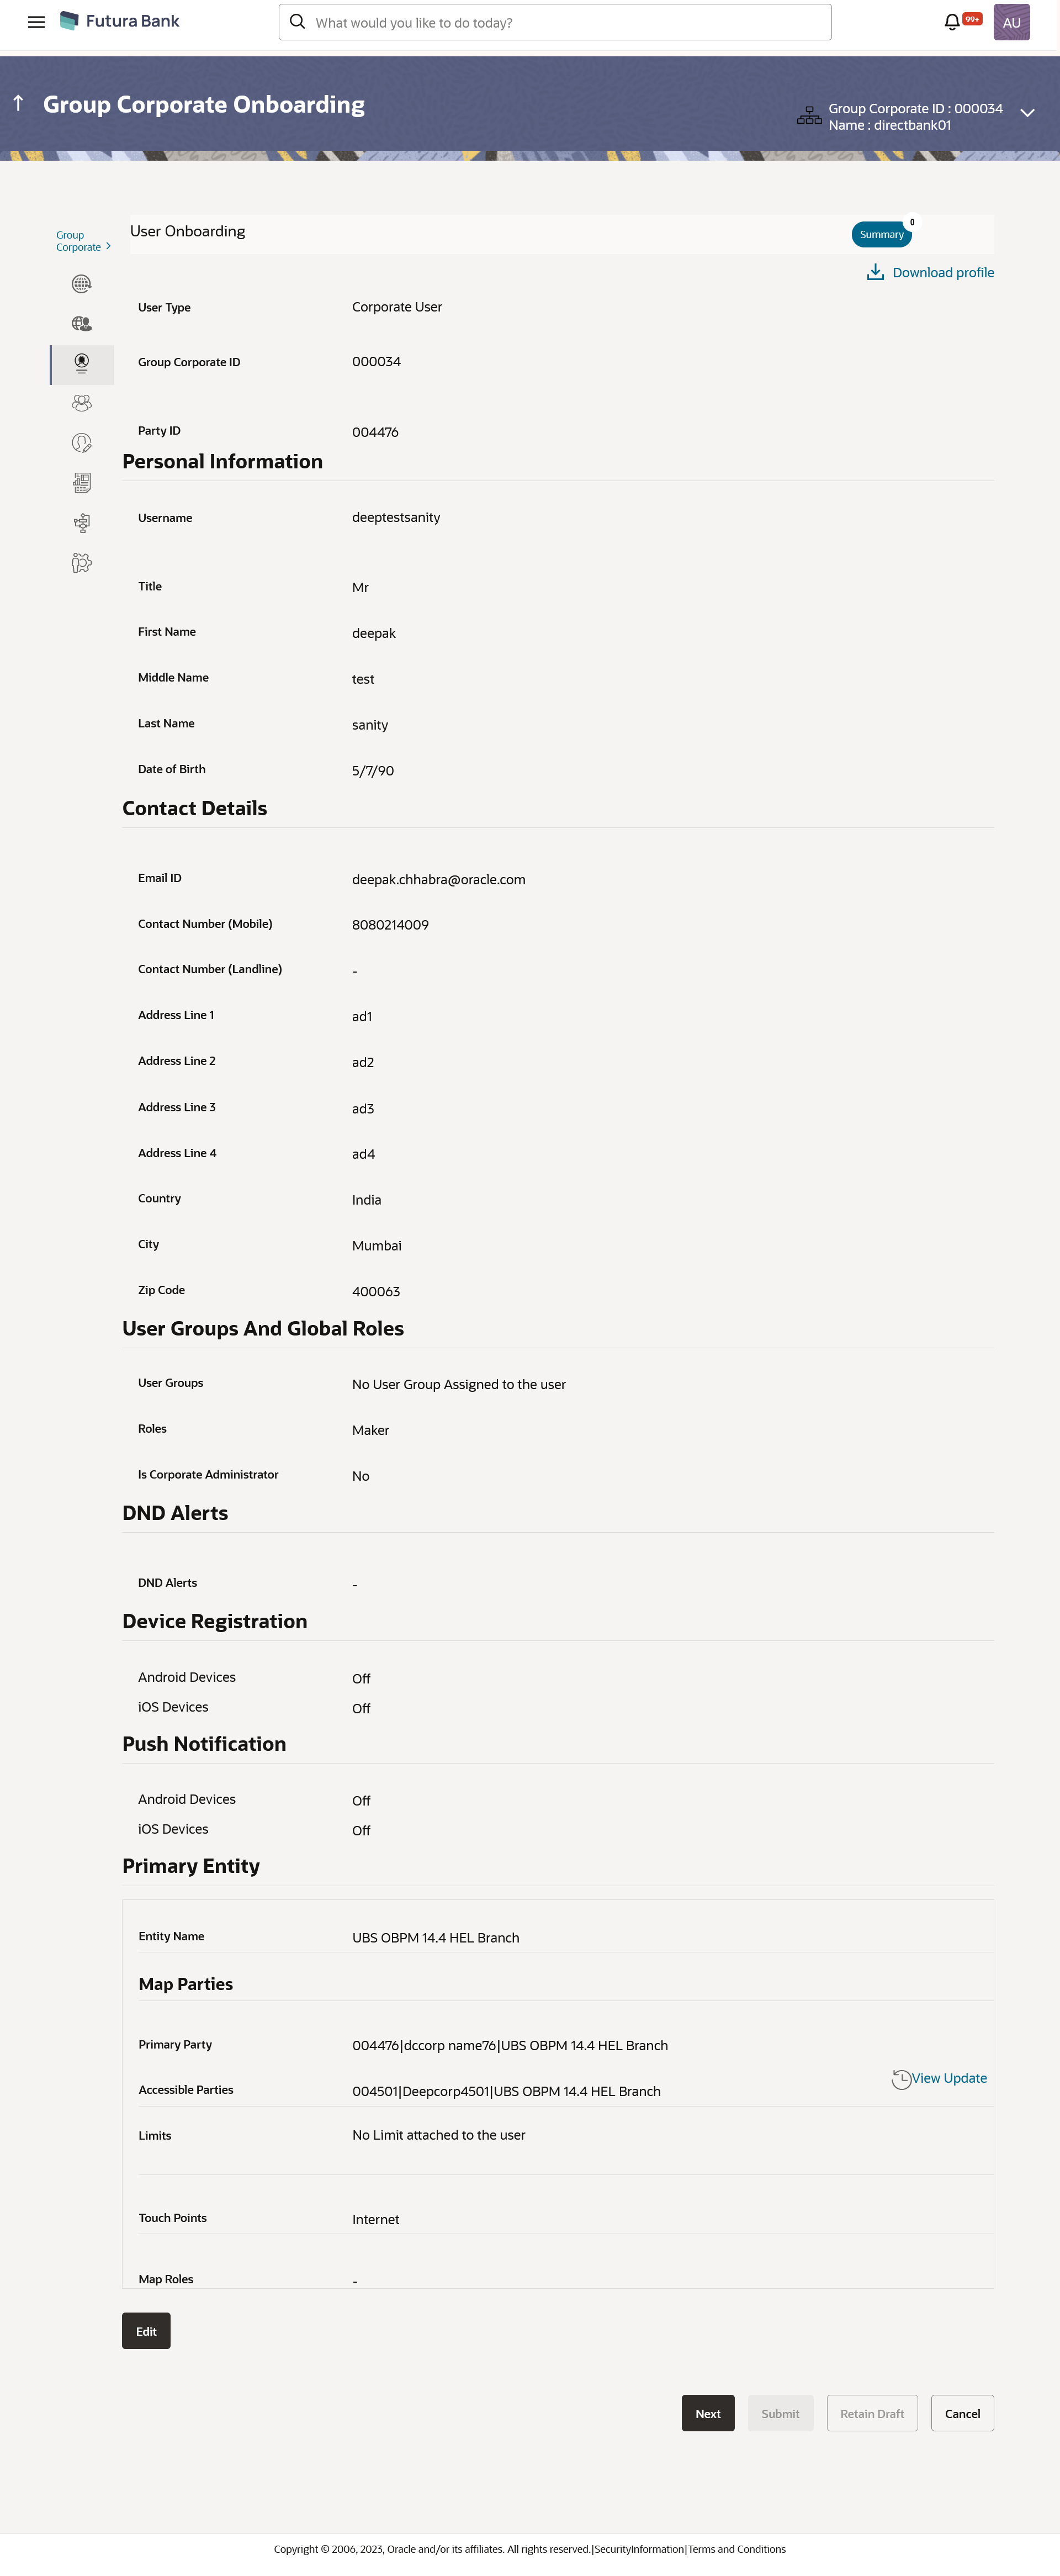
Table 16-16 Field Discription
Field Name Description View User Type Type of user. The user will be:- Corporate User
Group Corporate ID Group Corporate ID mapped to the user is displayed. Party ID Party ID for which the user is created will be displayed. Personal Information User Name Name of the user (login ID) of the user. Title Title of the user. The options are:- Mr
- Mrs
- Miss
- Ms
- Dr
- Master
First Name First name of the user. Middle Name Middle name of the user. Last Name Last name/ surname of the user. Date of Birth Date of birth of the user. Contact Details Email ID Email id of the user. Contact Number (Mobile) Mobile number of the user. Contact Number (Land Line) Phone number (land line) number of the user. Address Line 1-4 Address of the user. Country Country of the user. City City in which the user resides. Zip Code The postal code of the city in which the user resided. User Groups And Global Roles User Groups The list of all user groups to which the selected user belongs. Note:
- This information is read-only and hence cannot be modified.
- If a particular user needs to be removed from a user group, then the administrator must manually go to the particular user group screen and remove the user.
Roles The global roles which are mapped to the users. Is Corporate Administrator Displays whether the corporate user is corporate administrator or not. DND Alerts DND Alerts The list of categories for which DND is configured. Device Registration Android Devices This option shows if the user has registered futura Bank application on any android devices/s. Enabling of the device happens when the user installs and registers on the app on the android device. Administrator cannot manually enable the device. If the Administrator deregisters the device, the user gets logged out from all the android devices and his alternate login gets disabled from all the android devices on which the user has installed the application.
iOS Devices This option shows if the user has registered futura Bank application on any iOS devices/s. Enabling of the device happens when the user installs and registers on the app on the iOS device. Administrator cannot manually enable the device. If the Administrator deregisters the device, the user gets logged out from all the iOS devices and his alternate login gets disabled from all the iOS devices on which the user has installed the application.
Push Notifications Android Devices This option shows if the user has registered for push notifications for android devices. Enabling of the push notification is done by user himself and administrator cannot do the same. If the administrator disables this, the user will stop getting notifications as a pop-up message (push notification) on the user's registered mobile number.
iOS Devices This option shows if the user has registered for push notifications for iOS devices. Enabling of the push notification is done by user himself and administrator cannot do the same. If the administrator disables this, the user will stop getting notifications as a pop-up message (push notification) on the user's registered mobile number.
Note:
To receive push notification user will have to allow the same on the device settings.Primary Entity Details Entity Name Primary Entity name associated to the user. Map Parties Primary Party Primary Entity name associated to the user. Accessible Parties Accessible Entities associated to the user. Limits Limits attached to the user. Touch Points Name of touch points/ groups maintained under a specific entity for which the limit packages are mapped. Map Roles Displays the roles to which the entities are mapped. Accessible Entity Details Entity Name Accessible Entity name associated to the user. Map parties Primary Party Primary Party ID details of the user is associated with the New Entity Accessible Parties Accessible Party Details that user has access. Limits Limits package associated to the user for the accessible entity. Touch Points/ Group Name of touch points/ groups maintained under a specific entity for which the limit packages are mapped. Map Role The roles to which the entities are mapped. - Click Edit to edit the user details. OR
Click Cancel to cancel the transaction.
OR
Click Back to navigate back to previous screen.
OR
Click
 to download the user details.
OR
Click Next to proceed to the next logical step
OR
Click Submit to submit the steps performed so far for approval.
OR
Click Retain Draft to save the details entered as draft.
OR
Click Cancel to cancel the transaction.
Parent topic: Step 3: User Onboarding


