- Core User Manual
- Merchant Management
- Merchant Management – Funds Out
- Merchant Management – Funds Out – Create Merchant
5.2.2 Merchant Management – Funds Out – Create Merchant
To create a merchant:
- Navigate to one of the above paths.The Merchant Management screen appears.
- Click Create.The Merchant Management – Create screen appears.
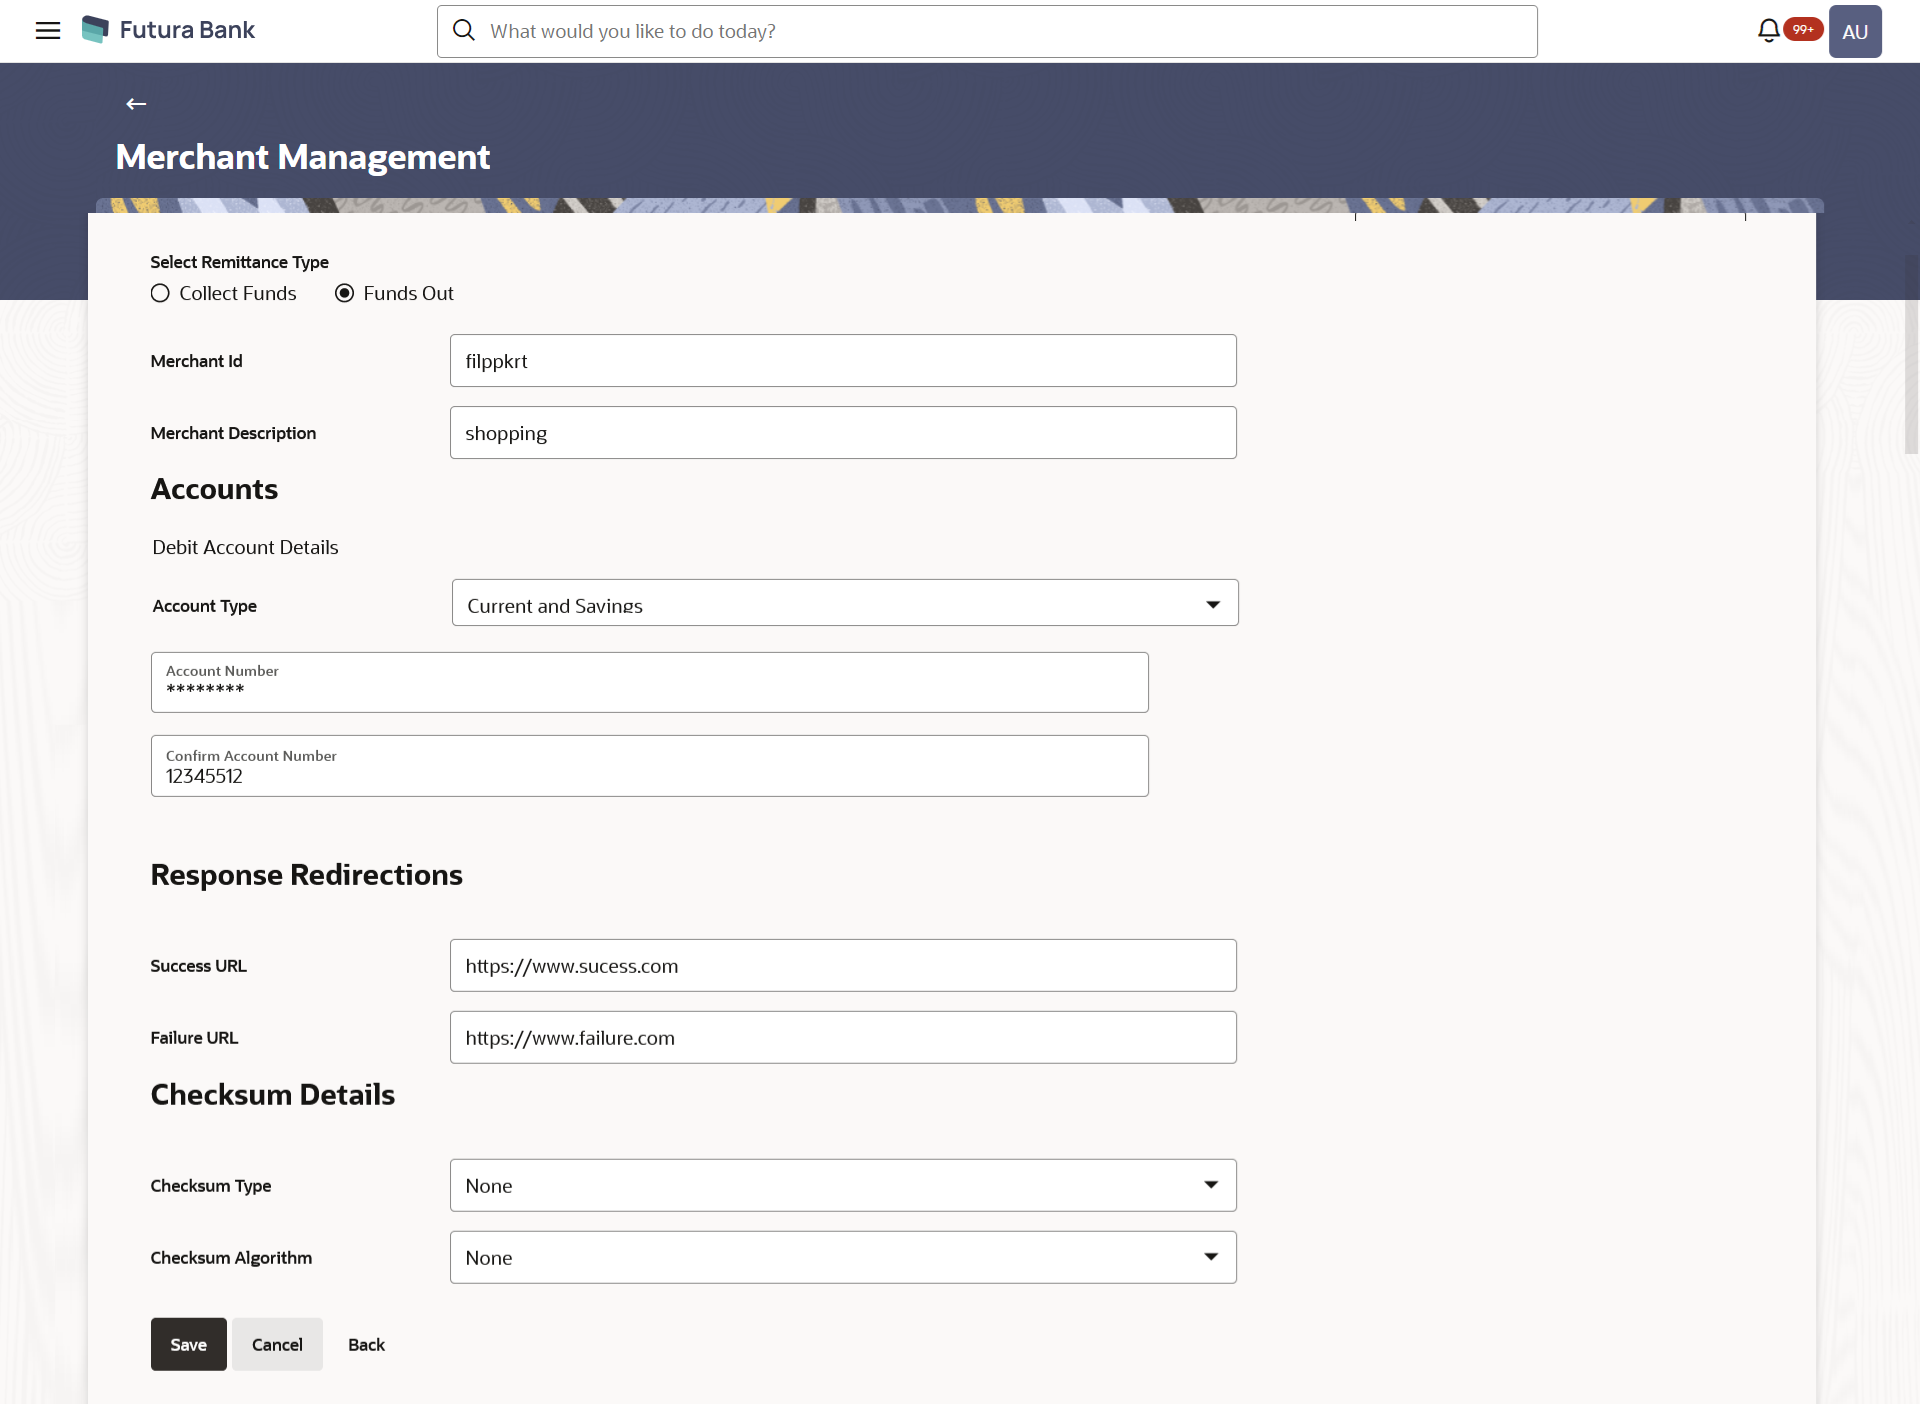
Figure 5-5 Merchant Management – Funds Out – Create Merchant
Table 5-4 Field Description
Field Name Description Select Remittance Type The type or remittance to be mapped to the merchant. The remittance type can be:- Funds Out
- Collect Funds
Merchant Id Specify a unique ID by which the merchant will be identified. Merchant Description Enter a description of the merchant. Accounts Debit Account Details Account Type Specify the type of account i.e. GL or CASA account, associated with the merchant. Account Number Specify the merchant’s debit account number. Confirm Account Number Re-enter the merchant’s account number to confirm the same if the account number has been changed. Response Redirections Success URL Specify the URL for sending the response of the transaction if it is a successful transaction. Failure URL Specify the URL for sending the response of the transaction if it is a failed transaction. Checksum Details Checksum Type Specify the checksum type. Checksum Algorithm Specify the checksum algorithm. Security Key Input the security key. This field appears if a value is selected in Checksum Algorithm drop-down list.
- In the Merchant Id field, enter the ID of the merchant.
- In the Merchant Description field, enter the description of the merchant.
- Under the section Debit Account Details, from the Account Typelist, select the appropriate account type.
- In the Account Number field, enter the account number of the merchant corresponding to the account type selected.
- In the Confirm Account Number field, re-enter the merchant’s account number.
- Under the Response Redirections section,
- In the Success URL field, enter the valid URL.
- In the Failure URL field, enter the valid URL.
- Under the Checksum Details section,
- From the Checksum Type drop-down list, select the checksum type.
- From the Checksum Algorithm drop-down list,
select the checksum algorithm.
- In the Security Key field, enter the security key
- Click Save to save the Merchant details.OR
Click Cancel to cancel the transaction.
OR
Click Back to navigate to the previous screen.
- The Review screen appears.Verify the details and click Confirm to confirm the details.
OR
Click Edit to make changes if any.
The administrator is directed to Merchant Management – Create screen with values in editable form.
OR
Click Cancel to cancel the operation.
- The success message appears along with the status of the transaction. Click Done.
Parent topic: Merchant Management – Funds Out
