2.3 Configuring SSL
One way SSL between the presentation tier and the application on WebLogic server is supported. The detailed configuration is explained below:
Note:
Procure an external CA signed certificate before proceeding further. Follow the instructions below to install the certificate once the certificate is available.- Import the Certificate into a Java Trust Keystore.
Execute the following command:
keytool -import -trustcacerts -alias sampletrustself -keystore SampleTrust.jks -file SampleSelfCA.cer.der -keyalg RSAkeytool -import -alias `hostname -f` -file `hostname -f`.cer -keystore <JAVA_HOME>/jre/lib/security/cacerts -storepass changeit -noprompt - Configure Application Domain’s WebLogic with Custom Identity and Trust
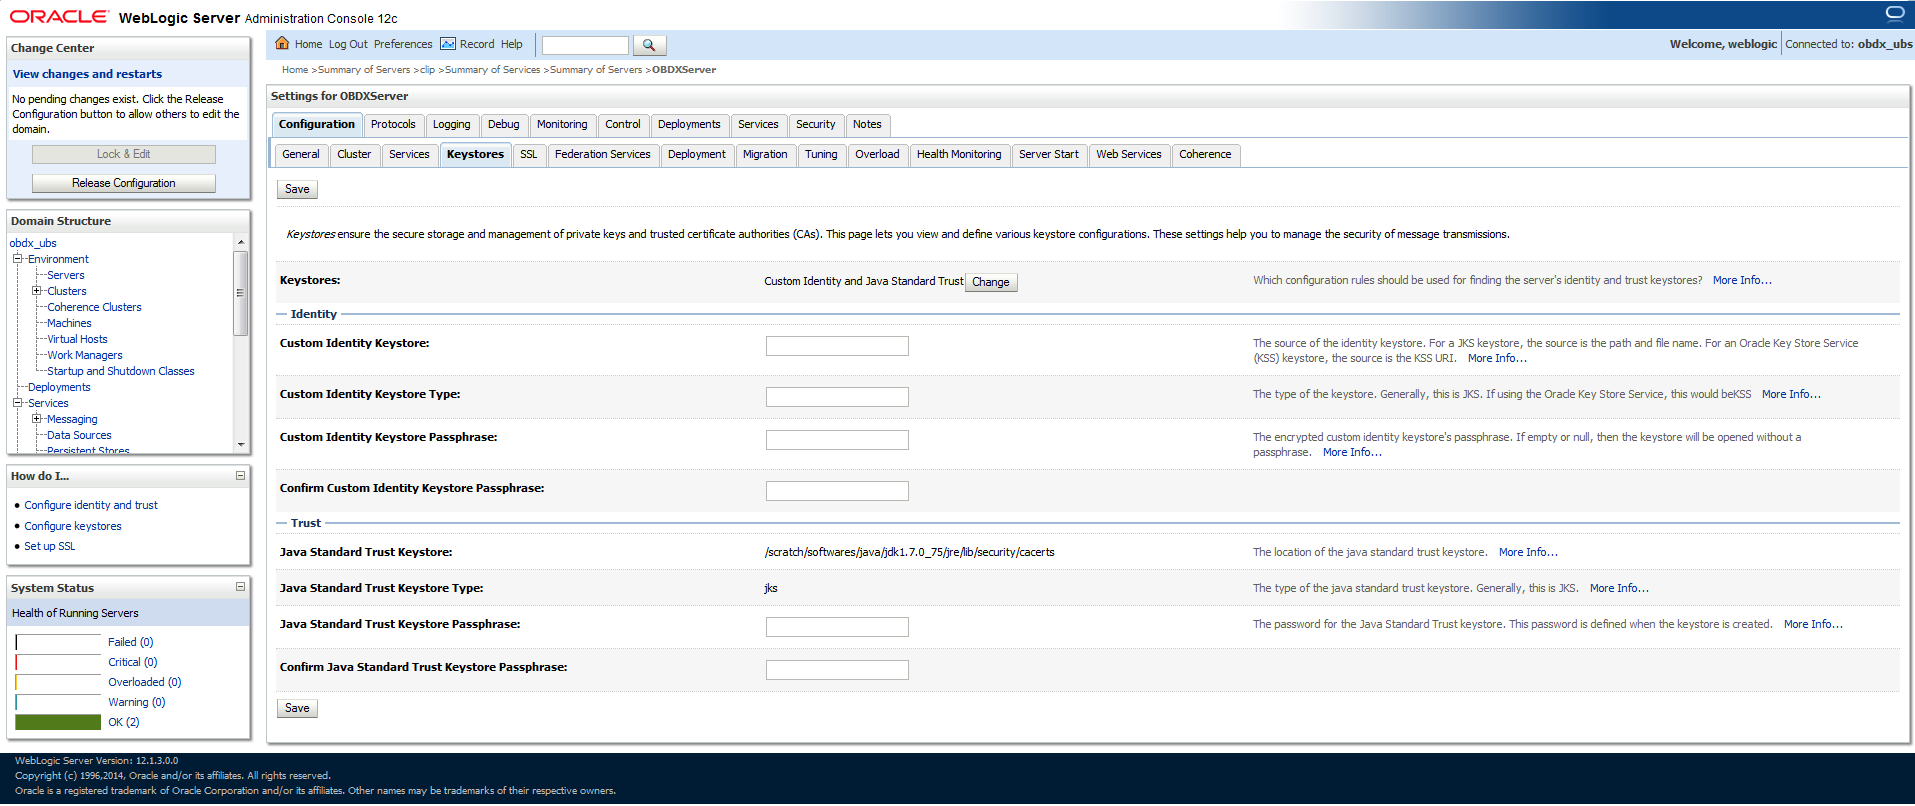
Keystores.
- Open the WebLogic admin console and navigate to
Home → Summary of Servers → AdminServer.
- Click the Keystores tab.
- Open the WebLogic admin console and navigate to
- Click the Change button.
- Select Custom Identity and Java Standard Trust option from the list.
- Click the Save button.
- Enter the following details in the Identity and Trust
sections:
Details in the Identity and Trust sections
Field Value Custom Identity Keystore Absolute path of the custom keystore Custom Identity Keystore Type JCEKS Custom Identity Keystore Passphrase <Passphrase> Confirm Custom Identity KeyStore Passphrase <Re-enter the same Passphrase>
Enter the passphrases that were used while creating the custom Identity Keystore and certificate.
- Click the Save button.
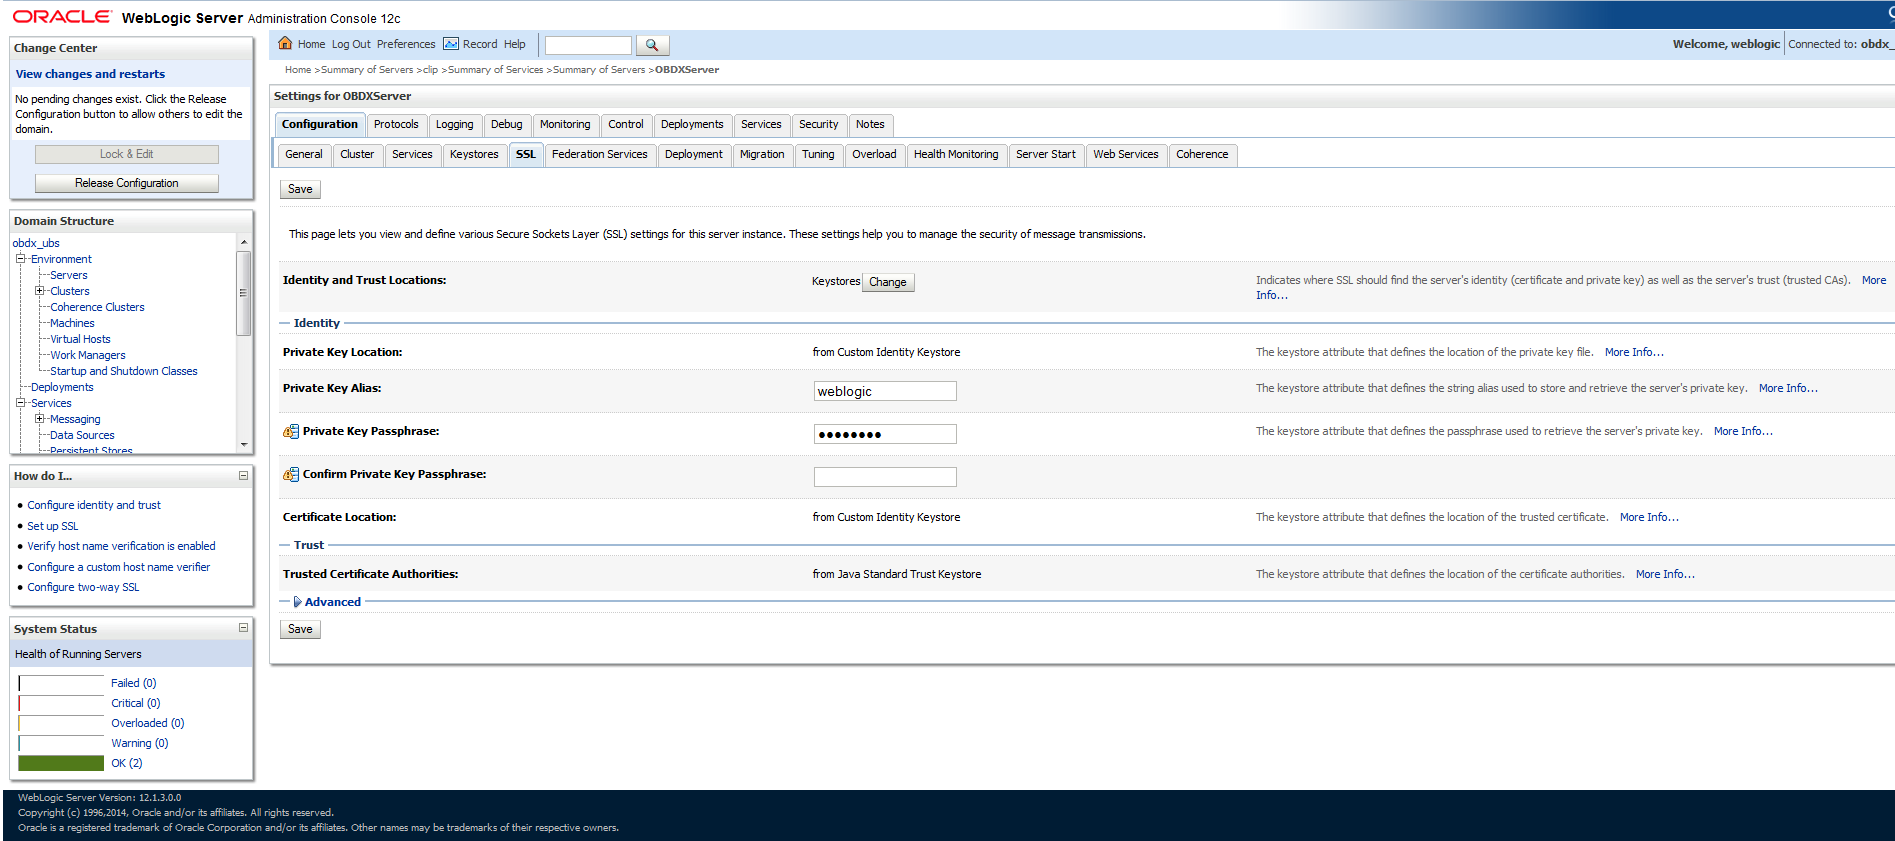
- Click the SSL Tab.
Enter the following details in the Identity section:
Field Value Private Key Alias <Alias> Private Key Passphrase <Passphrase> Confirm Private Key Passphrase <Re-enter passphrase> - Enter the passphrases that were used while creating the certificate.
- Click the Save button.
- Click the Advanced link.
- Ensure that Two Way Client Cert Behavior is set to Client Certs Not Requested.
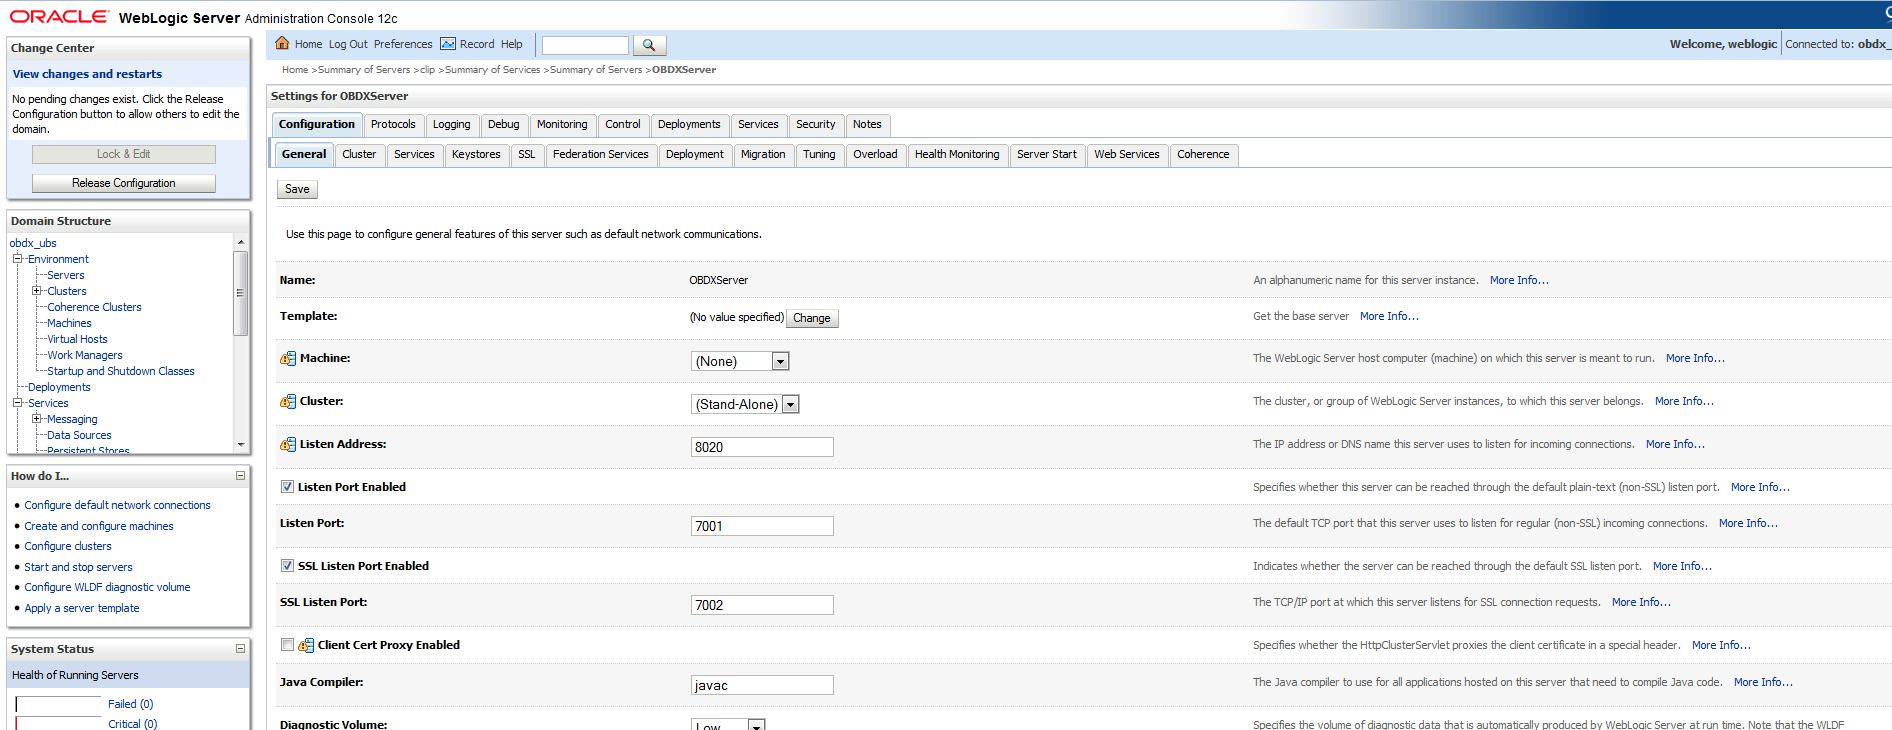
- Click the General tab.
- Select the SSL Listen Port Enabled check box.
- Click the Save button.
Parent topic: Secure Installation and Configuration


