4.1.3 System Configuration - Branch Details - View and Edit

Using this option System Administrator maintains the branch details. These details once defined can be viewed and edited using this transaction.

To view and edit the branch details:

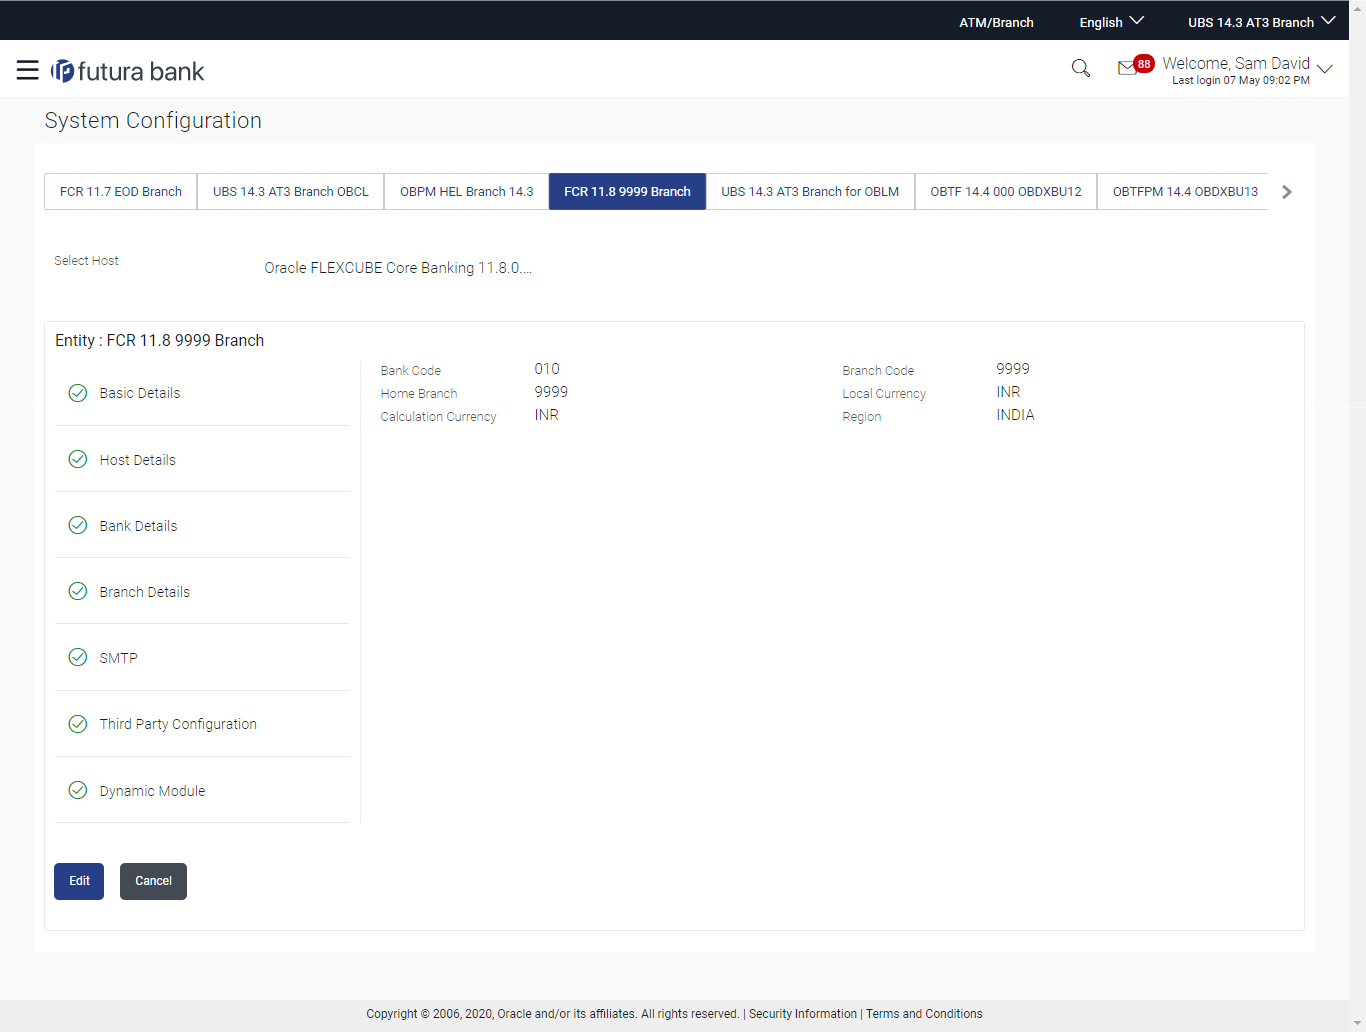
  1. Click on System Configuration option on the dashboard and navigate to the branch details tab. The default option is ‘View’.

    Figure 4-22 Branch Details – View


  2. Click Edit to edit the Branch Details.
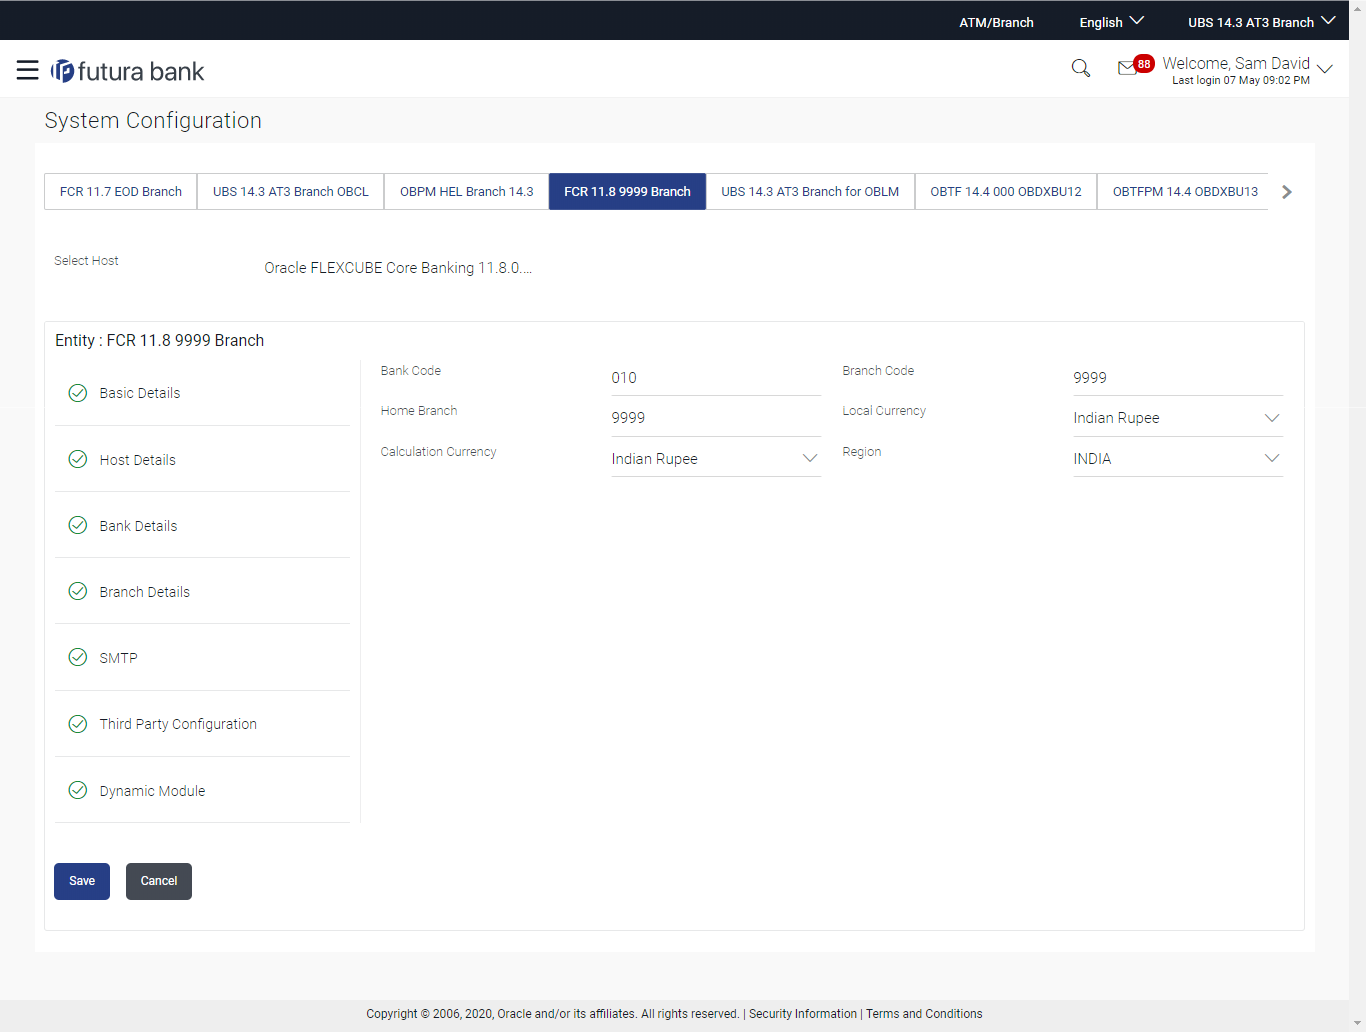
    The System Configuration - Branch Details screen appears in editable form.

    Figure 4-23 Branch Details - Edit


    Table 4-18 Field Description

    Field Name Description
    Bank Code Displays the unique code of the bank as defined.
    Branch Code Displays the bank branch code as defined and available for edit.
    Home Branch Displays the home branch code as defined and available for edit.
    Local Currency Displays the local currency as defined and available for edit.
    Calculation Currency Displays the calculation currency as defined and available for edit.
    Region Displays the region of bank payments as defined and available for edit.
    The options are:
    • India
    • UK
    • SEPA

    Note:

    With FCORE as host system, only India region is currently supported.
  3. In the Bank Code field, edit the code of the bank.
  4. In the Branch Code field, edit the branch code of the bank.
  5. In the Home Branch field, edit the name of the home branch of the bank.
  6. From the Local Currency list, select the local currency of the bank branch.
  7. From the Calculation Currency list, select the calculation currency of the bank branch.
  8. From the Region list, select the appropriate region.
  9. Click Save to save the changes.
    OR

    Click Cancel to cancel the transaction.

  10. The System Configuration - Branch Details - Review screen appears.
    Verify the details, and click Confirm.
    OR

    Click Cancel to cancel the transaction.

    OR

    Click the Basic Details, Host Details, Bank Details, Currency Payments, SMTP, Third Party Configuration or Dynamic Module tabs to view and edit the respective details if required.

  11. The screen with success message along with the reference number and status appears.
    Click OK to complete the transaction.