- Core User Manual
- Group Corporate Onboarding
- Step 6: Report Mapping
- User Report Mapping - Create
16.7.2 User Report Mapping - Create
To setup a Group Corporate Profiling:
- Navigate to one of the above paths.The User Report Mapping screen appears.
- Enter the search criteria, click Search. OR
Click Clear to clear the search parameters.
OR
Click Cancel to cancel the transaction.
- Click
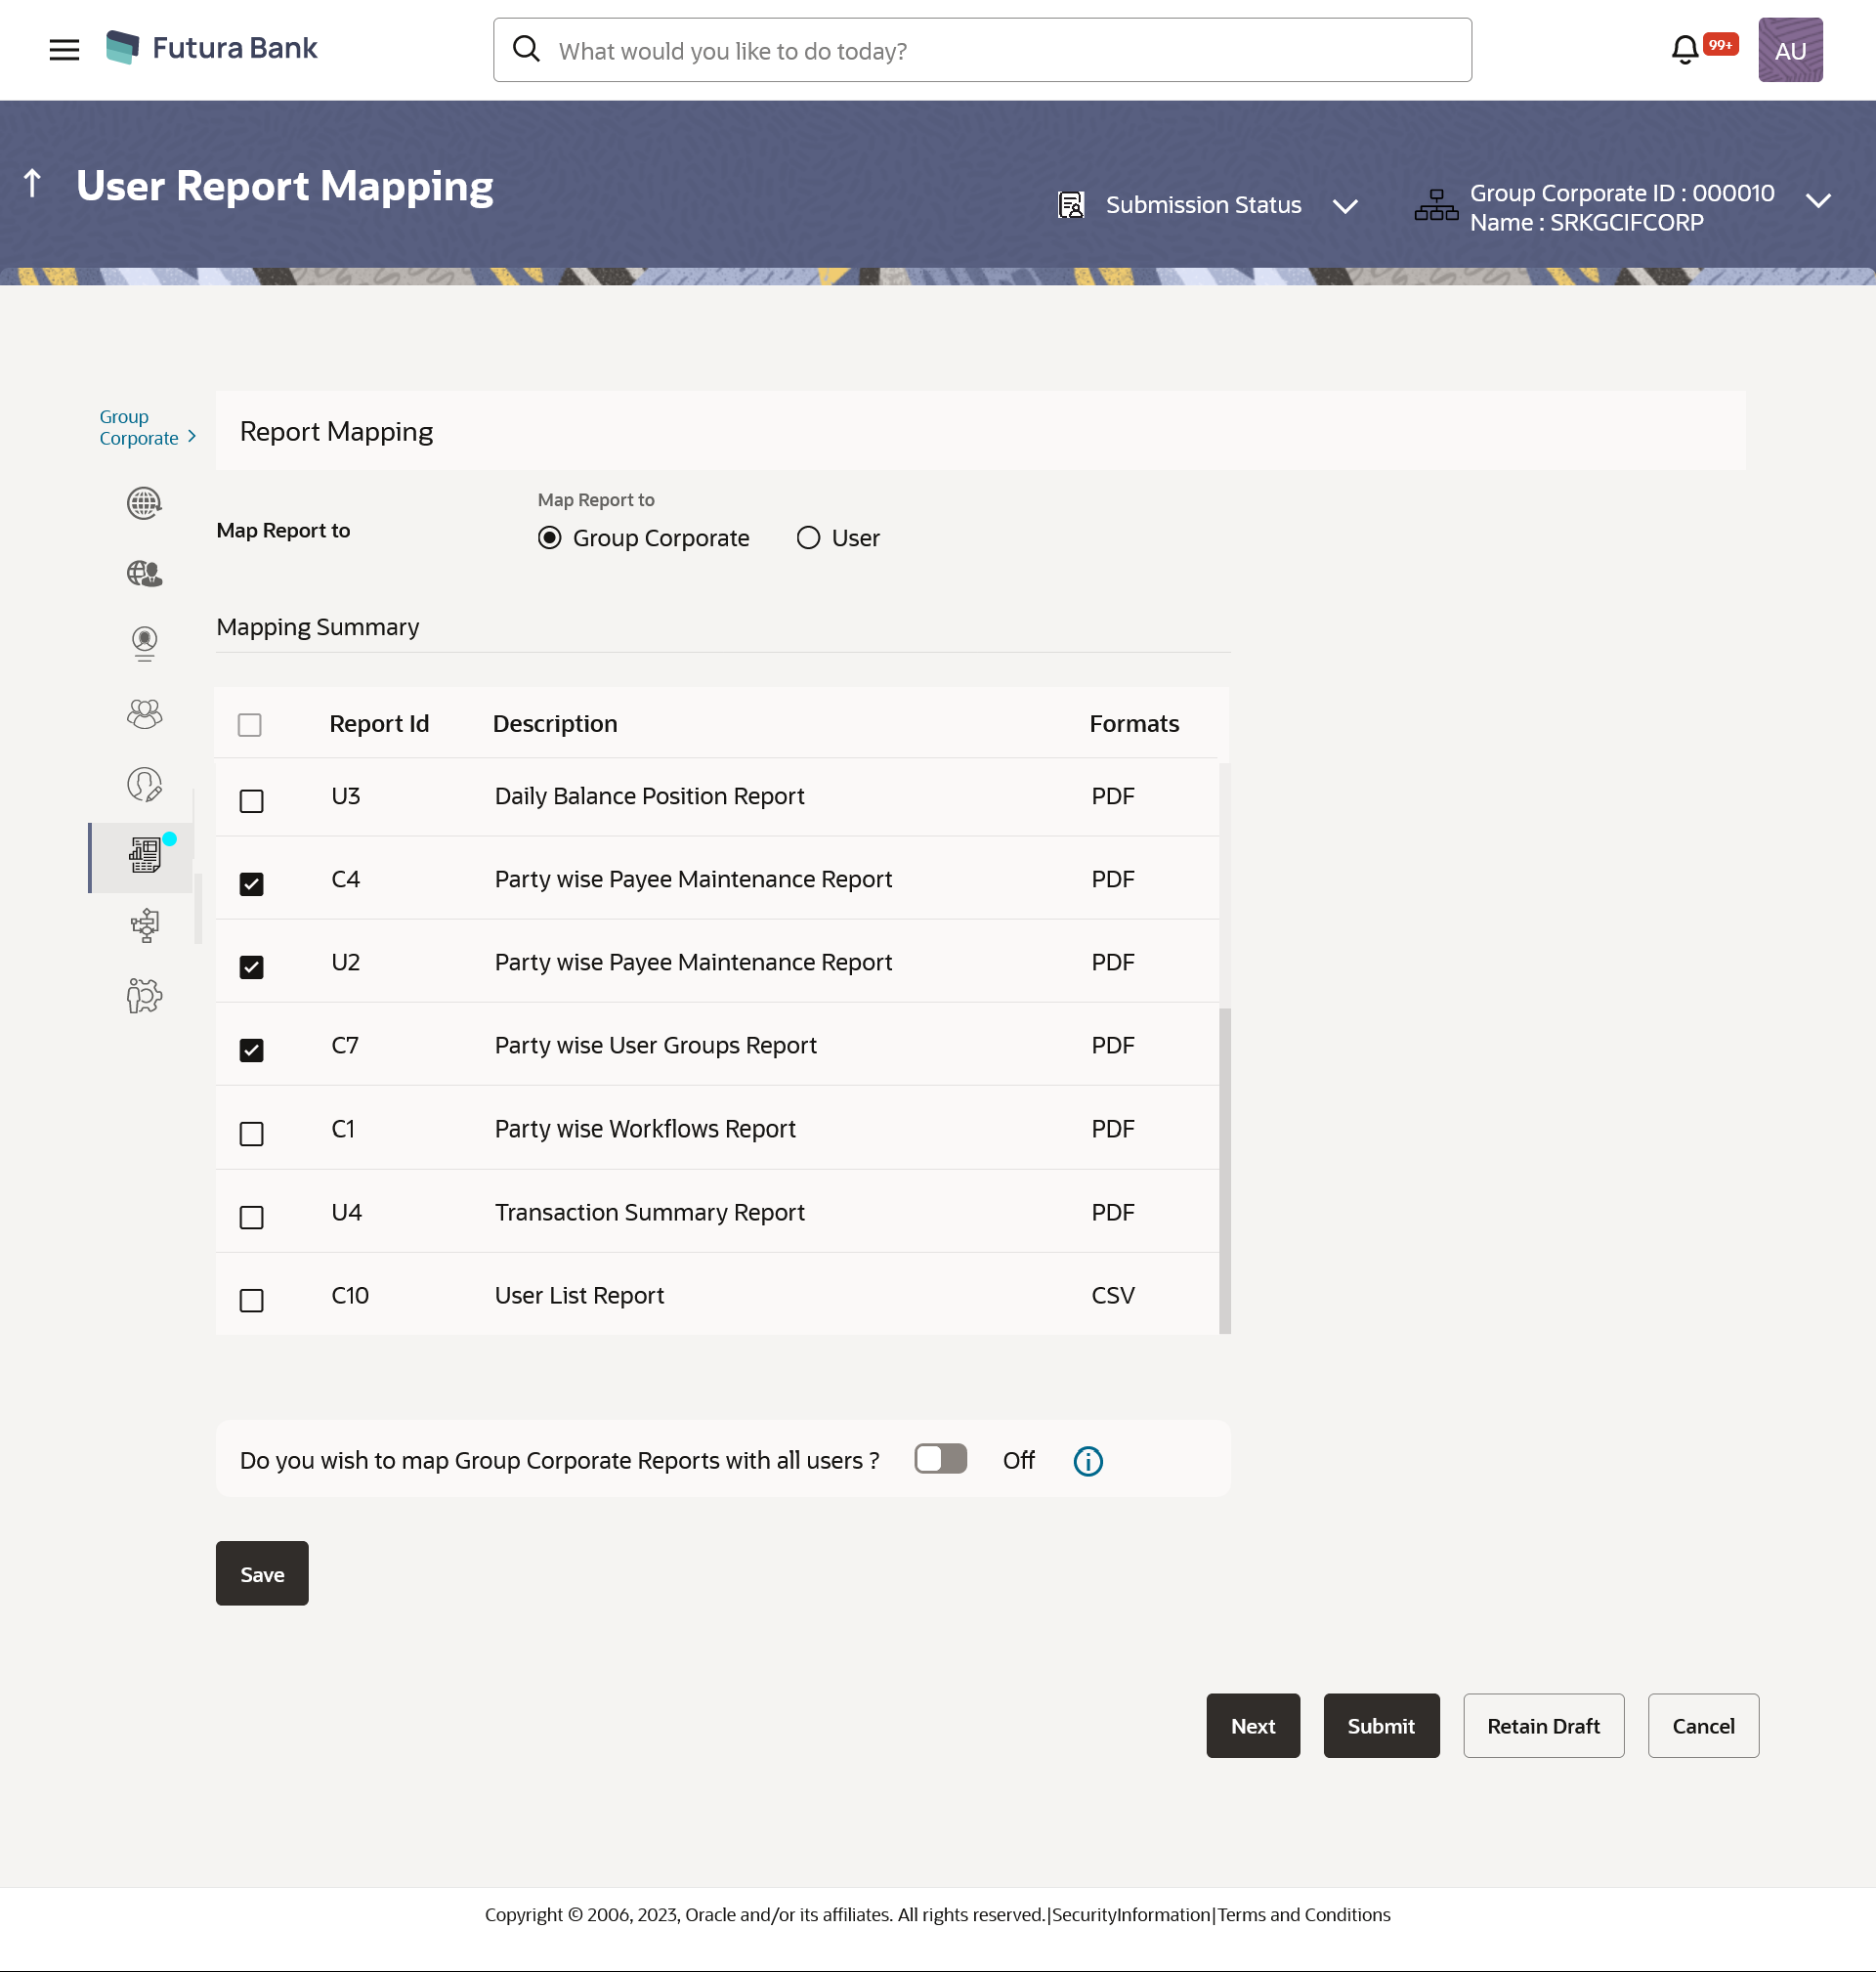
 icon of user record, for which you want to map the report/ s.The User Report Mapping screen to create the report mapping appears.
Table 16-38 Field Description
Field Name Description User Name Name of the corporate user. User ID User ID of the corporate user. Mapping Summary Report ID Unique id assigned to a report. Description Description of the report. Formats The format in which the report is to be generated.
The format could be PDF, XLSX.
- In the Mapping Summary section, select the report id of the report which you want to map to the user.
- Click Save to save the maintenance, and redirect to the
review page.OR
Click Back to navigate back to previous screen.
OR
Click Next to proceed to the next logical step
OR
Click Submit to submit the steps performed so far for approval.
OR
Click Retain Draft to save the details entered as draft.
OR
Click Cancel to cancel the transaction.
- The Review screen appears.Verify the details, and click Confirm.
OR
Click Add Another to add another maintenance of the same step.
OR
Click Cancel to cancel the transaction.
OR
Click Back to navigate back to previous screen.
- The success message appears along with the transaction reference number and status of the transaction.
Parent topic: Step 6: Report Mapping
