- Core User Manual
- User Report Mapping
- User Report Mapping - Administrator User
- User Report Mapping - Create
63.2.1 User Report Mapping - Create
To map the reports to a user:
- Navigate to the above path.The User Report Mapping screen appears.
- In the Username field, enter the username of the user
whose report mapping to be done.
OR
In the First Name field, enter the first name of the user whose report mapping to be done.
OR
In the Last Name field, enter the last name of the user whose report mapping to be done.
OR
In the Email field, enter the email of the user whose report mapping to be done.
OR
In the Mobile field, enter the mobile number of the user whose report mapping to be done.
- Click Search.The User Report Mapping screen with search results appears.
OR
Click Clear to clear the search parameters.
OR
Click Cancel to cancel the transaction.
- Click
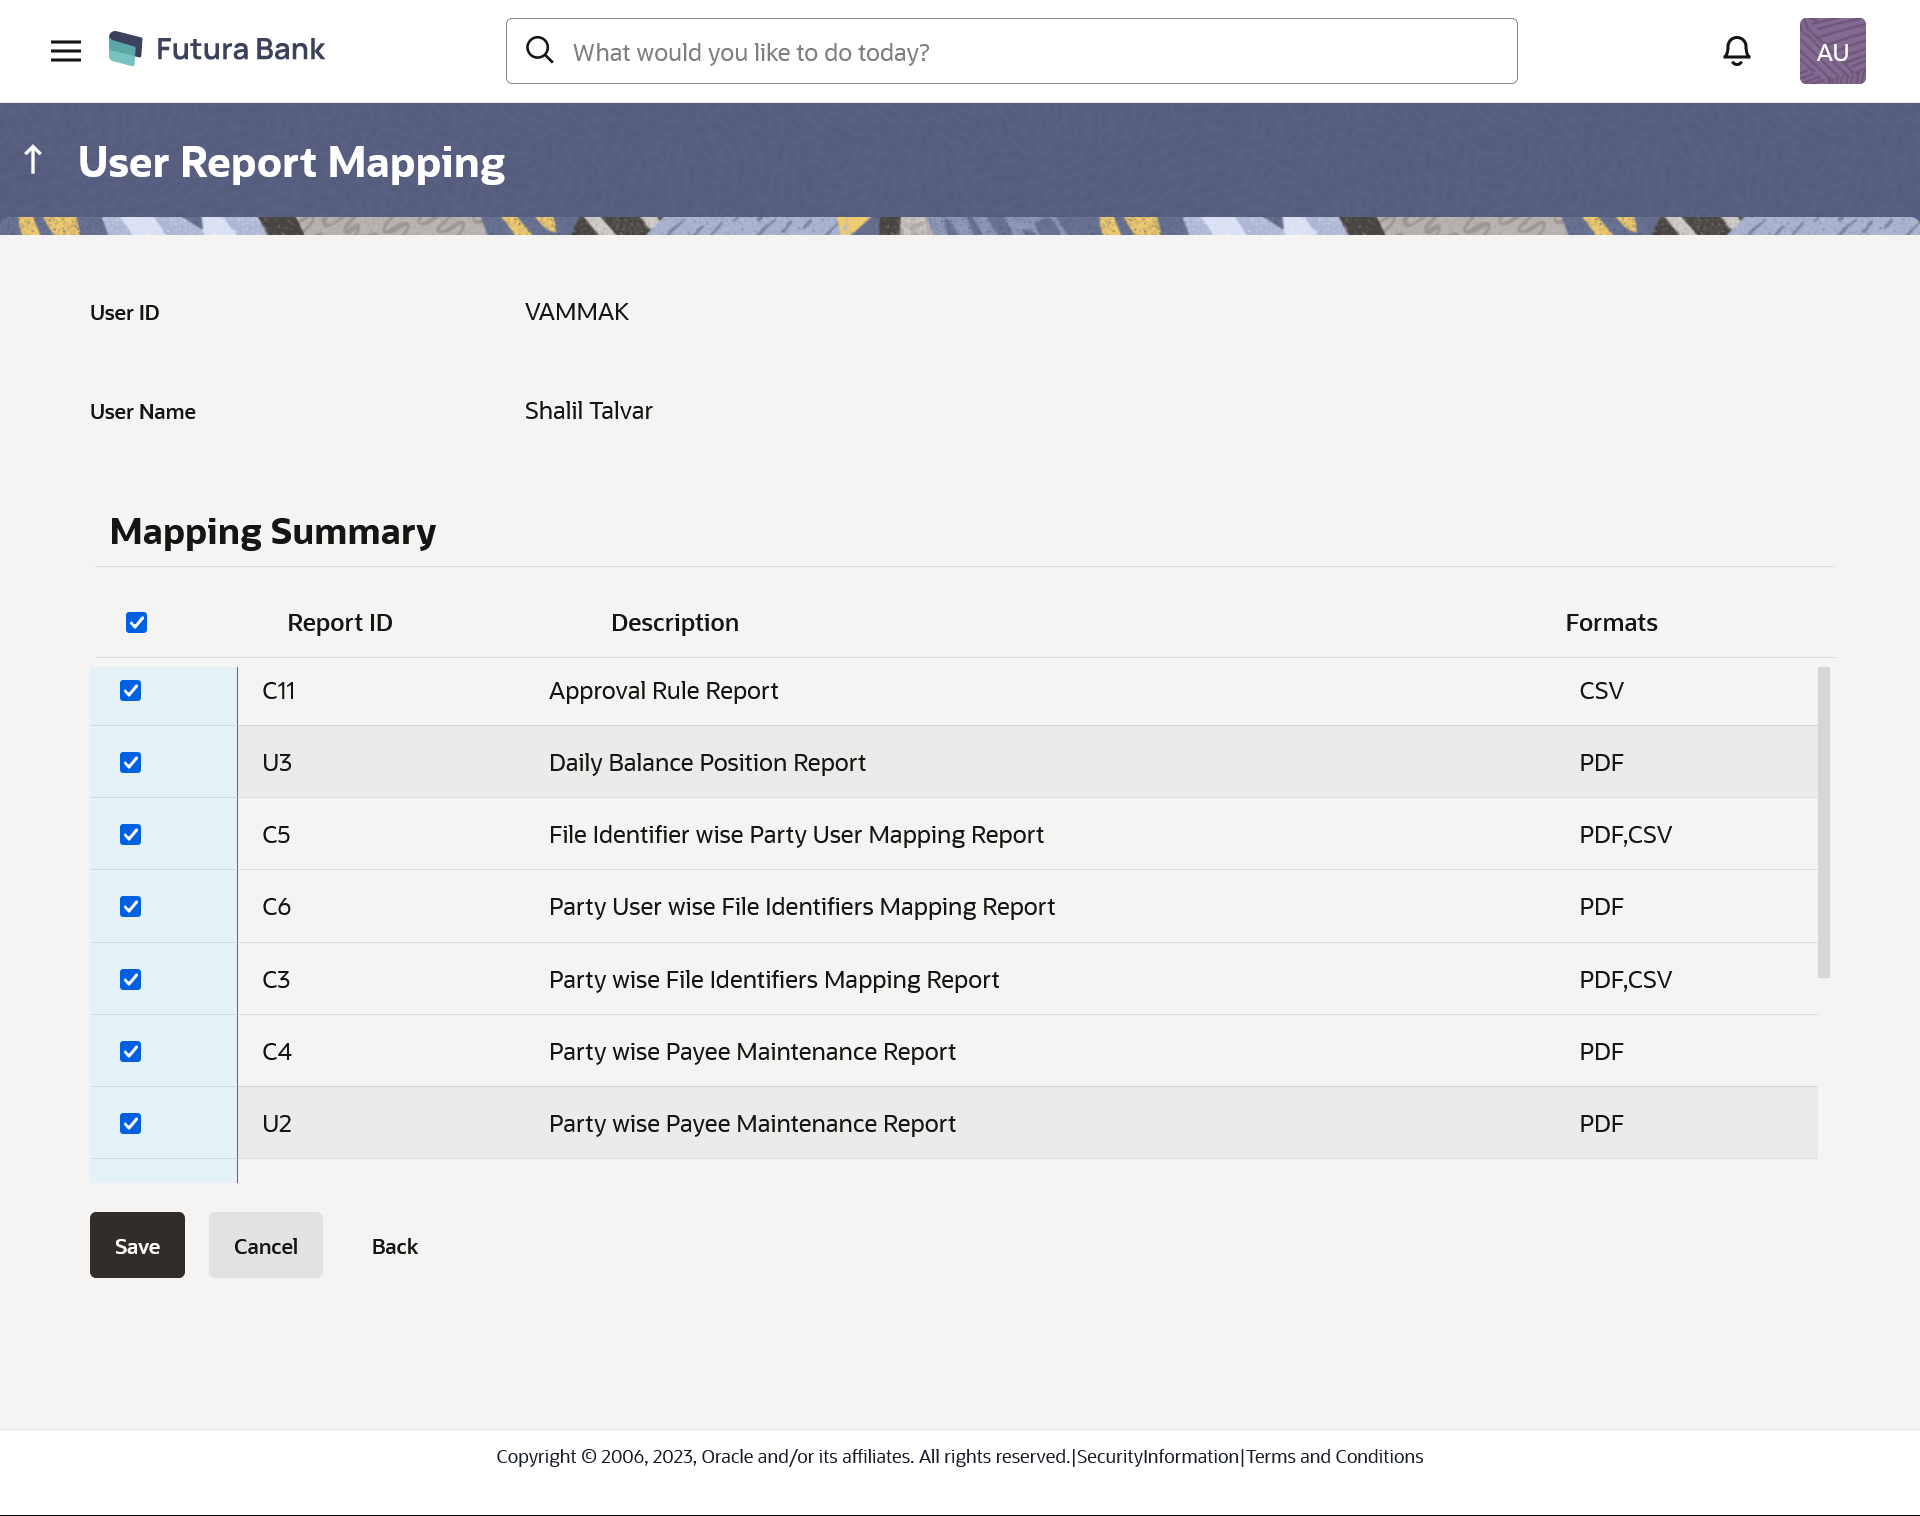
 icon of user record, for which you want to map the report/ s.The User Report Mapping screen to create the report mapping appears.
Table 63-1 Field Description
Field Name Description User Name Name of the admin user. User ID User Id of the admin user. Mapping Summary Report ID Unique id assigned to a report. Description Description of the report. Formats The format in which the report is to be generated. The format could be PDF, XLSX.
- In the Mapping Summary section, select the report id of the report which you want to map to the user.
- Click Save to save the mapping. OR
Click Cancel to cancel the transaction.
OR
Click Back to navigate to the previous screen.
- The User Report Mapping - Review screen appears.Verify the details, and click Confirm.
OR
Click Cancel to cancel the transaction.
OR
Click Back to navigate to the previous screen.
- The success message appears along with the transaction reference number and
status of the transaction.Click OK to complete the transaction.
Parent topic: User Report Mapping - Administrator User
