3.2 Manual ECA Input
This topic provides step-by-step instructions to create and process ECA transactions using the Manual ECA Screen.
- Click Account Transactions, and under Account Transactions, click Manual ECA Input.
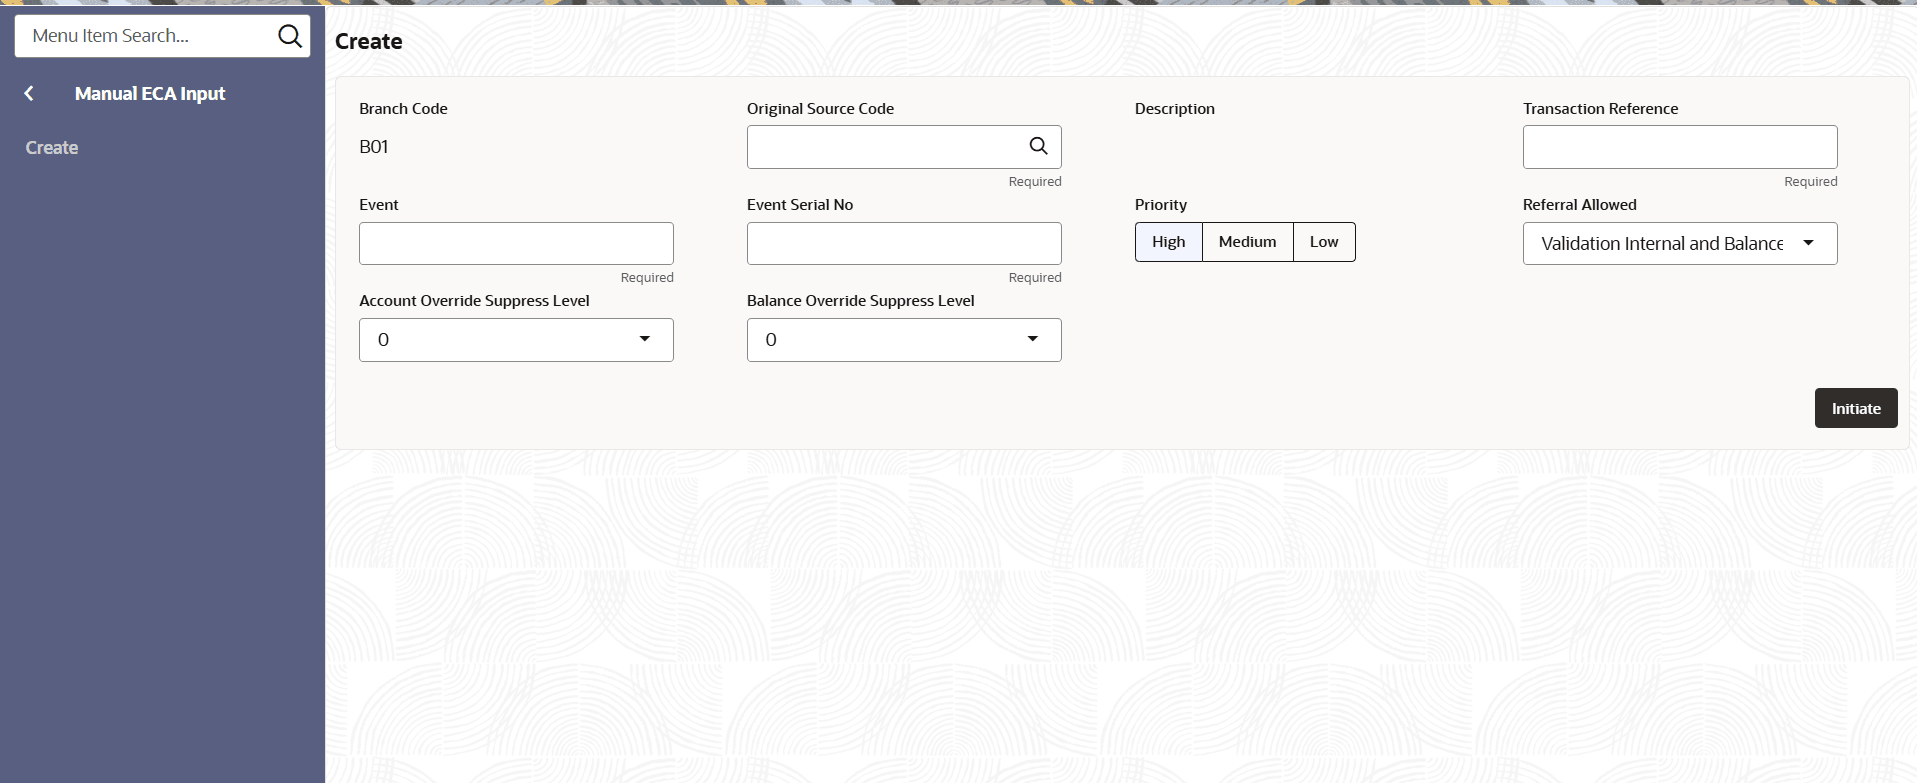
- Under Manual ECA Input, click Create.The Create screen displays.
- Specify the details described in the following table.
Table 3-1 Manual ECA Input - Create
Field Description Branch Code Displays the branch code. Original Source Code Click Search icon and select the source code from the list. Description Displays the description of the source code selected. Transaction Reference Specify the transaction number. Event Specify the event. Event Serial No Specify the serial number for the event. Priority Select the priority. The options are: -
- High
- Medium
- Low
Referral Allowed Select the reference allowed from the drop-down list. The options are: - Validation Internal and Balance Internal
- Validation External and Balance External
- Validation Internal and Balance External
- Validation External and Balance Internal
- No Referral
Account Override Suppress Level This field is used to define the level at which account overrides are suppressed within the system. Balance Override Suppress Level This field defines the threshold level for suppressing balance overrides in the system. -
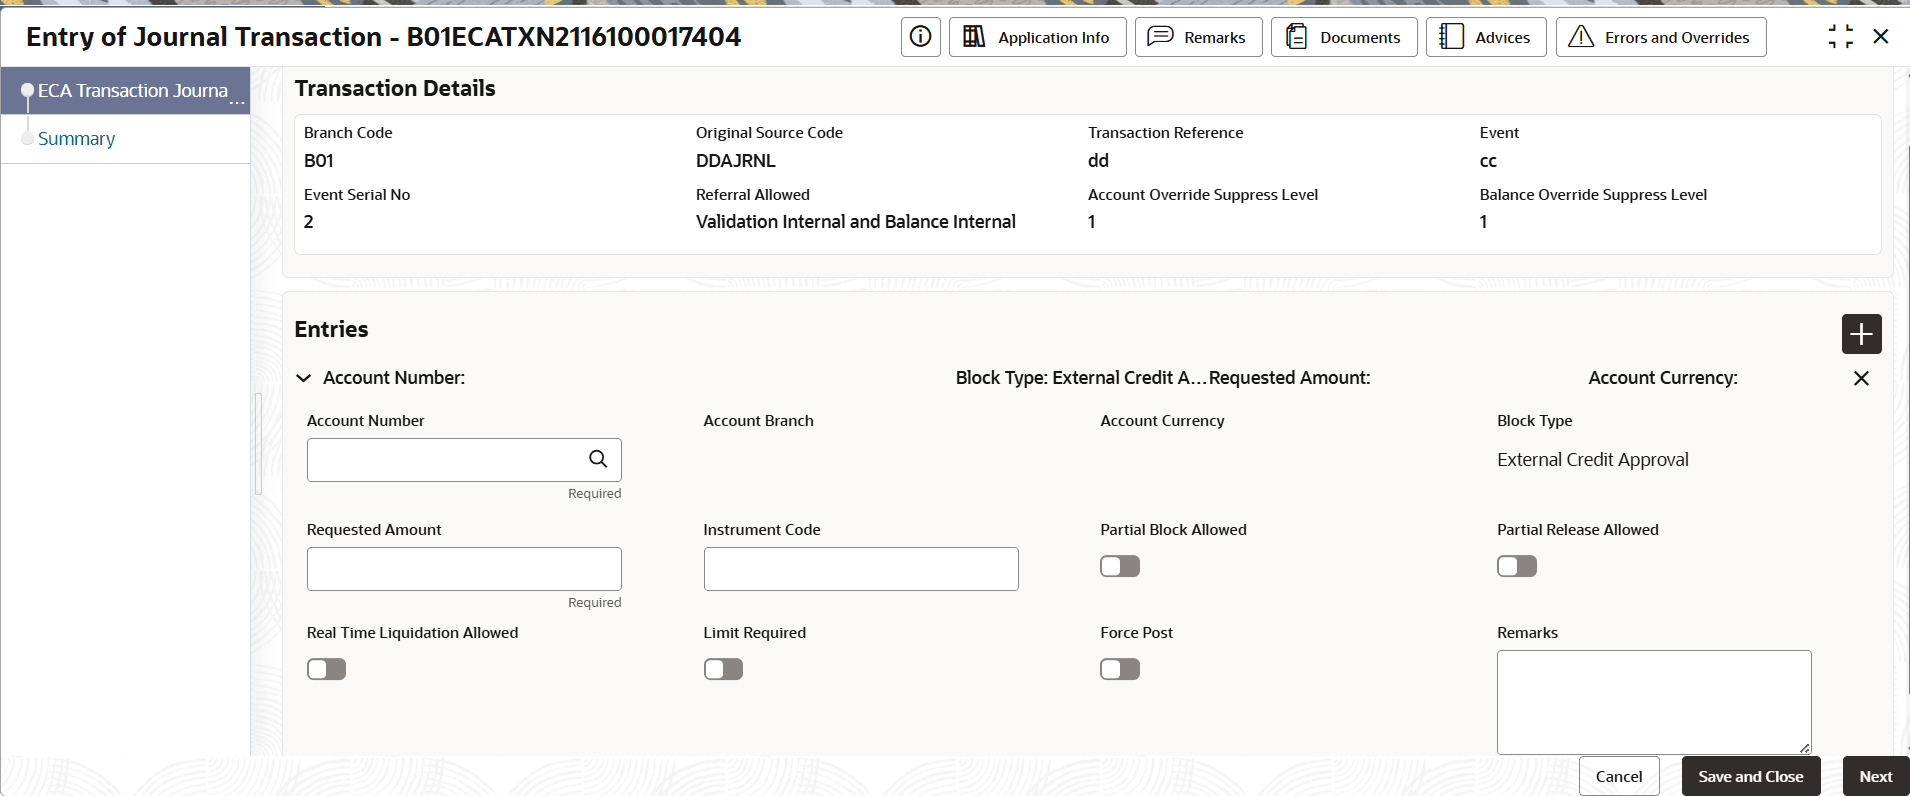
- Click Initiate button.The ECA Transaction Journal Entry screen displays.
- Specify the fields on ECA Transaction Journal Entry screen.
Table 3-2 ECA Transaction Journal Entry
Field Description Account Number Click Search icon and select the account number from the list. Requested Amount Specify the transaction amount requested for processing. This field is mandatory. Real Time Liquidation Allowed Click the toggle switch that enables or disables real-time liquidation for the selected account. Account Branch Displays the branch associated with the selected account. Account Currency Displays the currency of the account selected for the transaction. Instrument Code Specify the field for entering the instrument code related to the transaction, if applicable. Limit Required Click the toggle switch to specify whether limit verification is required for the transaction. Block Type Displays the type of block applied to the transaction. Partial Block Allowed Click the toggle switch to specify whether partial blocking of the account is permitted. Partial Release Allowed Click the toggle switch to specify whether partial release of the blocked amount is permitted. Force Post Click the toggle switch to allow force posting of the transaction, bypassing certain validation checks. Remarks Free-text field for entering remarks or additional details about the journal entry. - Click Add to add additional accounts.
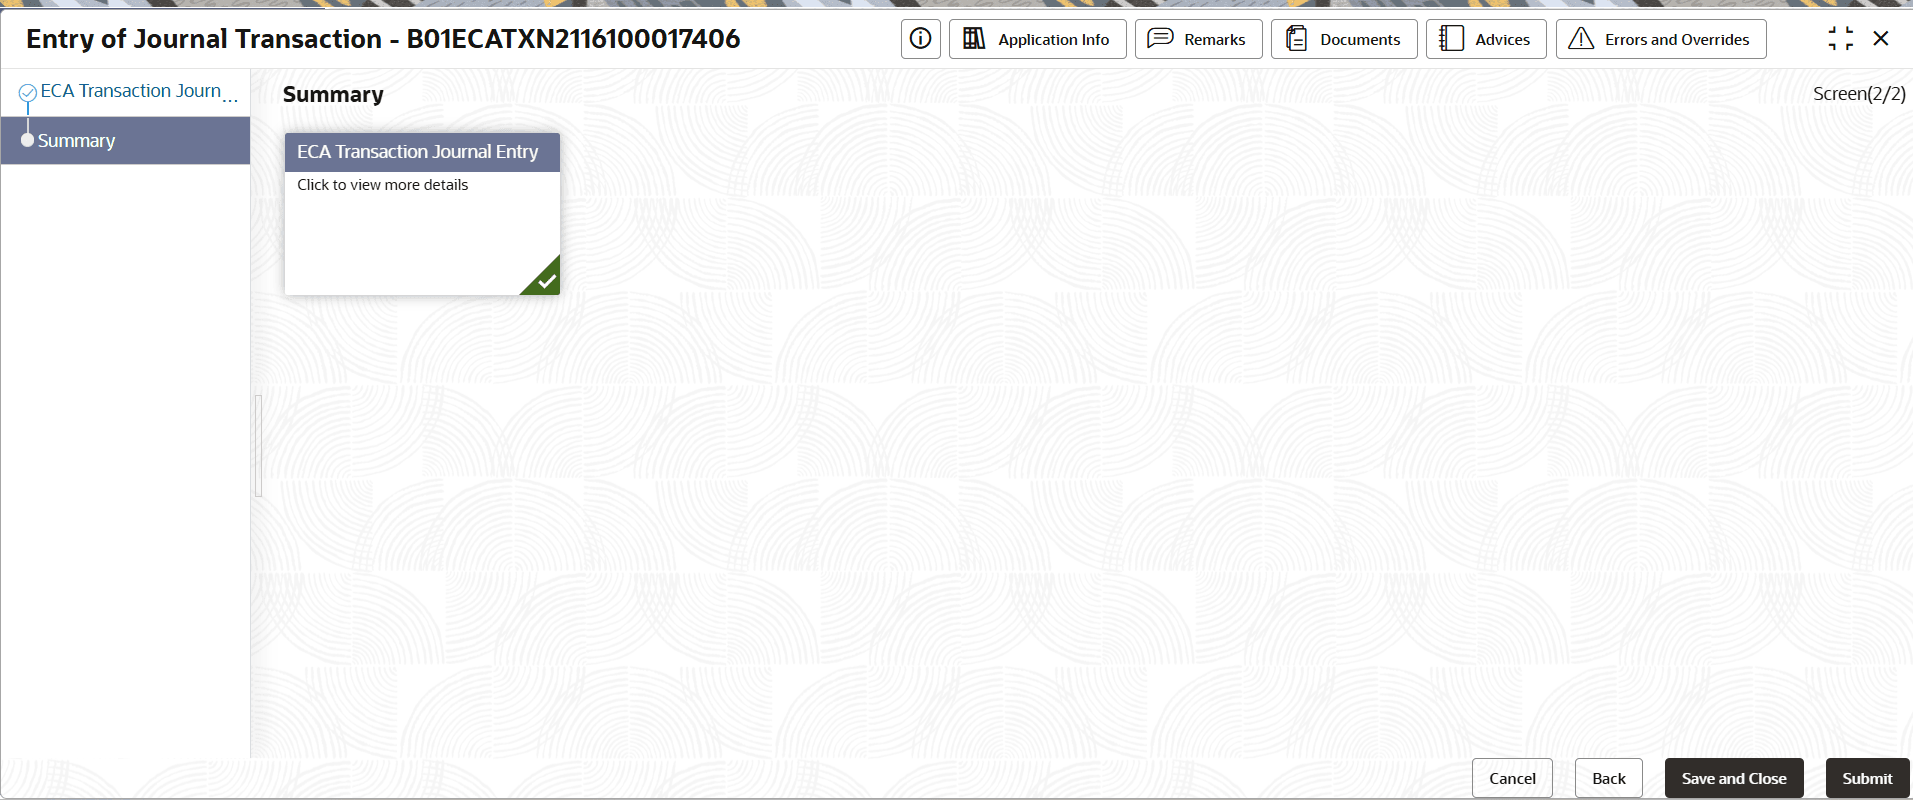
- Click Next.The Summary screen displays the edited or new tiles with a checkmark in green on the bottom right of the tile.
- Click Submit.The Stage Movement Submission dialog displays the Overrides stage.
- Complete the Stage Movement Submission process.
- Accept any Overrides generated and click Proceed Next.
The Checklist stage fetches and displays checklists mapped to this stage.
- Confirm the checklist items and then click Proceed Next.
The Outcome stage displays.
- Select PROCEED from the drop-down list and click Submit.
- Accept any Overrides generated and click Proceed Next.
Parent topic: Account Transactions


