5.3.1 Account Class Transfer
Account Class Transfer is a feature that allows changing the type or class of an active account without closing it or opening a new one. This helps customers access new account features more easily while following certain rules.
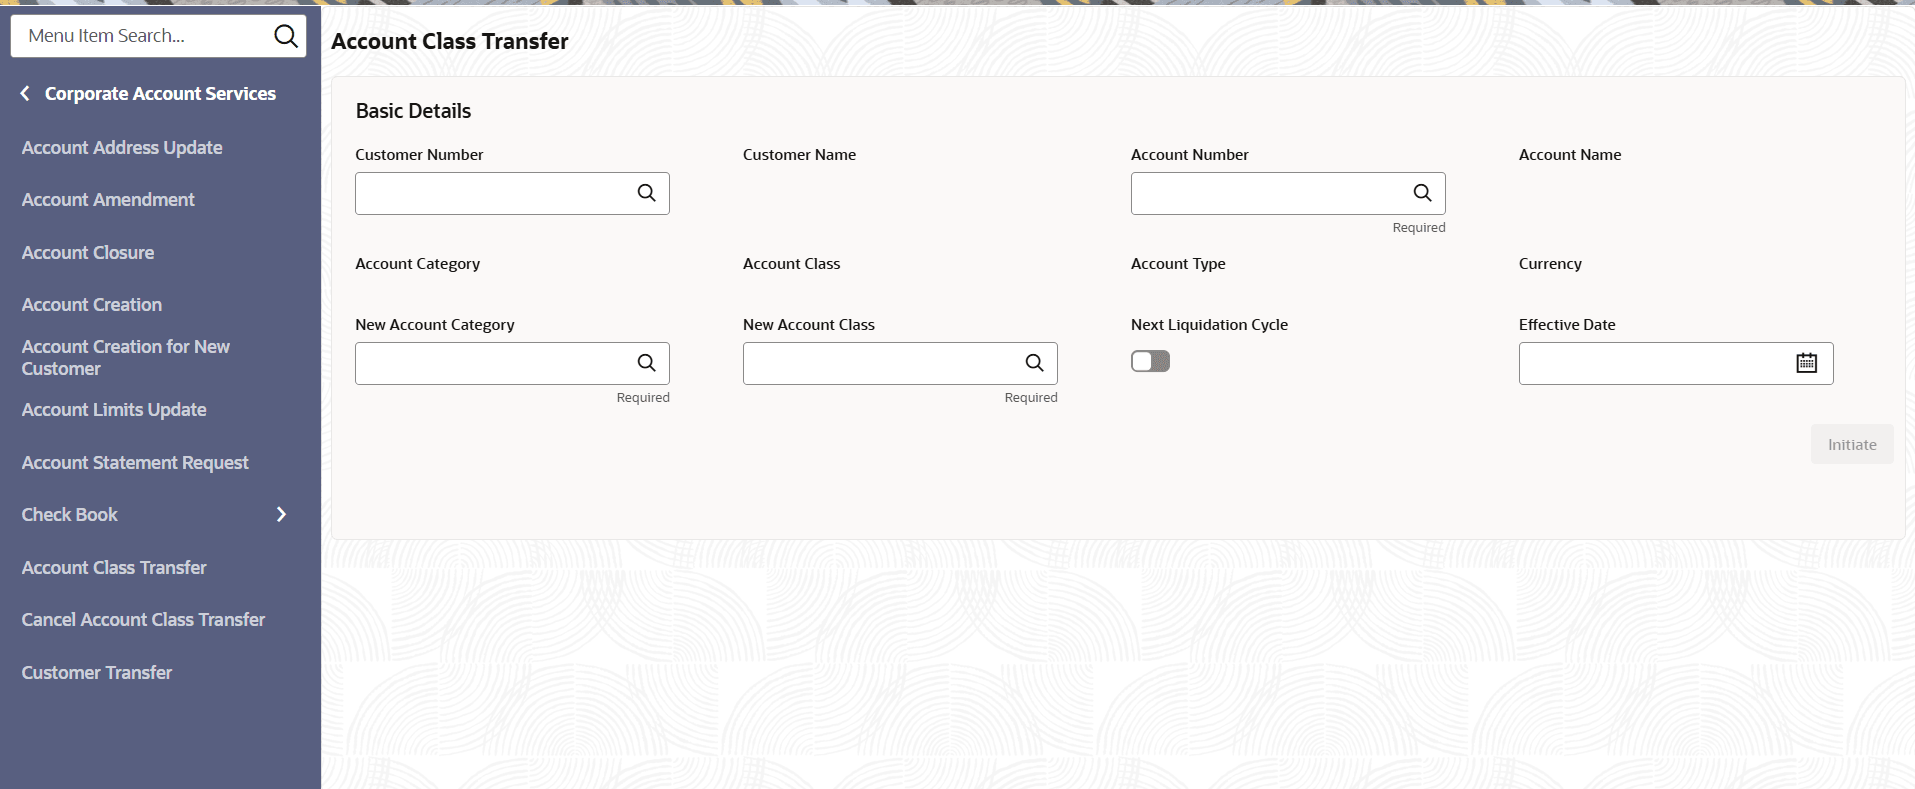
- Click Corporate Account Services, and under Corporate Account Services, click Account Class Transfer.The Account Class Transfer page displays.
- Specify one or more fields in the Basic Details section.
Table 5-5 Account Class Transfer- Field Description
Field Description Customer Number Specify the CIF number of the customer owning the account. Customer Name The name of the selected customer is auto-populated. Account Number Specify the Account number. - Click the Fetch icon.
The Account Number dialog displays.
- Search for the required account by providing some or all of the following details: Account Number, Account Name, or Account Currency.
- Select the required account from the results.
Account Name Displays the Account Name. Account Category This field defaults based on the selected account. New Account Category Specify the New Account Category Account Class This field defaults based on the selected account. New Account Class Specify the New Account Class. Account Type Specify the Account Type. Currency Specify the operating currency of the account. Next Liquidation cycle Toggle the switch On to display next liquidation cycle. Effective Date Specify the Effective Date from when the account class switch has to happen. - Click the Fetch icon.
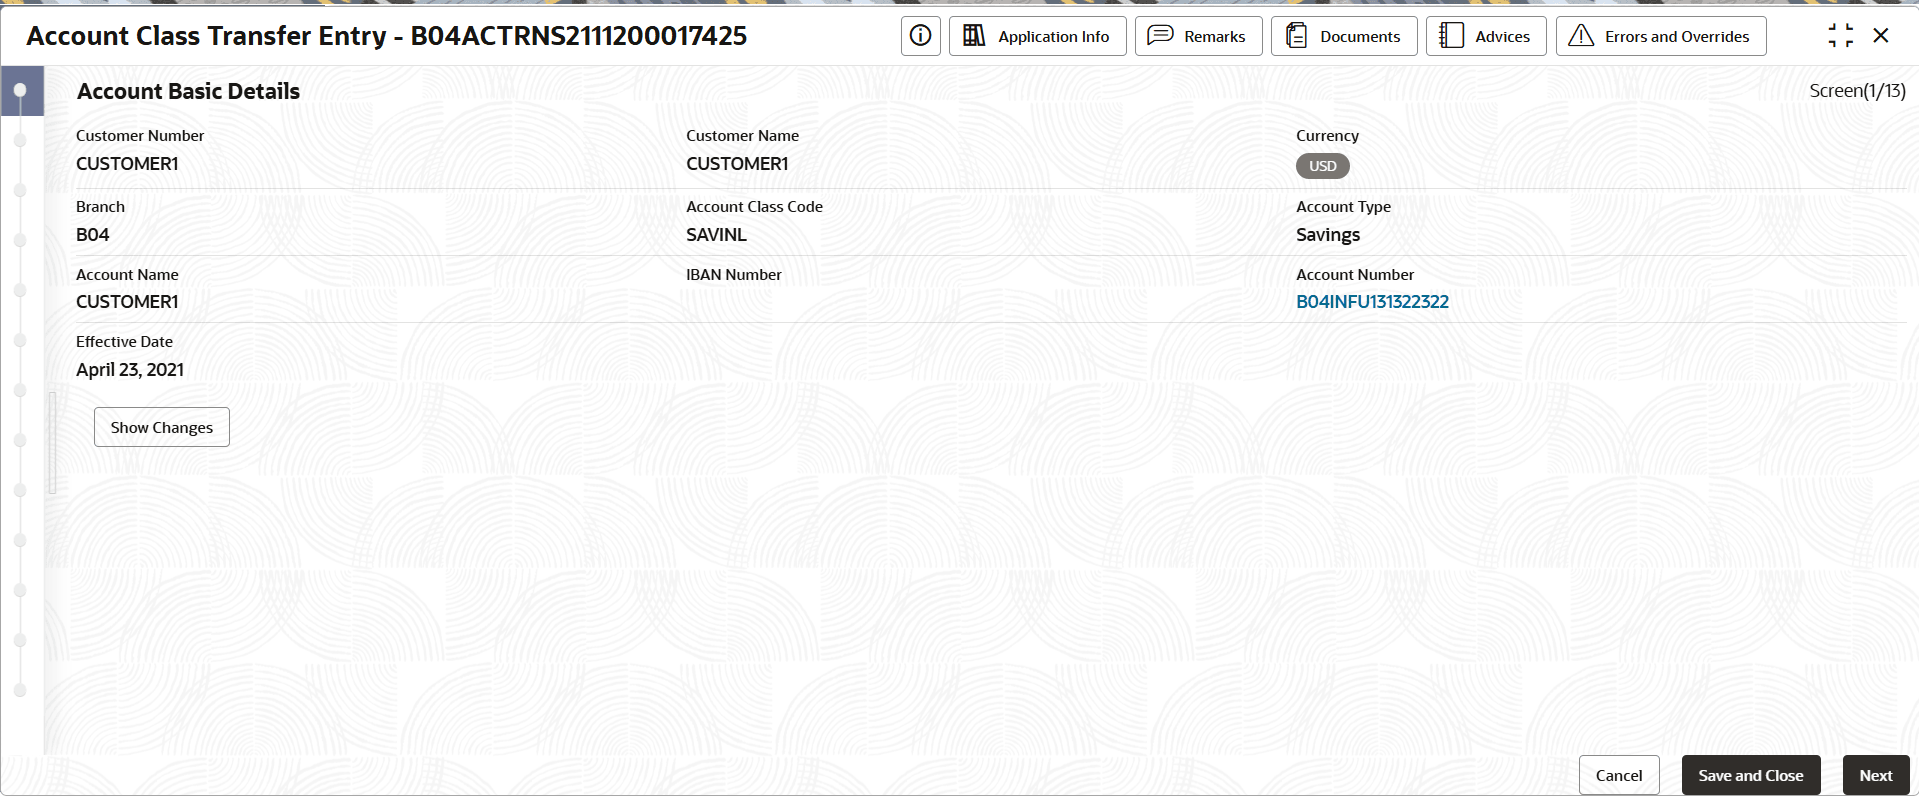
- Click Initiate.The Account Class Transfer page displays the Account Basic Details screen.
Figure 5-9 Account Class Transfer -Basic Details
- For more information the field descriptions on the Account Basic Details screens, see the Account Basic Details step in the Account Creation topic and click Next.The Account Address page displays.
- For more information on the Account Address screens, see the Account Address step in the Account Creation topic and click Next.The Account Status page displays.
- For more information on the Account Status screens, see the Account Status step in the Account Creation topic and click Next.The Account Signatory page displays.
- For more information on the Account Signatory screens, see the Account Signatory step in the Account Creation topic and click Next.The Account Class Transfer page displays.
- Click Next.The Summary page displays.
- Click Submit from the Summary screen.The Stage Movement Submission dialog displays the Overrides stage.
- Complete the Stage Movement Submission process.
- Accept any Overrides generated and click Proceed Next.The Checklist stage fetches and displays checklists mapped to this stage.
- Confirm the checklist items and then click Proceed Next.The Outcome stage displays.
- Select PROCEED from the drop-down list and click Submit.The account transfer is approved.
- Accept any Overrides generated and click Proceed Next.
- Confirm that all stages of the Account Transfer process are complete.
- Click Tasks, and under Tasks, click Completed Tasks.
- The Completed Tasks page should display the Approve stage.
Parent topic: Account Class Transfer

