5.2.1 Account Amendment
This topic describes the systematic instructions to amend an account.
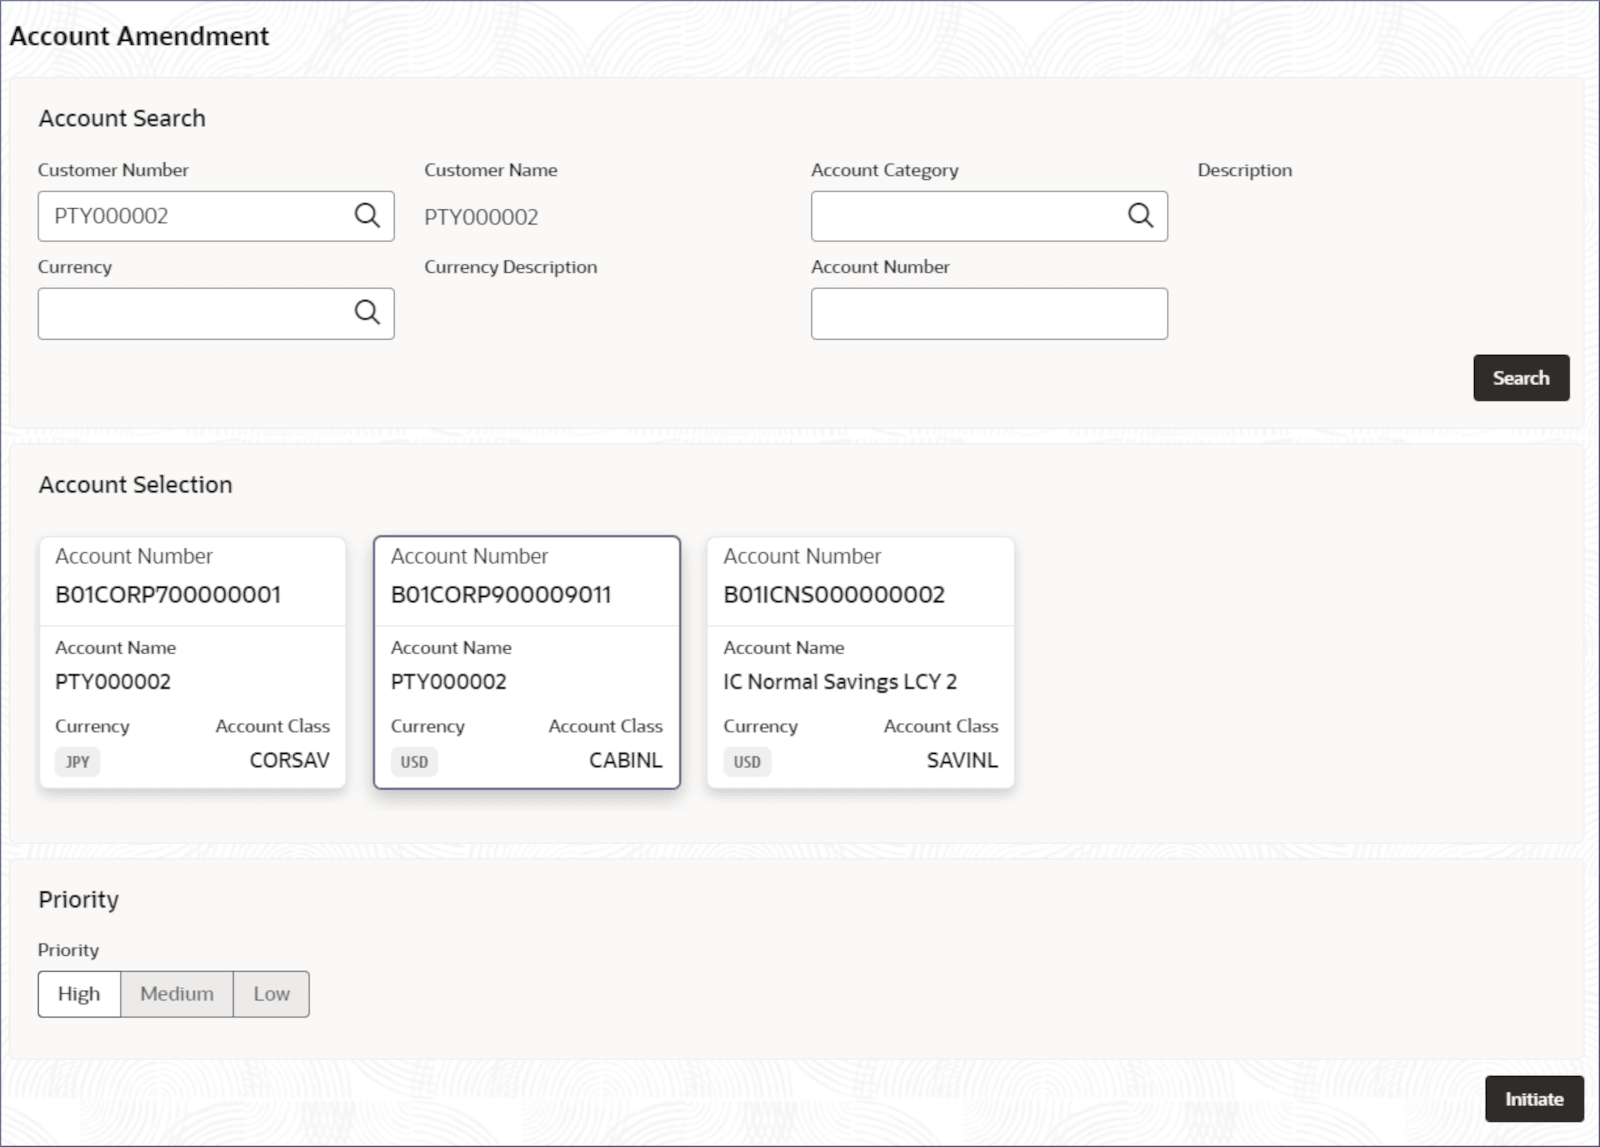
- Click Corporate Account Services, and under Corporate Account Services, click Account Amendment.The Account Amendment page displays.
- Specify one or more fields in the Account Search section.
Table 5-2 Account Search- Field Description
Field Description Customer Number Specify the CIF number of the customer to update the associated account details. - Fetch from the Customer Number dialog.
- Search for the required customer.
- Click the required customer number from the results.
Customer Name The name of the selected customer is auto-populated. Account Category Specify the account category to which the account belongs. Description The description of the selected account category is auto-populated. Currency Specify the operating currency of the account. Currency Description The description of the operating currency is auto-populated. Account Number Specify the required account number Note:
- Click Search.The Account Selection section displays the accounts matching the search filters. See the image in Step 1.
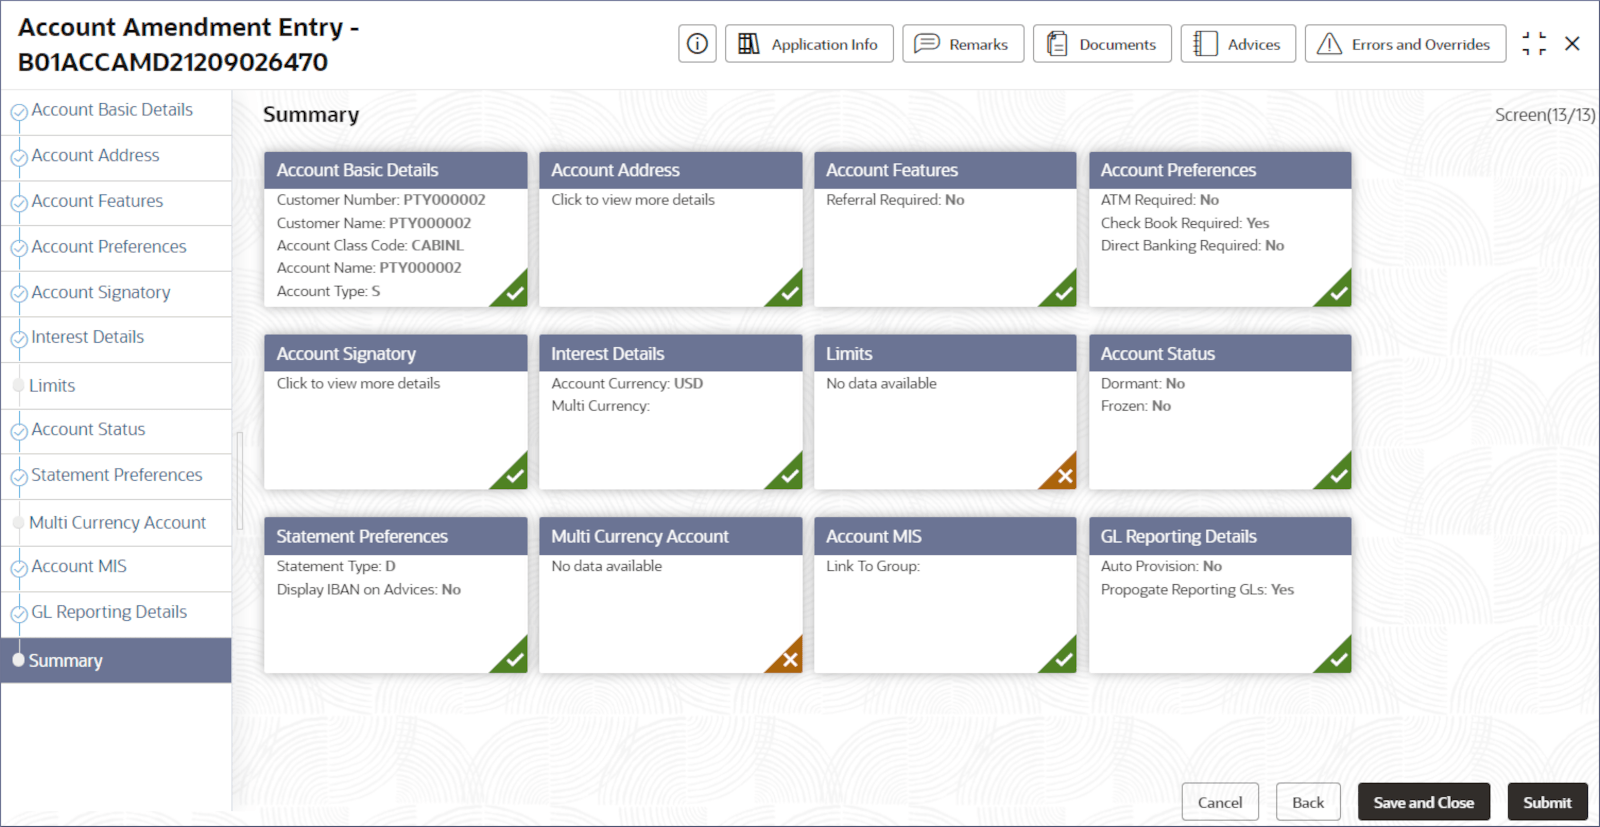
- Click and select the required account tile, then click Initiate.The Account Amendment Update Entry- Application Number page displays.
Tip:
Make a note of the Application Number. This is needed to identify the task at the entry, enrich, and approval stages in the matching process, on the Free Tasks page. - Click the required data entry tile from the Summary screen or the data entry tabs on the left of the page.The data entry screen displays.
Note:
For more details about the data segments, see the Account Creation topic. - Update the required information in the data entry screens.For more information on the editing process and the field descriptions on the data entry screens, see the Account Address data entry step in the Account Creation topic.
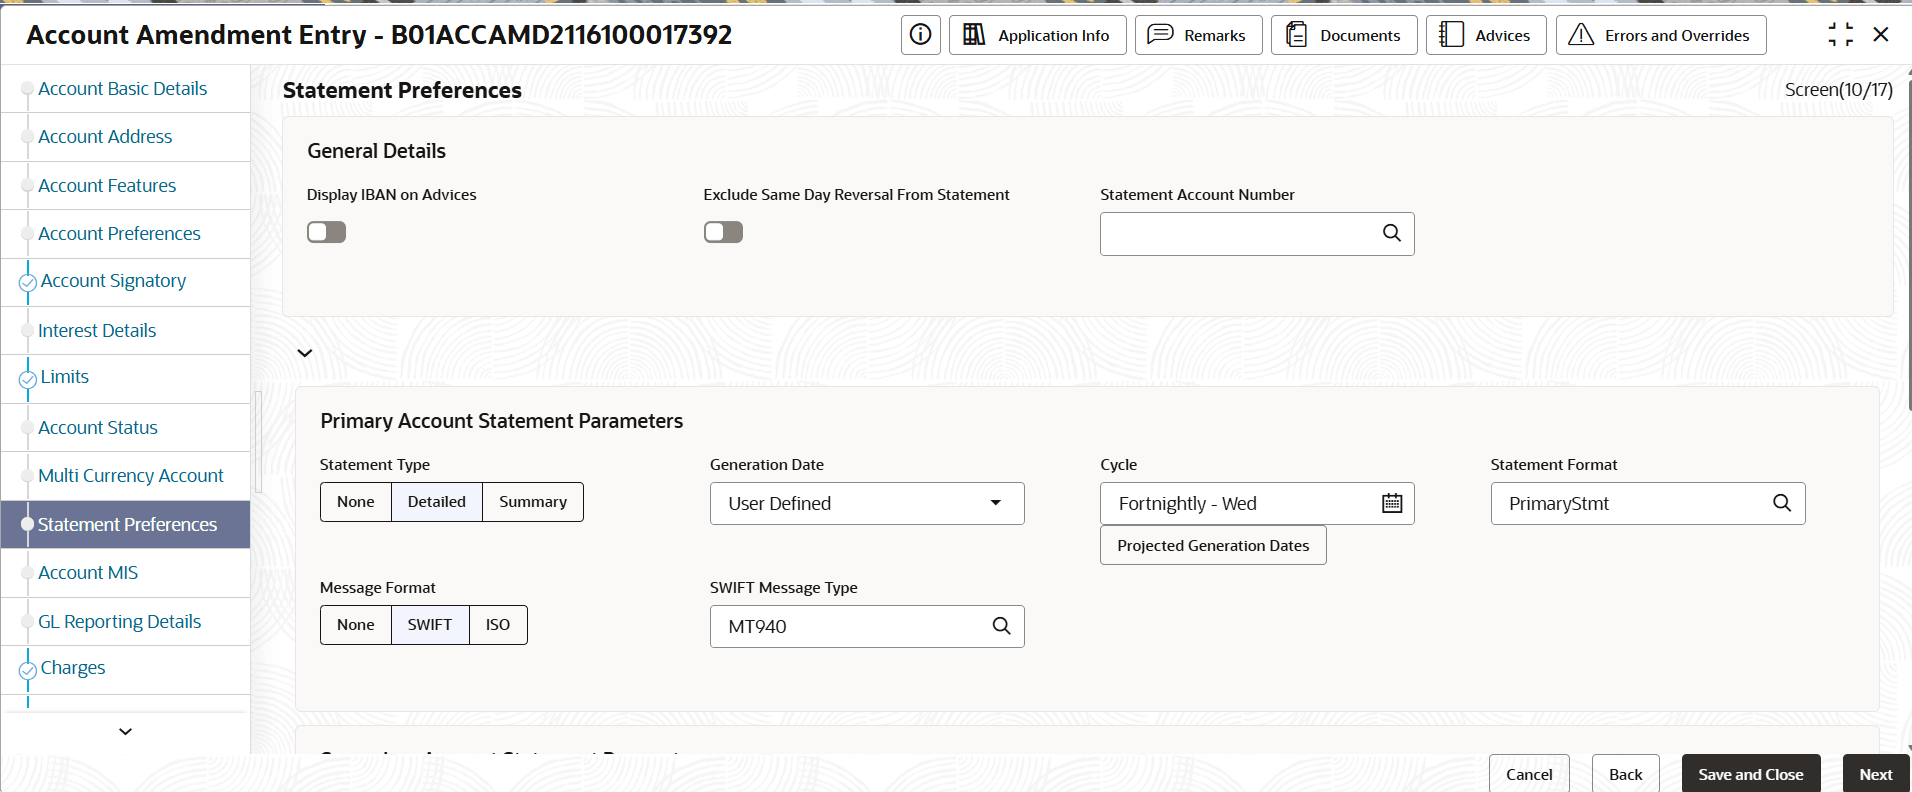
- Click Next.The Statement Preferences screen displays.
- Provide the details on the Statement Preferences page.
- Specify the fields described in the following table.
Table 5-3 Field Description
Field Description Display IBAN on Advices Toggle the switch On to display IBAN on advices. Exclude Same Day Reversal From Statement Toggle the switch On to exclude the same day reversed transactions. Account Statement Parameters Provide the statement parameter details for the following statement types: - Primary
- Secondary
- Tertiary
Statement Type Select one of the following: - None
- Detailed
- Summary
Note:
The remaining fields in the table are common for these three statement types.Cycle Specify the frequency of the statement generated. Click the Calendar icon and specify one of the following: - Daily: Statements are generated every day.
- Weekly: Select the day of the week to generate the weekly statement.
- Fortnightly: Select the day of the week to generate the fortnightly statement.
- Monthly: Select the day of the month to generate the monthly statement.
Statement Format Specify the format of the statement generated. SWIFT Required Toggle this option On to generate statements in the SWIFT format. This field is available only when the Statement Type is Summary or Detailed. Swift message Type Specify the SWIFT message type to generate. The supported Swift message type currently is MT950. This field is available only when SWIFT Required is Yes. ISO Statement Required Toggle this option On to generate statements in the ISO format. This field is available only when the Statement Type is Summary or Detailed. ISO Message Type Specify the SWIFT message type to generate. The supported ISO message type currently is CAMT053. This field is available only when ISO Statement Required is Yes.
- Specify the fields described in the following table.
- Click Next.
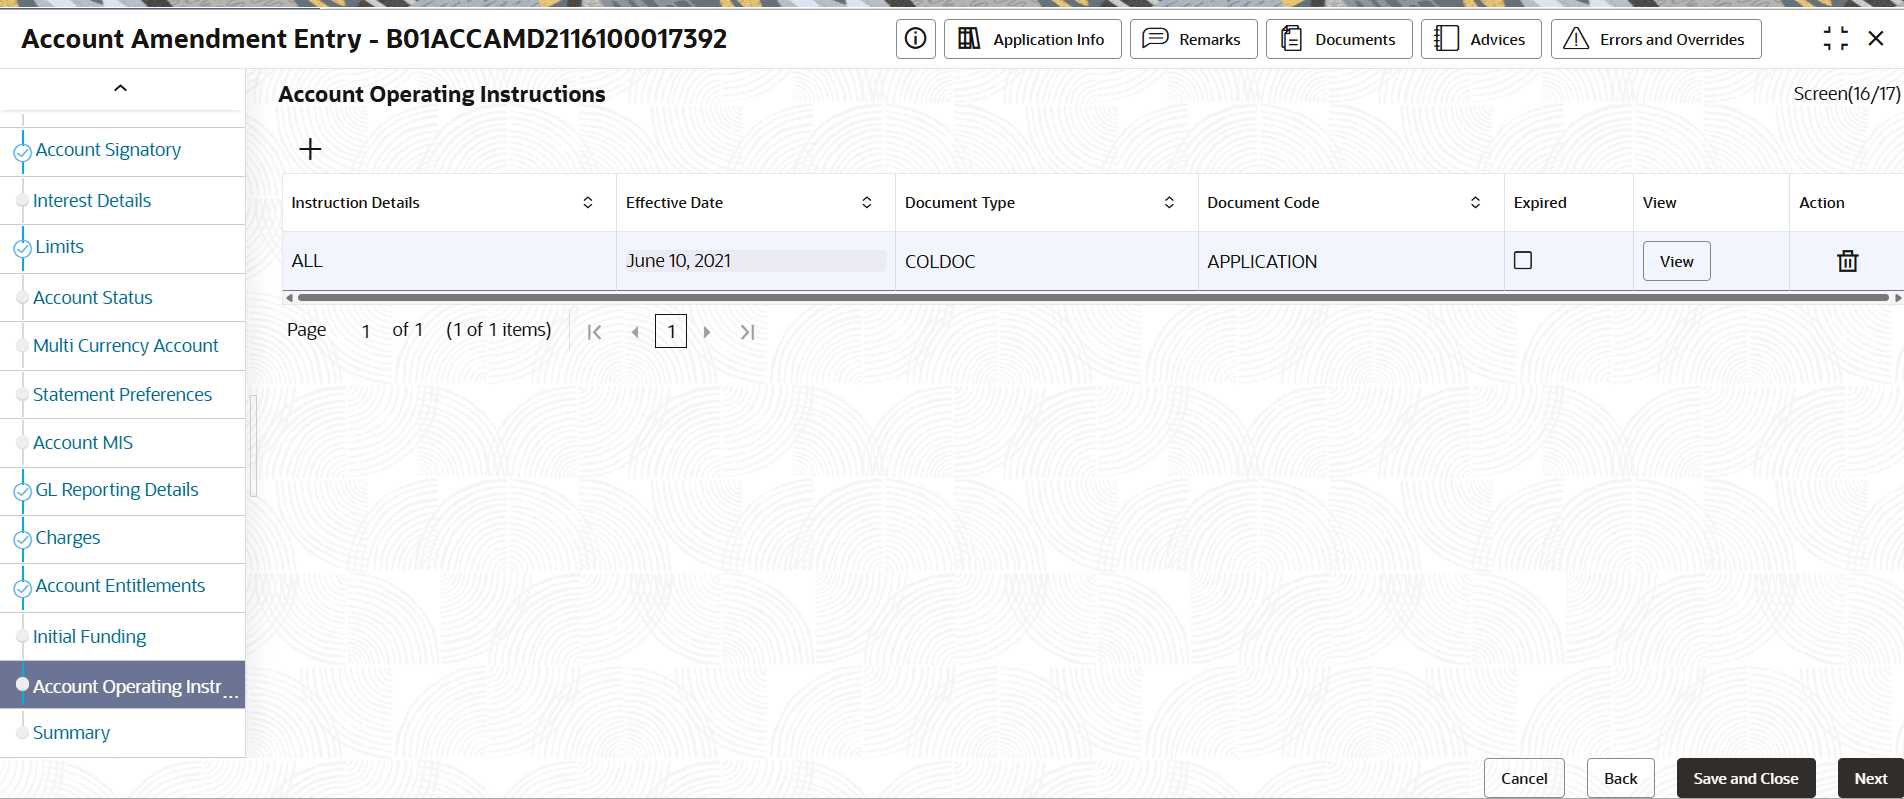
- Provide the details on the Account Operating Instructions page.
Table 5-4 Account Operating Instructions
Column Name Description Instruction Details Displays the Instruction Details. Effective Date Displays the date from which the block is active. Document Type Displays the Document Type. Document Code Displays the Document Code. Expired Displays the Expired date. View View the Document. - When the required updates are complete, click the Summary tab on the left of the page.The Summary screen displays all the data entry screen tiles.
- Click Submit.The Stage Movement Submission dialog displays the Overrides stage.
- Complete the Stage Movement Submission process.
- Accept any Overrides generated and click Proceed Next.The Checklist stage fetches and displays checklists mapped to this stage.
- Confirm the checklist items and then click Proceed Next.The Outcome stage displays.
- Select PROCEED from the drop-down list and click Submit.The Stage Movement Submission process creates the Approve Address Update task.
- Accept any Overrides generated and click Proceed Next.
- Complete the Approve Account Amendment task.
- Click Tasks, and under Tasks, click Free Tasks. The Free Tasks page displays.
- Search the listed tasks with these column values. Process Name column contains ACCOUNT AMEND, the Stage column contains Approve Account Amendment, and the Application Number column has the number noted in Step 4.
- Click Acquire and Edit.The Approve Account Amendment- Application Number page displays.
- Review the amendments made and click Submit from the Summary page.The amendments to the account are approved.
- Click Tasks, and under Tasks, click Free Tasks.
- Confirm that the two stages of the Account Amendment process are complete.
- Click Tasks, and under Tasks, click Completed Tasks.
- The Completed Tasks page should display entries for the Entry, and Approve stages.
To view the amended account details, see Account Search.
Parent topic: Account Amendment


