2 Install Oracle BI Publisher

Follow the instructions given in this section to install:

  • BI Publisher
  • Weblogic Server
  • Oracle Fusion Middleware Infrastructure
  • Oracle Business Intelligence 12c

Install Fusion Middleware Infrastructure

With the introduction of Business Intelligence (BI) Publisher Release 12c, the Repository Creation Utility is part of the Oracle Fusion Middleware.

Follow the instructions given in this section to install the Oracle Fusion Middleware infrastructure in preparation for installing the BI Publisher.
  1. Download Oracle Fusion Middleware 12c from the Oracle Business Intelligence Downloads page. Look for the .Zip file fmw_12.2.1.3.0_infrastructure_Disk1_1of1.zip.
  2. Copy the file to your server in the oracle1 directory created under the path /home/oracle/oracle1.
  3. Login to your server as the oracle user with the -Y flag
  4. Go to the oracle1 directory at the path /home/oracle/oracle1.
    ssh -Y oracle@vm
    cd oracle1
  5. Ensure that the file was not corrupted during transfer. Match the checksum of the file to checksum published by Oracle for the file. The checksum is displayed next to the download link. Use this command to calculate the checksum.
    - md5sum <filename>
    The checksum output has the following format: <checksum> <byte count> <filename>
  6. Extract the contents of the file fmw_12.2.1.3.0_infrastructure_Disk1_1of1.zip.
    
    unzip fmw_12.2.1.3.0_infrastructure_Disk1_1of1.zip
  7. Run this command on the resulting JAR file to run the Oracle Fusion Middleware installer:
    java –d64 –jar fmw_12.2.1.3.0_infrastructure.jar
  8. In the Welcome window, click Next.
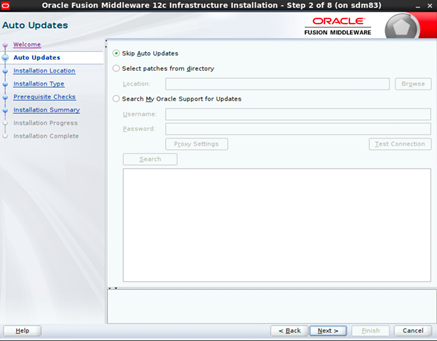
  9. In the Auto Updates window,
    1. Select the default choice (Skip Auto Updates) if you do not plan on receiving any updates for Oracle Fusion Middleware from Oracle Support and click Next.
    2. However, if you want automatic updates later, or the ability to search for updates through Oracle Support, you can choose the other options and click Next. For example:

    Figure 2-1 Auto Updates


    Auto Updates

  10. Create a new directory Oracle_Home1 at the path /home/oracle/Oracle/Middleware
    [oracle@vm ~]$ cd /home/oracle/Oracle/Middleware
    [oracle@vm Middleware]$ mkdir Oracle_Home1
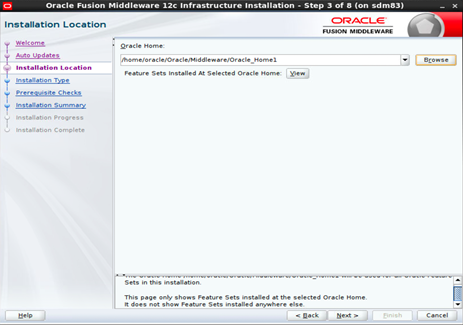
  11. In the Installation Location window, enter the path of the New Oracle Home:
    /home/oracle/Oracle/Middleware/Oracle_Home1
  12. click Next.

    Figure 2-2 Installation Location


    Installation Location

  13. In the Installation Type window, keep the default choice (Fusion Middleware Infrastructure) and click Next.
  14. In the Prerequisite Checks window, checks are performed and click Next.
  15. In the Installation Summary window, click Install to begin the Oracle Fusion Middleware installation.
    The Installation Progress window appears to display the progress of the installation.
  16. When the installation completes, click Next.
  17. In the Installation Complete window, click Finish.

Setting the NEW_ORACLE_HOME Path

Set the variable NEW_ORACLE_HOME to refer to it quickly at multiple places.

  1. Open the file: /home/oracle/.bashrc file
  2. Append the following line to permanently set the NEW_ORACLE_HOME variable in the /home/oracle/.bashrc file:
    export NEW_ORACLE_HOME=/home/oracle/Oracle/Middleware/Oracle_Home1
  3. Start a new bash shell as the "oracle" Linux user. For example:
    ssh -Y oracle@<my_oracle_server>