Managing Accounts
Use the Accounts link on Admin page of the ISR Dashboard to manage accounts in the ISR network.
The Accounts page in the ISR Dashboard allows you to add new Account(s) and configure account parameters. This function also allows you to view, edit, and delete existing Accounts on the ISR.
For each account, you can configure account branding and configure route defaults. You can configure multiple accounts (supports multi-tenancy) if required, and assign specific users or edit user parameters for each account.
Note:
A default System Account exists under the Accounts page and should not be renamed or deleted. This account includes all users and routes configured on the ISR. Users assigned as Super Users and Account Administrators can edit the System Account. For more information about users, see Chapter 6, Managing Users.You can also use other applications (i.e., Microsoft® Excel, Notepad®) to specify the parameters for an account, and then import the contents of the file into the ISR Dashboard.
Select Accounts from the Admin page to manage Accounts.
Accounts Page

The following table describes the information displayed on the Accounts page.
| Column | Description |
|---|---|
| Account Name | Name of the account. |
| Description | Description of the account. |
| Number of Routes | Number of routes configured for the account. |
| Recorder State | Identifies whether or not recording is enabled or disabled on the account. |
| Sessions Capacity | Total number of available sessions currently allowed for this account. |
| Button | Description |
|---|---|
| Create | Create an Account. |
| Edit | Edit an Account. This button is only enabled when an Account row is selected. |
| Delete | Delete an Account. This button is only enabled when an Account row is enabled. |
Adding an Account
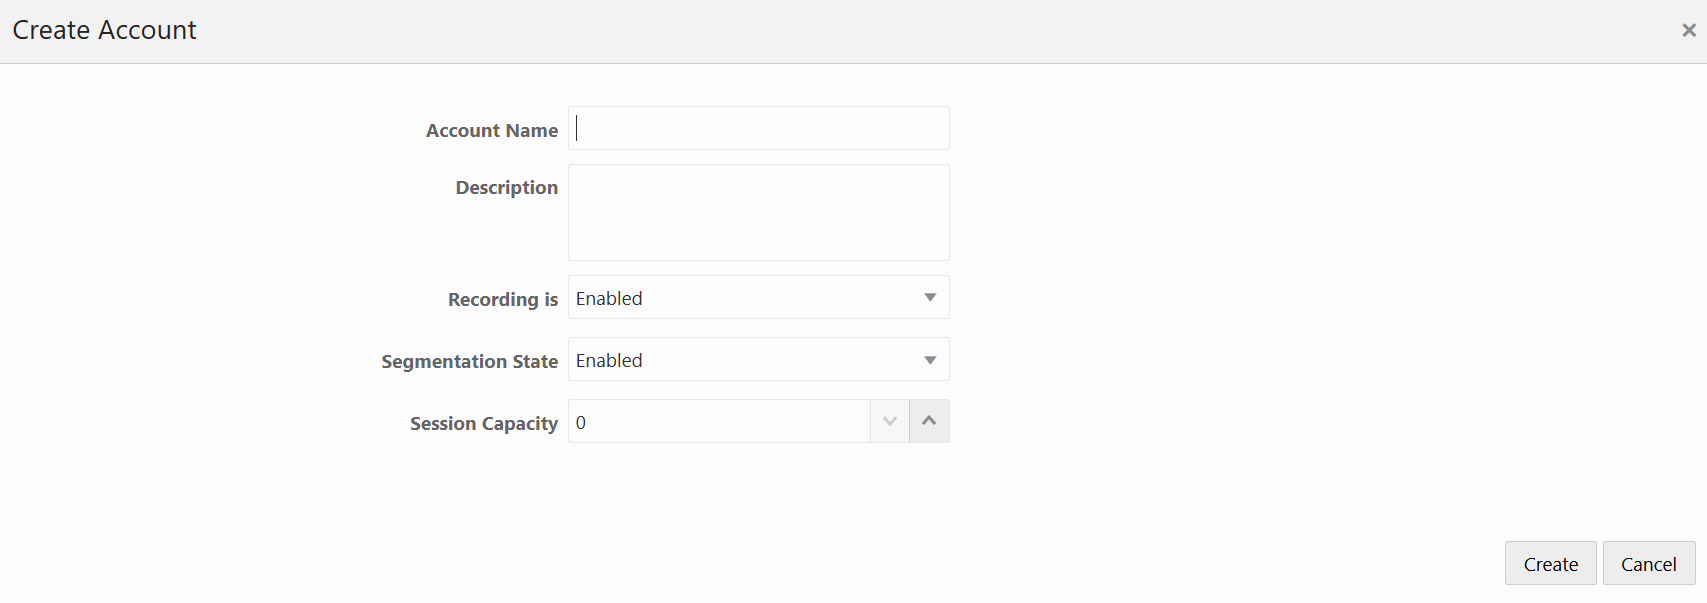
You can add an account(s) using the ISR Dashboard. After adding an account, the settings are applied as the default settings for all routes under that account.
Note:
You can create an account using any application that can save to a comma separated value (CSV) file (i.e., Microsoft® Excel, Notepad®, etc.). Using the ISR Dashboard, you can then import the account information from the file (<filename>.csv) to the ISR database.For more information about importing account information into the ISR database, see Importing an Account CSV File.
Only a Super User and Account Administrator can add new accounts.
To add an account:
Configuring/Editing Details for an Account
Super Users and Account Administrators can configure or edit the details for any of the accounts on the Accounts page. Tenant Administrators can configure or edit the details for their own accounts only.
After selecting an account on the Accounts page, you can click Edit and make changes to the following:
- Account Configurations
- Archival Configurations
- Dashboard Configurations
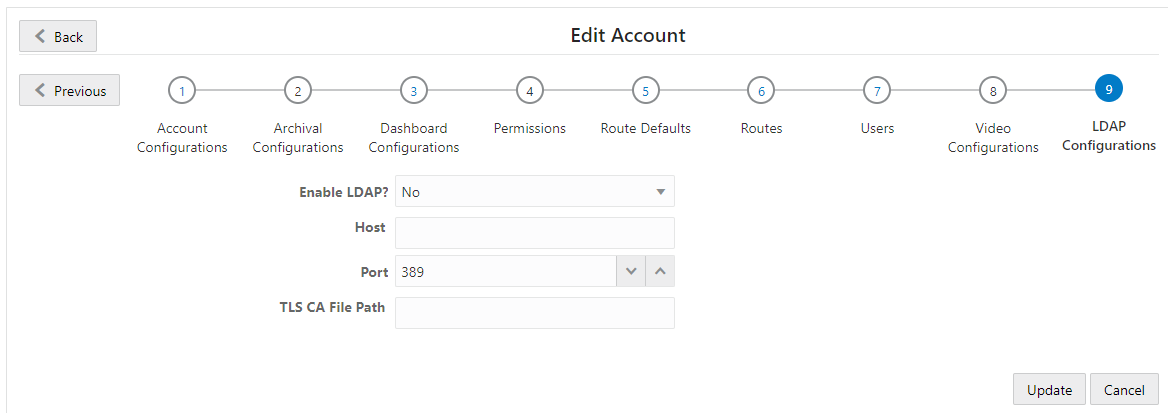
- LDAP Configurations
- Permissions
- Route Defaults
- Routes
- Users
- Video Configurations
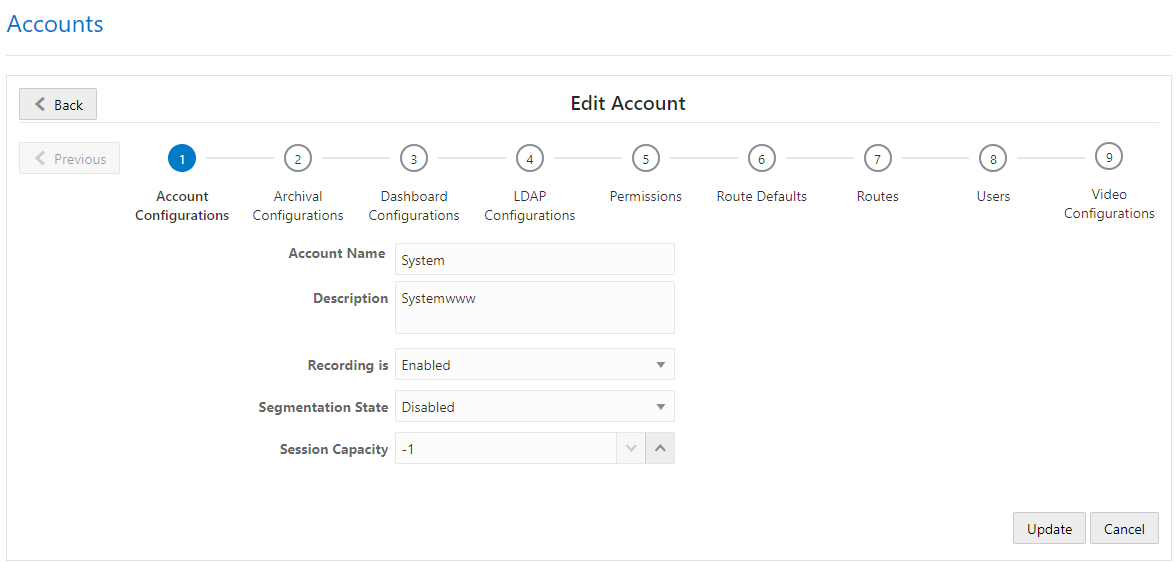
Edit Account Configurations
You can edit the general information for an account when required.
To edit the Account Configurations:
Archival Configurations
To add an Account-specific Archival destination:
Configuring MD5 Checksum Validation
Site Archival Configuration with Account Archival Enabled
To edit Archival:
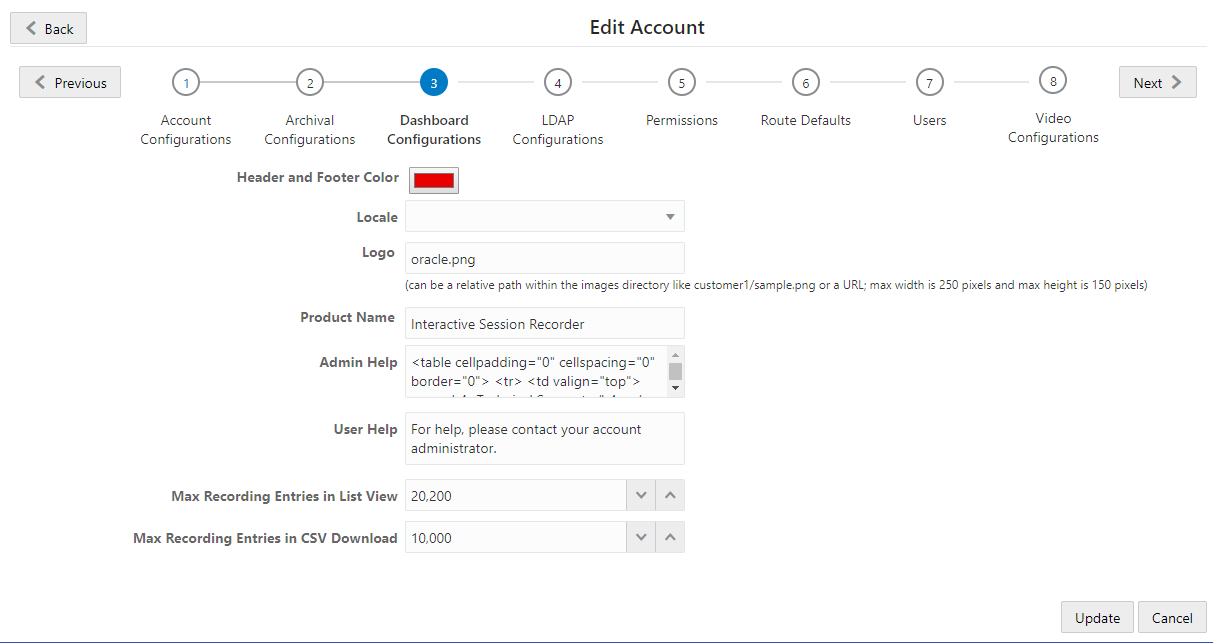
Dashboard Configurations
You can customize the ISR Dashboard for each account using the Account page's Dashboard Configurations section.
Permissions
The Accounts' Permissions page allows you to configure
Account-level playback, deletion, and download recording file permissions
through the
ISR Dashboard.

Route Defaults
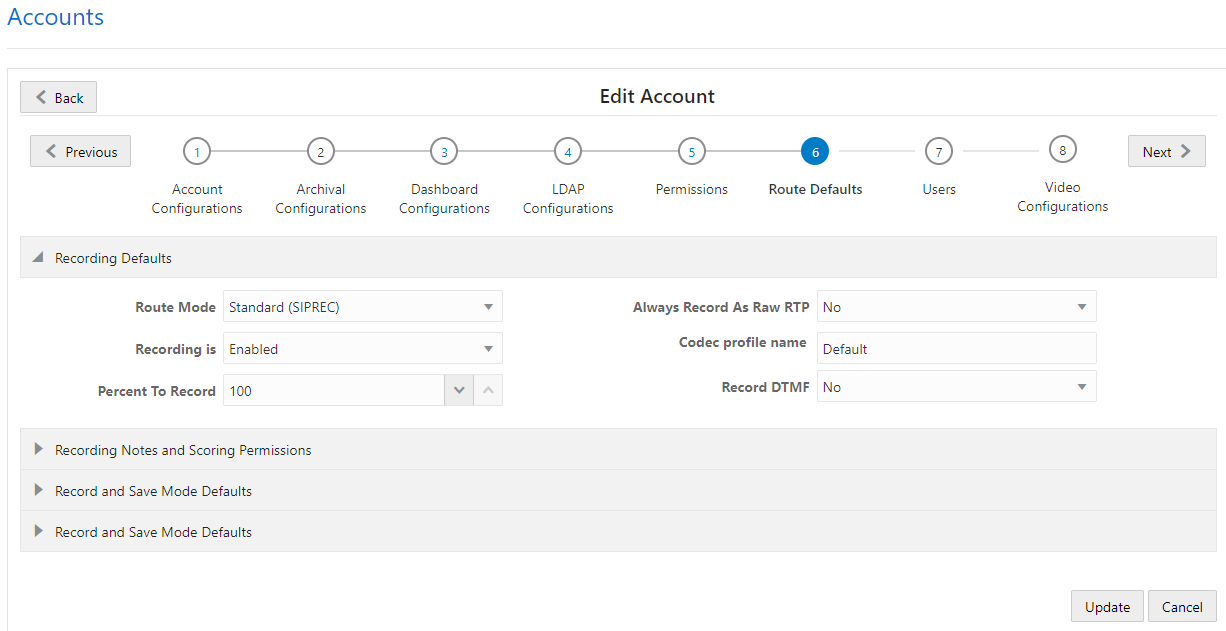
- Recording Defaults
- Recording Notes and Scoring Permissions
- Record and Save Mode Defaults
Route Defaults
The Route Defaults allow you to specify whether or not recording is enabled by default for the routes that are created on the account. You can also specify the Route mode to use for the recording, the percent of recordings allowed, and the recording format.
To configure recording defaults:
Recording Notes and Scoring Permissions
Recordings in the ISR Administrator Dashboard have specific metadata information that is stored with the actual recording. Some of this information includes Agent ID, rating, notes, and whether or not the recording was completed. For more information about recordings, see Managing Recordings.
You specify whether or not routes created for the account allow users, by default, to edit recording information by setting the Recording Notes and Scoring Permissions parameters.
To set recording editing permissions:
- Allow Editing of Agent
ID?—Select whether or not you want users for this route to edit the
Agent ID for a recording. Valid values are:
-
Yes - Allow editing of Agent ID for a recording.
-
No (default) - Prevent editing of Agent ID for a recording.
-
- Allow Editing of
Rating?—Select whether or not you want users for this route to edit
the Rating assigned to a recording. Valid values are:
-
Yes - Allow editing of rating for a recording.
-
No (default) - Prevent editing of rating for a recording.
-
- Allow Editing of Completed
Transaction?—Select whether or not you want users for this route to
be able to indicate that a recording represents a complete transaction. Valid
values are:
-
Yes - Allow editing of completed transaction information for a recording.
-
No (default) - Prevent editing of completed transaction information for a recording.
-
- Allow Editing of
Notes?—Select whether or not you want users for this route to edit
the Notes specified for a recording. Valid values are:
-
Yes - Allows editing of notes specified for a recording.
-
No (default) - Prevent editing of notes specified for a recording.
-
Record and Save Mode Defaults
When the Route Mode is set to Record and Save (see Recording Defaults), you can set the DTMF key that indicates the recording is to be saved. If any other key is pressed, or no key press is received, the recording is discarded.
Note:
The Route Mode parameter MUST be set to Record and Save to enable this Record and Save on DTMF parameter.To set the record and save mode defaults:
- Record and Save on DTMF—Select the type of keypress that allows the caller to save their recording from their phone’s keypad. This parameter allows you to assign a specific DTMF key (keypress), that when pressed by the caller, stores the recording at their location. The value
dtmf-disableddisables this feature. Valid values are:
- dtmf-pound # (default)
- dtmf-star *
- dtmf-0
- dtmf-1
- dtmf-2
- dtmf-3
- dtmf-4
- dtmf-5
- dtmf-6
- dtmf-7
- dtmf-8
- dtmf-9
- dtmf-disabled
Sessions Capacity Defaults
The ISR allows you to set the maximum number of sessions available by default for routes created under the current account. When the maximum session capacity is reached across all routes on the account, a recording may indicate to the caller that all lines are busy and to call back at another time.
You can also set the number of additional call recording sessions available by default for routes to use after the maximum number of sessions has been depleted. The additional burst sessions are used ONLY when the maximum session capacity is reached.
- Session Capacity—Enter the maximum number of sessions to assign by default to new routes for the account. Default is 24. Valid values are:
-
-1 to 999999999 (must indicate total number of licensed sessions)
-
-1 indicates no limit (default)
-
The maximum session limits for an Account are subject to your licensing agreement.
-
The maximum session limit data is included in the Usage and Billing Reports. For more information about generating reports, see Managing Reports.
-
- Additional Burst Session Capacity—Enter the number of additional call recording sessions to assign by default to routes for the account. These are only used after the maximum number of sessions has been depleted. Default is 6. Valid values are:
-
-1 to 999999999 (must indicate total number of licensed sessions)
-
-1 indicates no limit (default)
-
The additional burst session limits for an Account are subject to your licensing agreement.
-
The additional burst session data is included in the Usage and Billing Reports. For more information about generating reports, see Managing Reports.
-
- Click Update to save the default route parameters. The Edit Account page displays.
Routes
The Routes section of the Edit Account page allows you to
view all routes associated with this account.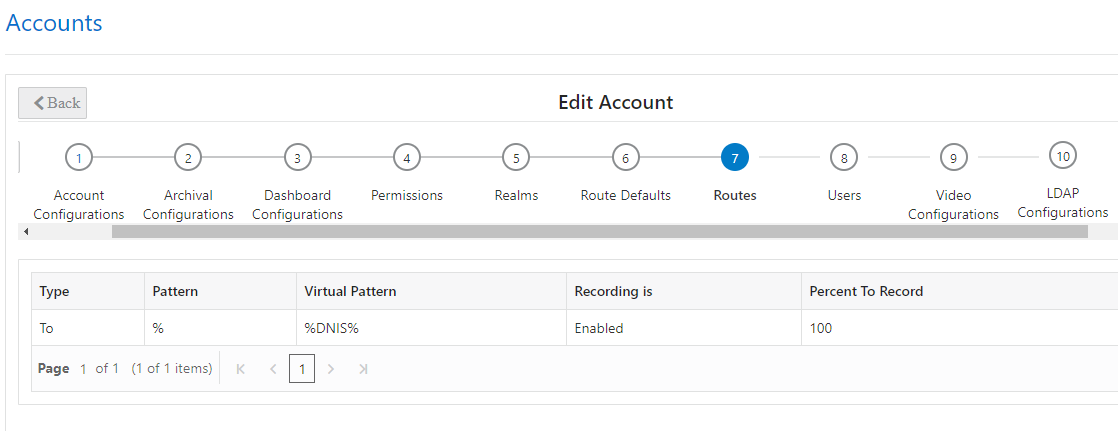
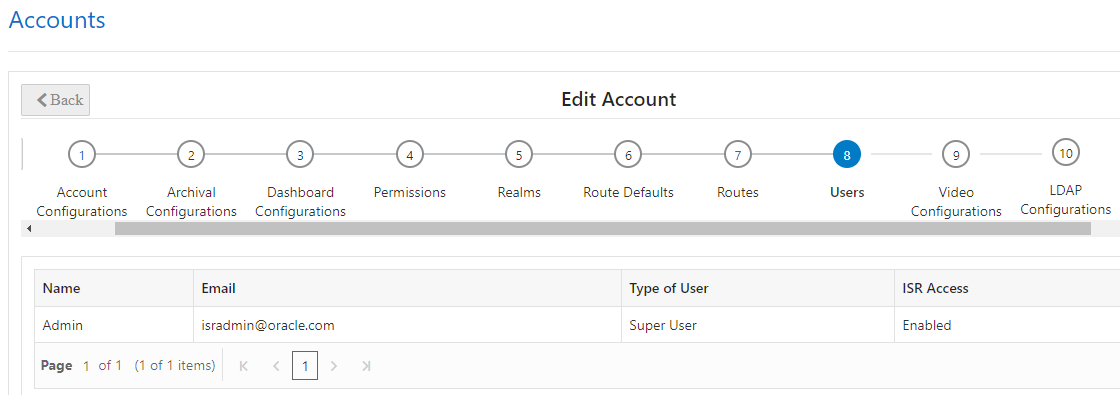
Users
Video
The Account's Video Configurations page allows you to enable or disable video recording for an Account.
- On the Admin page, click Accounts.
- Select an account from the Accounts page and click Details for that account.
- Click
Video
Configurations.

- In the Video recording is field, enable or disable video recording. By default, video recording is disabled.
- In the Video Access Permissions field, specify whether users are allowed to access video recordings. By default, users are enabled.
- Click Update.
LDAP Configurations
- Enable LDAP on the ISR Dashboard
- The host URL or IP
- The port number of the LDAP server
- The TLS certificate file to use for secure LDAP requests.
