- Installation Guide
- Configuring an NFS Share For Archival
B Configuring an NFS Share For Archival
This chapter provides information about configuring a Network File System (NFS) share for archival.
To configure archival to an NFS share:
- Once the NFS
filesystem is properly being exported by the server, you may try mounting the
share to the client host using the following command:
object.
mount -t nfs -o rw,nosuid <nfs_host_name>:<nfs_mount_path> /opt/isr/
ArchivedRecordings" e.g. mount -t nfs -o rw,nosuid host01.mydoc.com:/usr/
local/apps /opt/isr/ArchivedRecordings
Note:
You may need to install the nfs-utils package for mounting an NFS file system. For more information, refer to https://docs.oracle.com/cd/E52668_01/E54669/html/ol7-cfgclnt-nfs.html. - For the mounted
share to persist through reboots, you must edit the
/etc/fstabfile and add a line to the bottom with the following format:
For example,<server>:</remote/export> </local/directory> <nfs-type> <options> 0 01.2.3.4:/mnt/nfs_share /opt/isr/ArchivedRecordings nfs defaults 0 0Note:
Use the mount -a command to remount the filesystems and test your configuration. - From the RSS Linux
shell, verify that users in the group "isr" have write permissions on the NFS
share.
-
Verify the current user is in the "isr" group (in the following example the user's name is "isradm").
#groups isradm isradm: isradm wheel isr wireshark -
Add a file on the share.
touch /opt/isr/ArchivedRecordings/foo.txt -
Verify that the file exists
ls -l/opt/isr/ArchivedRecordings/foo.txt
-
- From the RSS Linux shell, using the systemctl restart tomcatd command, restart Tomcat. Since the Archived Location was not available as a resource to the application server responsible for serving recordings previously, this is necessary.
- From the
ISR Dashboard, add the
new Archival Location.
-
Click the Admin tab.
-
Click the Manage Sites link.
-
Click on the displayed Site.
-
Click on the Locations icon.
-
Click the Create link.
-
name—Enter a specific name for the Location.
-
Recordings Directory—Set the recordings directory path to /opt/isr/ArchivedRecordings.
-
URL—Set the URL serving recordings in the directory (this is likely to be http://<RSS IP>/ArchivedRecording).
-
IP Address—Specify the RSS IP address for conversion to play recordings using certain codecs.
-
Click Create.
-
- From the ISR
Dashboard, configure Archival to the Location.
-
Click the Admin tab.
-
Click the Manage Sites link.
-
Click on the displayed Site.
-
Click on the Archivers icon.
-
Click the Create link.
-
IP Address—Enter the RSS IP address.
-
Source Location—Set to <RSS name> (<RSS IP>) Primary.
-
Destination Location—Set to the name you gave the Location.
-
Click Create.
For more information on advanced settings while configuring a new Archiver, see Managing Archivers in the Oracle Communications Interactive Session Recorder Administrator Guide.
-
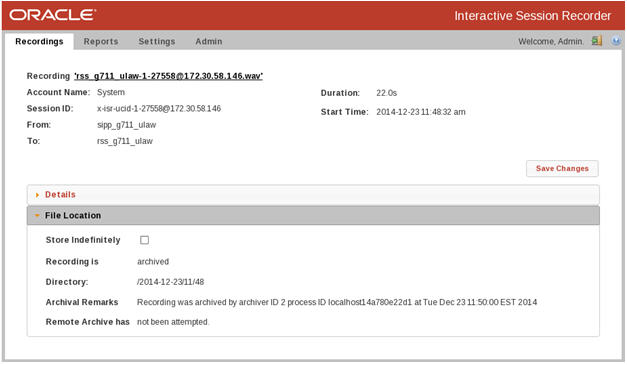
- From the ISR
Dashboard, verify that Archival is configured properly.
-
Click on the Recordings tab.
-
Click on a recording to display the details.
-
Click the File Location tab and verify that the recording was archived in the Archival Remarks field.

Note:
By default, the Archival process runs every two minutes and you must wait for it to run at its scheduled time.
-