1 Getting Started
Oracle® recommends that you review the topics in "Getting Started" before working with the system to ensure success with the tools and functions provided.
About This Software
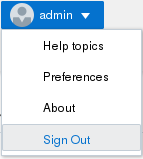
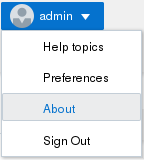
You can display information about the software currently installed on the Oracle® Enterprise Session Border Controller (E-SBC) that you are logged on to by clicking About on the User menu located in the upper right corner of the Web GUI.
The following screen capture shows the location of About on the User menu.
The following screen capture shows an example of the information that the About link displays.

The About page also displays the following links to more information about Oracle and the E-SBC.

Browser Support
You can use the following Web browsers to access the Oracle® Enterprise Session Border Controller (E-SBC) Web GUI:
- Google Chrome (Recommended)—version 77.0.3865.120 and higher
- Internet Explorer—not supported
- Microsoft Edge—not supported
- Mozilla Firefox—not supported
Note:
After upgrading the software, clear the browser cache before using the E-SBC Web GUI.Web GUI Access with the Admin Security License
The Admin Security License provides additional configuration parameters and behavioral controls to enhance security. You can install the Admin Security License from the Web GUI, which you may find more convenient than using the ACLI. To support the Admin Security License, the system requires certificates and an HTTPS connection.
Additional Security Configuration Parameters
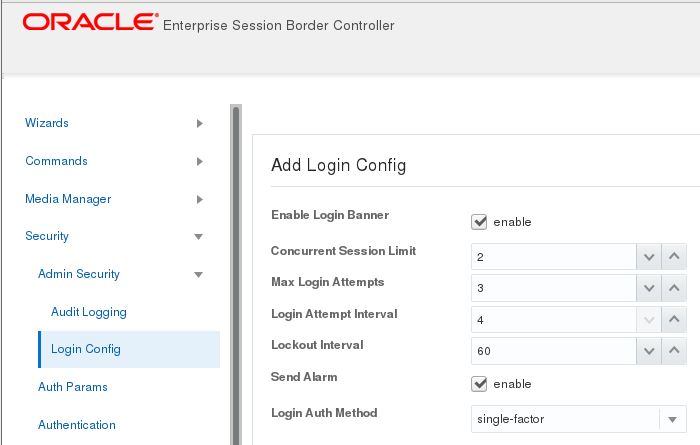
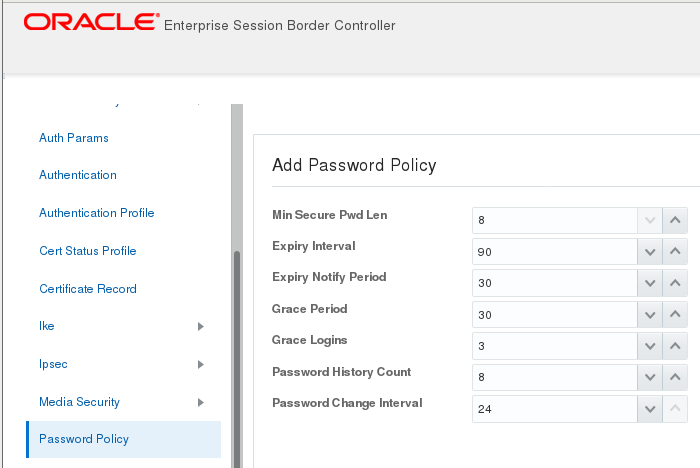
With the Admin Security License installed, the Web GUI adds the Login Config object under Security and adds parameters to the existing Password Policy object.
The Login Config dialog provides the configuration parameters shown in the following illustration.
The Password Policy dialog displays the additional configuration parameters available with the Admin Security license below Min Secure Pwd Len in the following illustration.
Enhanced Security Requirements
HTTPS—The system requires an HTTPS connection to access the Web GUI. Oracle recommends that you configure HTTPS on the Web server before installing the Admin Security License. If the Web server is configured for HTTP when you install the Admin Security License, the system displays an error message when you attempt to Save. Note that after you install the Admin Security License, the system does not allow changing HTTPS to HTTP.
Certificates—The system requires you to configure Local Cert and Local Cert CA on the E-SBC in order to gain access to the Web GUI with HTTPS. Oracle recommends configuring the certificates and a TLS profile before installing the Admin Security license. For instructions, see "Configuring TLS on the Web Server" in the ACLI Configuration Guide.
Enhanced Security Behavior
Concurrent Sessions Limit—In Login Config, you can specify the maximum number of concurrent sessions allowed. When the limit is reached, the system allows no more logins until the number of active sessions falls below the maximum.
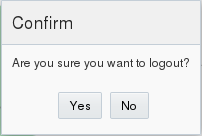
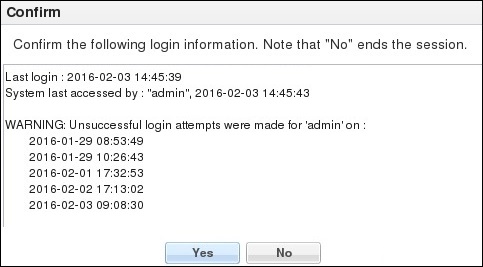
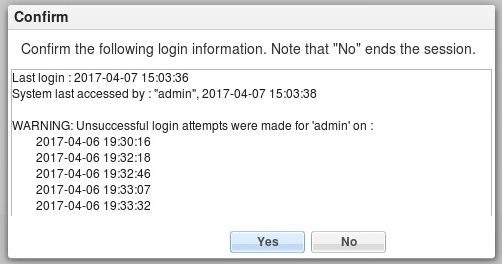
Login History Confirmation—With the Admin Security License installed, and the login banner enabled, the system displays the previous login history. The user must acknowledge the login history. Yes allows the login attempt to proceed and No ends the session. The following illustration shows an example of the information provided.
- When you enable the login
banner, the system displays the notification in the Confirm banner.
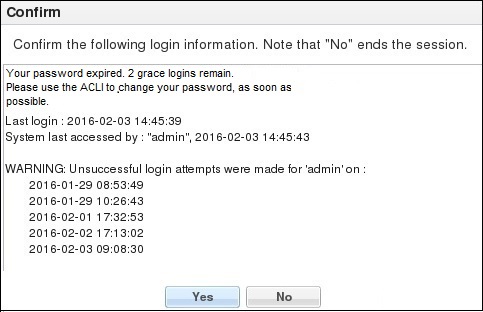
- When you do not enable the
login banner, the system displays the notification in the Password banner upon
a login attempt.
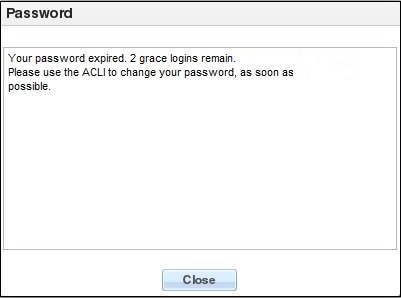
Note:
The Web GUI does not support changing a user password. You must use the#secret enable command from the ACLI.
- The local Admin and User can log on by way of the E-SBC console, the Web GUI, SSH or SFTP, and the system performs the local user authentication process.
- The local Admin and User can log on only by way of the ACLI on the E-SBC when RADIUS is enabled. (No Web GUI, SSH, or SFTP login) You must configure the corresponding authentication type on the Session Director.
- RADIUS users can use their corresponding RADIUS user name to login to the Web GUI, and the system performs the secure user authentication process. The system displays the same login banner that local users see.
Note:
You must change the default passcode upon the first login attempt.License Installation
From the Web GUI, install the Admin Security License by way of the Set License wizard on the Configuration tab.
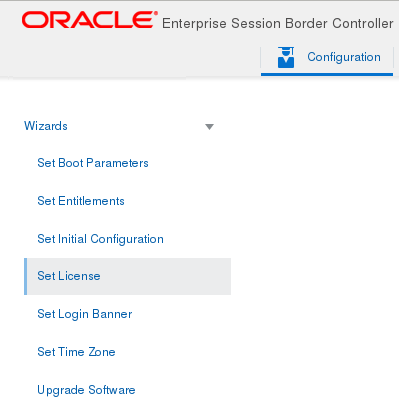
The Set License wizard launches the Set License dialog, where you enter the license serial number.

Note:
The system deactivates the Set Initial Configuration wizard in the current session, so that you cannot accidentally erase the existing configuration.Access the Web GUI with HTTPS
To provide secure access to the Web GUI from the Web server, you can enable HTTPS by creating a Transport Layer Security (TLS) profile. The Oracle® Enterprise Session Border Controller (E-SBC) does not require either the hardware Security Service Module (SSM) or the software TLS license when configuring certificate record, tls-profile, and tls-global for an HTTPS connection to the Web GUI from the Web server.
Note that the E-SBC requires the TLS license when you configure SIP for TLS.
Note:
Virtual machines require the software TLS license.Two-Factor Authentication
Two-factor authentication provides an extra level of security for the Oracle® Enterprise Session Border Controller (E-SBC) by requiring users to enter a Passcode during login, in addition to their Username and Password credentials. Two-factor authentication applies to the Super User for both local and SSH login to the ACLI, and for HTTPS login to the Web GUI.
The two-factor authentication option requires the Admin
Security feature be provisioned, and you must enable the option by setting
login-auth-method to "two-factor" and
saving the configuration. After you set "two-factor" and save the
configuration, the
E-SBC prompts you to set
the Passcode.
The following illustrations show the user login experience on the Web GUI after you enable two-factor authentication.
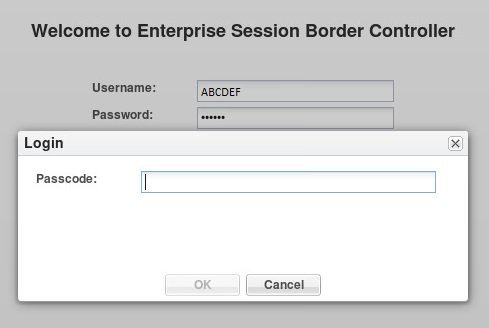
Passcodes must conform to the length and strength requirements specified in "Enable Two-Factor Authentication."
When you want to change the Passcode in the future, use the secret command that you also use for changing the Username and Password.
You can enable two-factor authentication only from the ACLI.
Two-factor authentication does not support RADIUS, TACACS, and HTTP.
Enable Two-Factor Authentication
To enable two-factor authentication for local or SSH login, you must set two-factor as the login authentication method and set the required Passcode.
- Import the local certificate and the local certificate CA into the E-SBC
- Configure the Web server for HTTPS
- Install the Admin Security license
A passcode must meet the following length and strength requirements:
- contain only upper and lower case alphabetical letters, numbers, and punctuation characters.
- contain a minimum of fifteen characters.
- contain two lower-case alphabetical letters.
- contain two upper-case alphabetical letters.
- contain two numerals.
- contain two special characters.
- not contain, repeat, or reverse the user name.
- not contain three of the same characters used consecutively.
- differ from the previous passcode by at least four characters.
- differ from the last three previous passcodes.
- not change more than once every 24 hours.
- Access the Login Config configuration object: Configuration, Security, Admin Security, Login Config.
- In the Login Config dialog, select Two Factor from the Login Auth Method drop-down list.
- Click OK.
- Save the configuration.
User and Administrator Access Rules
Users and Administrators can use the Oracle® Enterprise Session Border Controller (E-SBC) Web GUI according to the following rules for their role.
| User |
|
| Administrator |
|
Simultaneous Logons
The Web GUI allows simultaneous logons for both the User and Administrator. Session availability to the User and Admin depends on which type of user is logged on to the session. The following illustrations depict and explain the system behavior when a User and an Administrator log on to a Web GUI session.
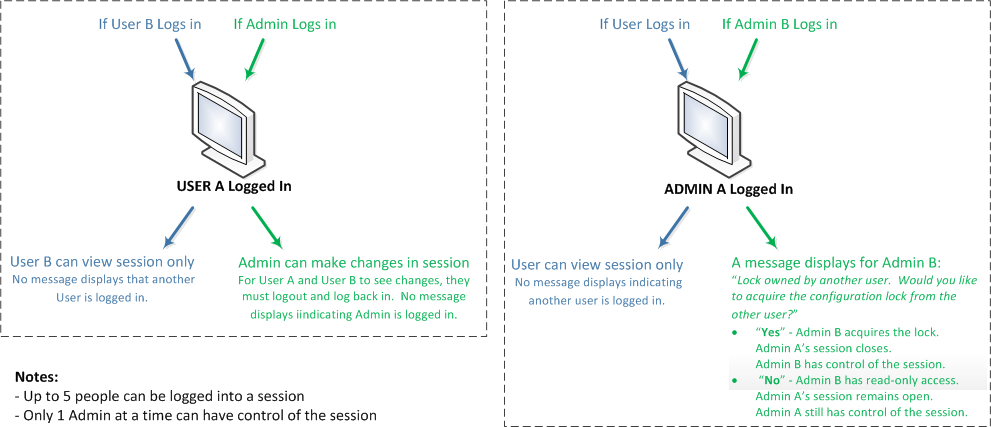
Up to five users can log onto the same session at the same IP address at the same time. Only one Administrator at a time can have full control of a simultaneous session. If more than five users attempt to log on, the system displays the following error message:
User limit reached. Please try again later.Log On to the Web GUI
You can log on to the Oracle® Enterprise Session Border Controller (E-SBC) as a User or an as Administrator, depending on your permissions.
You need your User name, Password, and optionally your Passcode to log in. The system requires your passcode when two factor authentication is enabled. If your system Administrator configured the optional log on page message, the system displays the message after you enter your log on credentials. After reading the message, click Close, and the system displays the GUI.
Log Off from the Web GUI
Change the Log On Password
Use the Oracle® Enterprise Session Border Controller ACLI to change a User or Administrator log on password.
RADIUS Server Roles and Access Privileges
The Web GUI supports RADIUS authentication functionality similar to a user logging on by way of Secure Shell (SSH) and SSH File Transfer Protocol (SFTP).
Available functions depend on the role that you assign to the "userclass" on the RADIUS server.
- When you configure the RADIUS server as userclass=admin, the system allows the Administrator full access to all features and functions after logging onto the GUI.
- When you configure the
RADIUS server as userclass=user, the system limits User access to the following
features and functions after logging onto the GUI.
-
Full access to all System features and functions
-
Can download the following files in System File Management:
- Backup Configuration
- Configuration CSV
- Fraud Protection Table
- Log
- Audit Log
- Playback Media
- Software image
- SPL Plug-in (SPL)
Note:
The "User" account cannot upload files in System File Management.
-
Update the Configuration Schema
When a release includes new parameters, you must update the schema to see them. The updated schema adds the new parameters to their respective configuration screens.
After you update the software to a subsequent release, the system displays a schema update prompt after first log on to the GUI. If you click Cancel, the system bypasses the update and adds no new parameters. The system displays the update prompt each time you log on to the Web GUI, until you choose to update the configuration schema.
Web GUI Tabs Displays and Operations
The Web GUI displays tabs that you click to display information and perform tasks, such as configuring, managing, and monitoring the system. Each tab displays a unique set of tools to control its operations. The following information describes the operations and tool sets for each tab.
Home Tab
The Home tab displays the Web GUI Dashboard, which can display SIP statistics through configurable widgets that you add and remove as needed. You can add up to 18 Widgets to the dashboard. The Home Tab displays and operates in the same way for both Basic Mode and Expert Mode. On the Home tab, you can:- Refresh the page.
- Add a widget.
- Reset the display to the default.
- Refresh—Refresh the data in the Widget.
- Settings—Set the data sampling parameters for the Widget.
- Remove—Remove the Widget from the Dashboard.
- Maximize—Display the Widget in full screen size.
- Show Information—Display data in a graph or table.
- Collapse—Minimize a maximized Widget.
- Export—Download the data displayed in the Widget.
Basic Mode Configuration Tab
In Basic Mode, the Configuration tab displays the following buttons and links that display configuration controls:- Save—Save and activate the configuration.
- Verify—Confirm that the configuration is valid, before saving and activating.
- Settings—Configure system settings.
- Discard—Delete unsaved configuration changes.
- Switch to Expert—Change from Basic mode to Expert mode.
- Search—Search for objects and attributes.
Navigation Pane
- Wizards—Set boot parameters, Set Entitlements, Set initial configuration, Set License, Set Login Banner, Set Time Zone, and Upgrade software.
- Devices—Add a PBX, a Trunk, Remote Workers, a Device, a Recording Server, and a SIP Interface.
- Management—Configure Accounting, SNMP Community, Trap Receiver, and Web Server.
- Network—Configure the Host Route and the Network Interface.
- Others—Configure a Media Profile, SIP Features, SIP Manipulation, SPL, and Translation Rules.
- SBC—Configure Advanced Routing and a Web Server.
- Security—Configure a Certificate Record, an SDES profile, and a TLS profile.
Expert Mode Configuration Tab
In Expert Mode, the Configuration tab displays the Wizards and Commands objects along with lists of configuration objects, grouped in the same tree-like structure as those in the Acme Command Line Interface (ACLI). The configuration objects include:- Media Manager
- Security
- Session Router
- System
Monitoring Tab
The Monitoring tab displays information about system activities by way of summaries and Widgets. Summaries are lists that you can only view on the Monitoring tab and Widgets are graphical or textual displays that you can view on the Monitoring tab and the Dashboard.
The Monitor and Trace link displays summaries of data that the system collects about:- Notable Events
- Registrations
- Sessions
- Subscriptions
- Search—Configure a search filter.
- Show all—Override the display filter and show all data.
- Ladder diagram—Displays data in a ladder diagram.
- Export session details—Save the detailed data to an external location.
- Export summary—Save a summary of the data to an external location.
- System
- Media
- Signaling
System Tab
The System tab displays controls for managing, booting, and upgrading the system. The System Tab operates in the same way for both Basic Mode and Expert Mode.- Force HA Switchover—Manually place the system in the standby state.
- Reboot—Manually reboot the system at any time.
- Support information—Generate a file that displays troubleshooting information that you can save and send to Oracle Customer Support.
- File management—Displays a list of file types and a set of controls to Refresh, Upload, Download, Backup, Restore, and Delete files.
- Set Boot Parameters—Use the Web GUI to set boot parameters, instead of the ACLI command line.
- Upgrade Software—Verify the health of the system software, for example, synchronization health, configuration version, and disk usage. Configure the upload method, browse to the software file to upload, and opt to automatically reboot the system after the upgrade.
Customize the Page Display
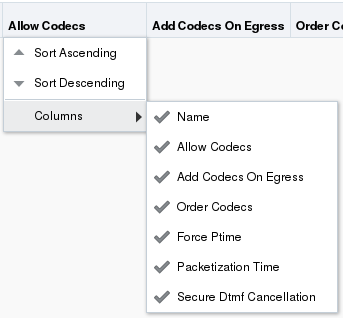
You can customize the display of the data on Web GUI pages by selecting which columns display, the information type, and the sort order. You can also re-order the column headings.
The Search Tool
The Oracle® Enterprise Session Border Controller provides search operations for both system-wide and a configuration-specific objects.
The global Search button on the branding bar opens the Search text box where you enter the text to search for, such as an object name, an attribute, or value.

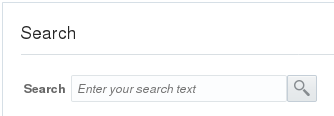
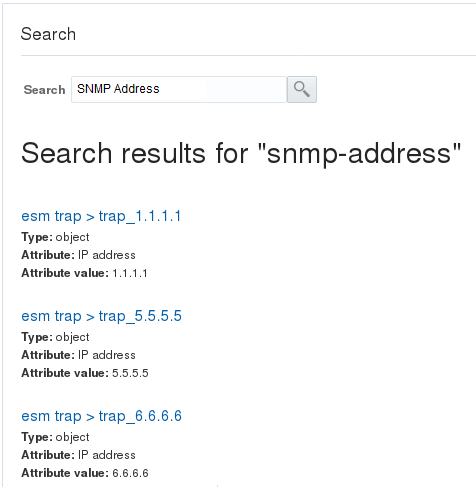
The resulting display includes links to the configuration object, for example:
Multi-instance configuration objects display a table of configurations and the table includes a text box for local search within the table.
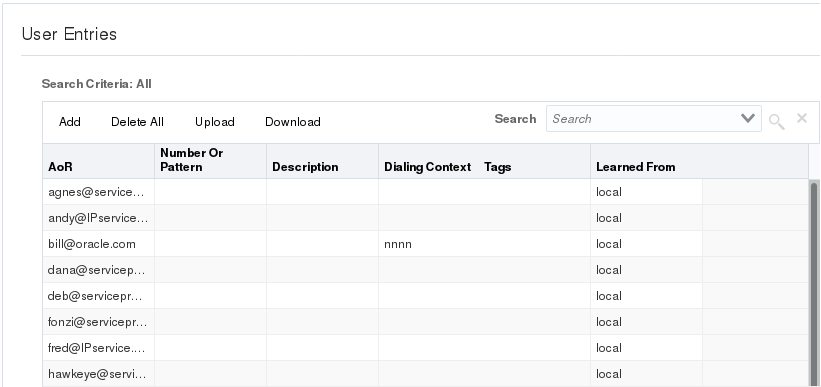
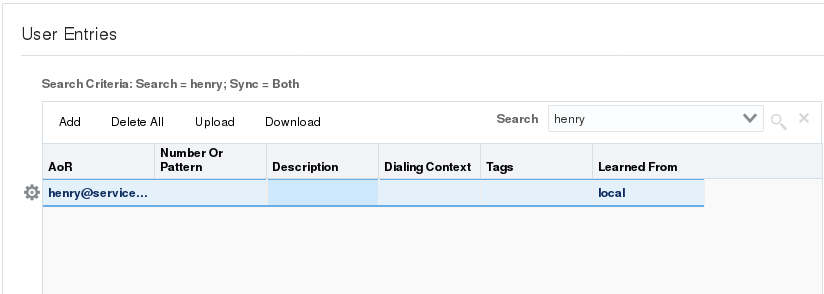
The result of the search is displayed in the table. For example, searching for "henry" in the User Entries list above results in the display of henry's record, which you can edit, copy, or delete.
