Retroactive Blackouts and Outages
If a target is brought down for maintenance and a blackout is not scheduled for that target, the maintenance period would be reflected as target downtime, thus a negative impact on the target’s availability history. This would be a problem for say a target’s service-level agreement (SLA) where the collected metrics that define the level of expected service would be inaccurate.
Enterprise Manager lets you remedy this situation by allowing you to define blacklouts and outages retroactively.
Retroactive Blackouts
As mentioned previously, retroactive blackouts can be used to specify past maintenance periods where the administrator has forgotten to set a blackout. The retroactive period will be used to adjust the target's availability (%) period by excluding these periods from availability (%) calculations, thus increasing a target's availability (%). Retroactive blackouts can be created either from the console or using EM CLI.
The following sequence of events illustrates the typical scenario for a retroactive blackout.
-
The target is brought down for maintenance.
-
The target availability % goes down from 100% => 80%.
-
The target is brought back up after the maintenance work has been completed.
-
The administrator realizes no blackout was created for the maintenance period.
-
The administrator creates a retroactive blackout for the maintenance period.
-
The target availability goes back up from 80% ==> 100%.
-
From the Enterprise menu, select Monitoring and then Blackouts. The Blackouts page displays.
-
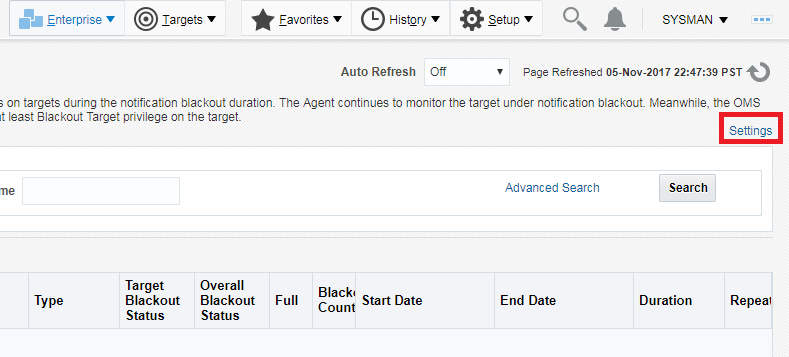
Click Settings. The Settings page displays.
-
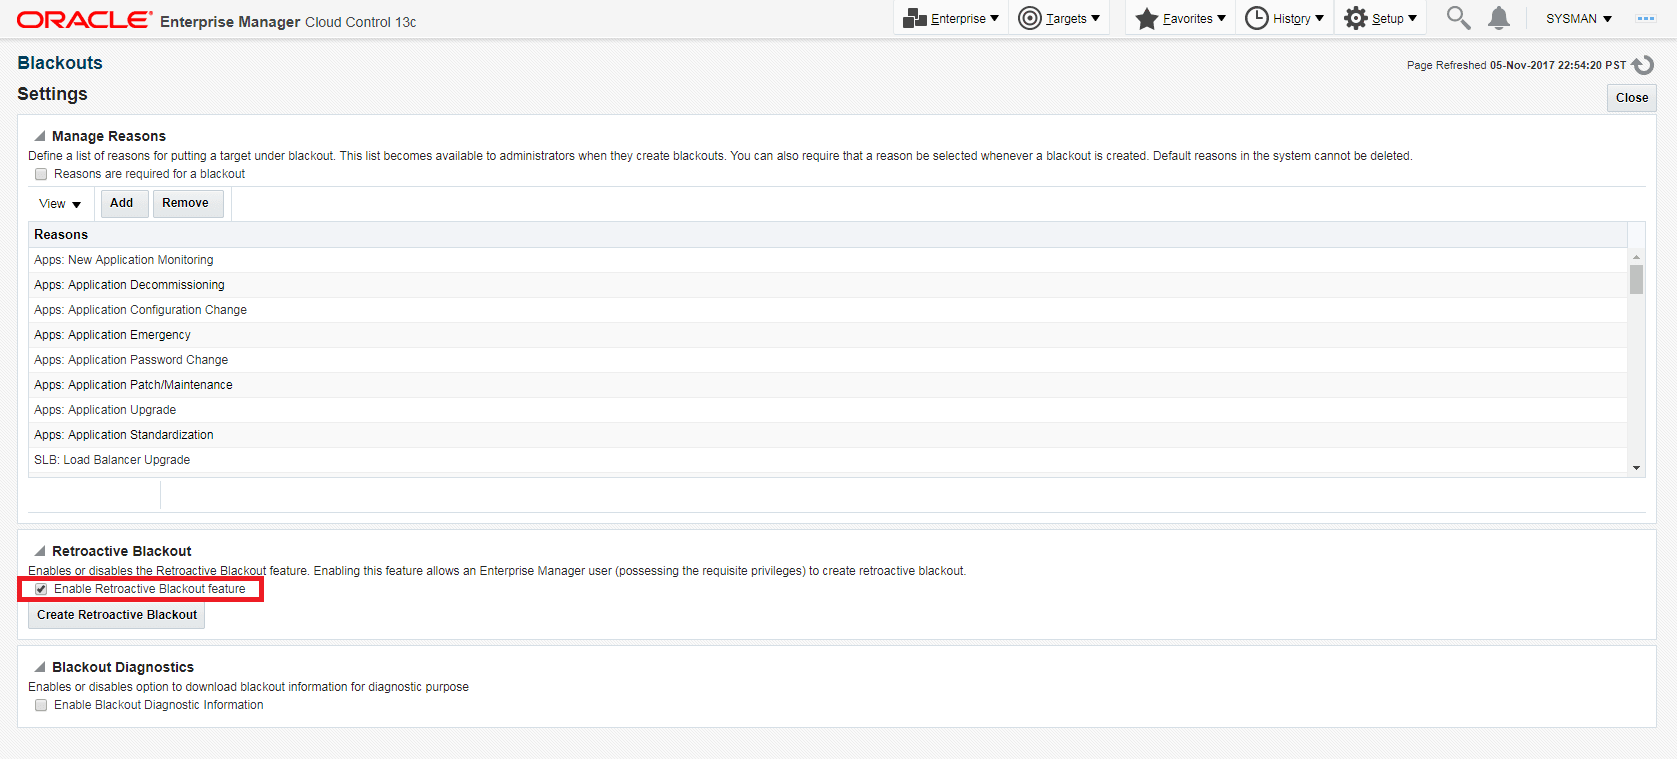
At the bottom of the Settings page, check the Enable Retroactive Blackout Feature option box.
-
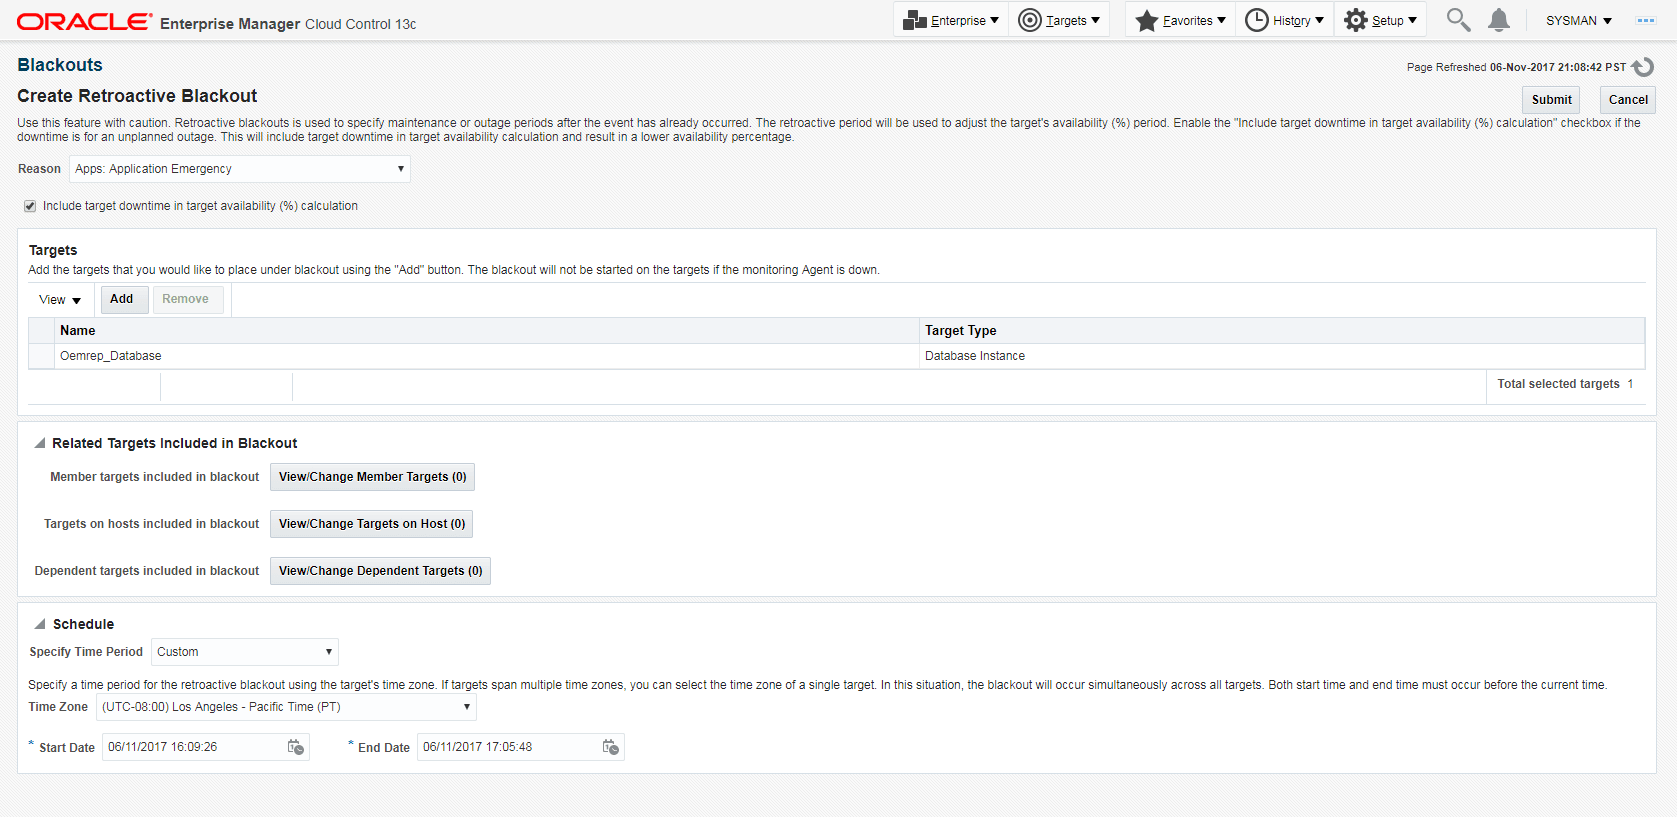
Click Create Retroactive Blackout. The Create Retroactive Blackout page displays.
-
Enter the requisite information and then click Submit.
Retroactive Outages
If a monitored target goes down (outage) and Enterprise Manager does not detect it, the target availability percentage will be inaccurate. In this situation, the availability percentage will be too high. To remedy this inaccuracy, Enterprise Manager lets you specify this outage retroactively. A retroactive outage is essentially a retroactive blackout that specifies target downtime should be included as part of the availability calculation.
Retroactive outage can be created either from the console or using EM CLI.
The following sequence of events illustrates the typical scenario for a retroactive outage.
-
The target goes down for an unknown reason.
-
Enterprise Manager does not detect the target's down state. Target availability remains at 100%.
-
The administrator brings the target back up.
-
The administrator creates a retroactive blackout with the Include target downtime in target availability (%) calculation option selected for the unplanned outage period.
-
Target availability goes down from 100% ==> 84%.
-
From the Enterprise menu, select Monitoring and then Blackouts. The Bl
ackouts page displays. - Click Settings. The Settings page displays.
- Click Create Retroactive Blackout. The Create Retroactive Blackout page displays.

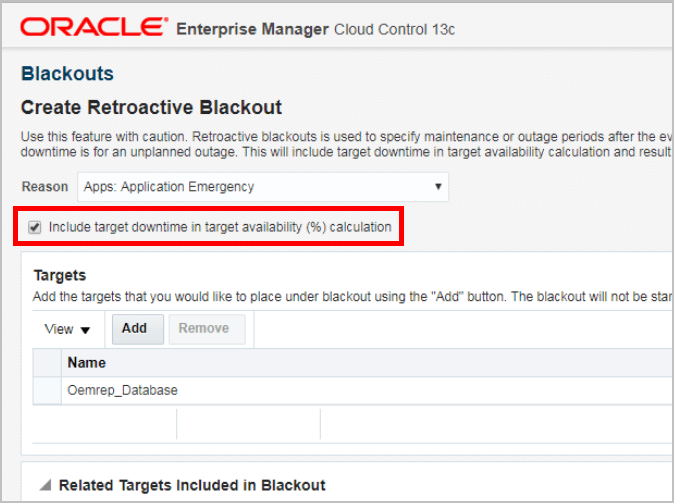
- Ensure that the Include target downtime in target availability (%) calculation option is checked.
Note:
The Include target downtime in target availability (%) calculation checkbox should be enabled during the creation of a retroactive blackout/outage, only if Enterprise Manager did not detect the outage. Checking this option will include target downtime in the target availability calculation and will result in a lower availability percentage. -
Select a reason from the Reason drop-down menu and then click Add to add the target(s) for which you are creating the retroactive outage.
-
In the Schedule region, specify the time period in which the target was down.
-
Click Submit to create the retroactive outage. A success confirmation message will be displayed on the Blackouts page.
The following graphic shows target availability history for the repository database before the retroactive outage has been defined. Target availability percentage is 100% with no down time.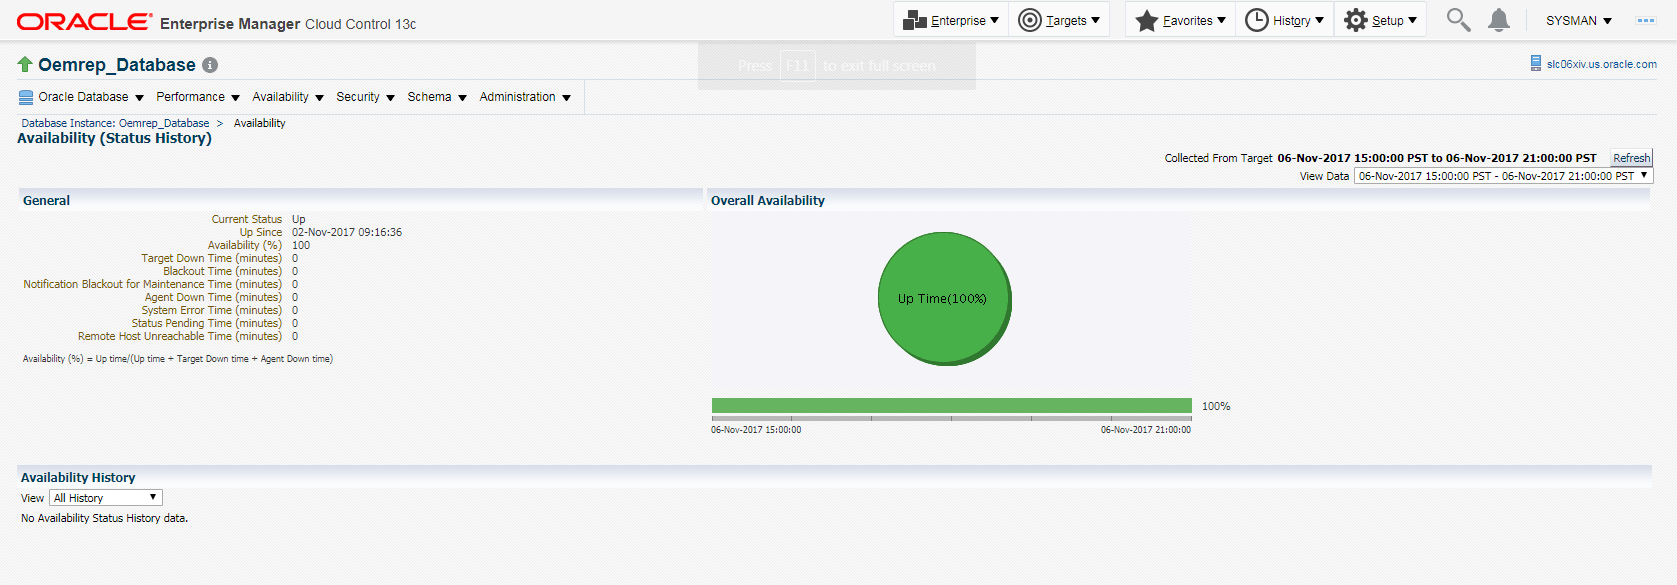
The next graphic shows the target availability history after a retroactive outage of 56 minutes has been defined. Target availability percentage has been reduced to 84% with 56 minutes of target down time.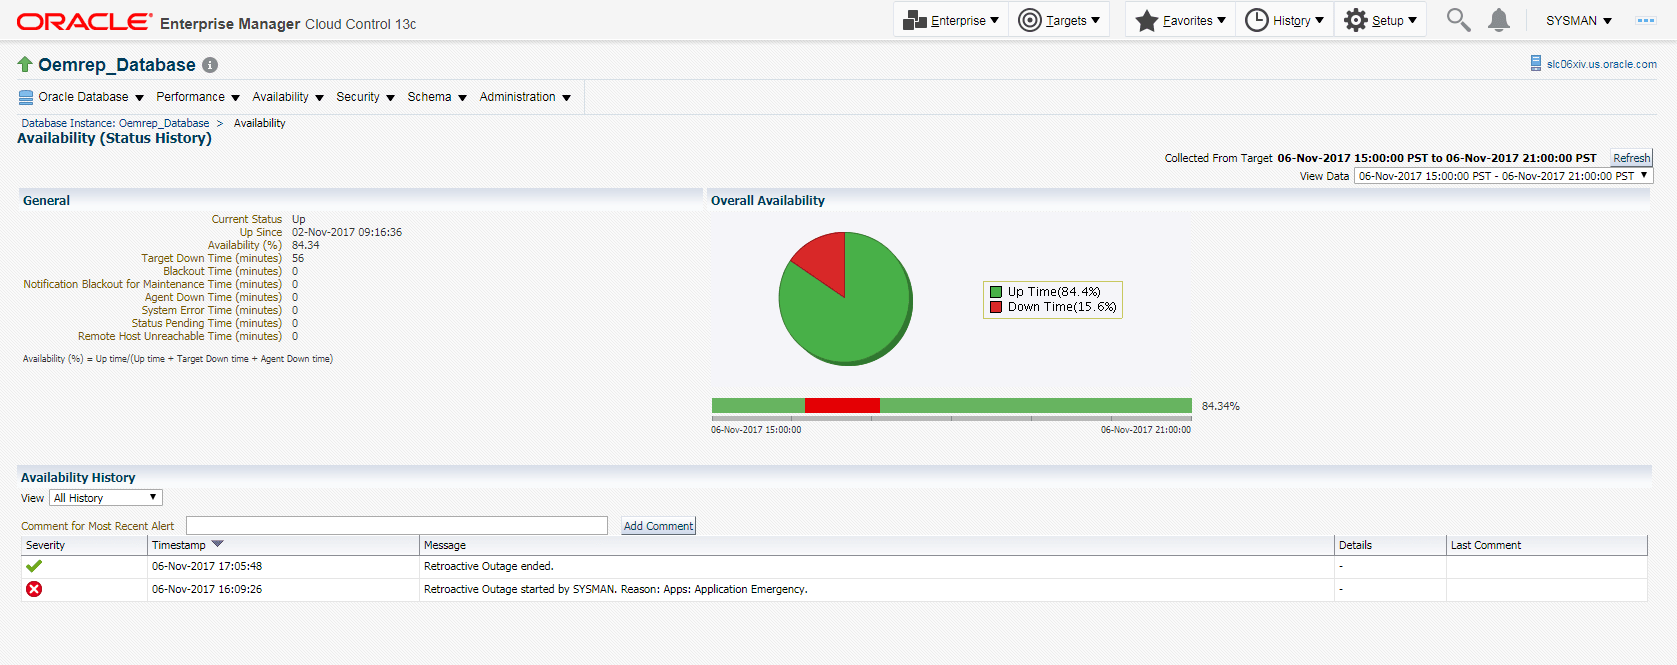
Creating a Retroactive Outage using the Command Line Interface (EM CLI)
create_rbk verb. The verb syntax is as follows:emcli create_rbk
-add_targets="name1:type1;name2:type2;..."...
-reason="reason"
[-propagate_targets]
-schedule=
start_time:<yyyy-MM-dd HH:mm>;
end_time:<yyyy-MM-dd HH:mm>;
[tzregion:<...>]
[-outage]
Table 8-1 create_rbk Options
| Option | Description |
|---|---|
| add_targets | Targets to add to the blackout, each specified as target_name:target_type The add_targets option may be specified more than once.
|
| reason | Reason for the retroactive blackout. This is used for storing in backup tables. |
| propagate_targets | When this option is specified, a blackout for a target of type host applies the blackout to all non-agent targets on that host. Regardless of whether this option is specified, a blackout for a target that is a composite or a group applies the blackout to all members of the composite or group. |
| schedule | Blackout schedule.
Parameters
|
| outage | Use this option with caution as it will lower the target availability (%). This option should be used only if Enterprise Manager did not detect the outage. |
The following example shows the command output.
General Usage Guidelines
-
For planned outages, where the administrator forgot to set a blackout, create a retroactive blackout without enabling the Include target downtime in target availability (%) calculation checkbox. This will increase the target's availability %. For example, 84% ==> 100%.
-
For unplanned outages, where Enterprise Manager did not detect the outage, create a retroactive blackout and enable the Include target downtime in target availability (%) calculation option. This will decrease the target's availability %. For example. 100% ==> 84%.
-
For unplanned outages, where Enterprise Manager did detect the outage, nothing needs to be done.