Create a DB Zones Cluster
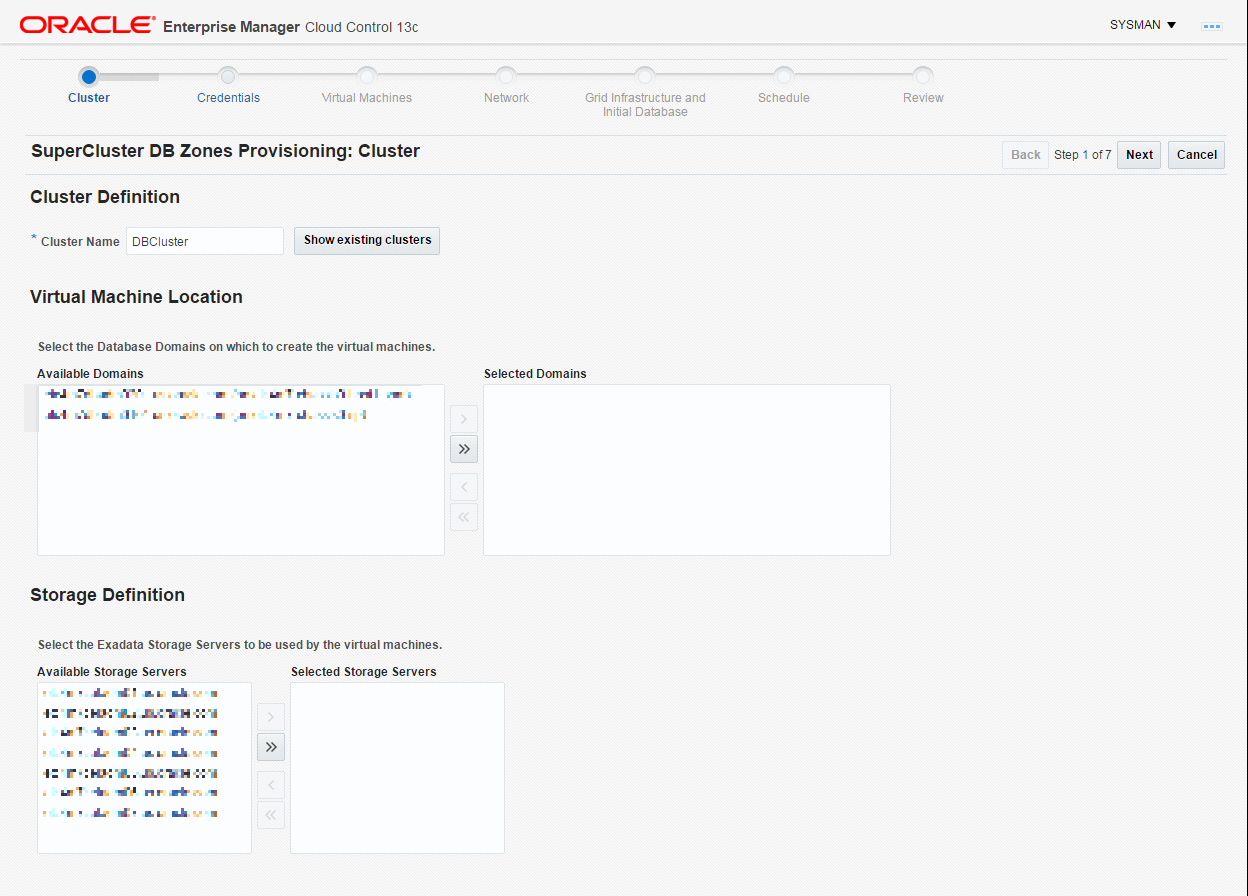
- Create a Cluster Definition.
- Select a Database Machine target and once on the Database Machine Home Page, select Database Machine, then Provisioning, and finally click Create cluster.
- Enter a cluster name, the list of available Domains provided are Domains on which an Enterprise Manager agent was deployed.
- Select one or several Database Domains on which a Solaris zone will be created.
- Select at least 3 Exadata Storage Servers:
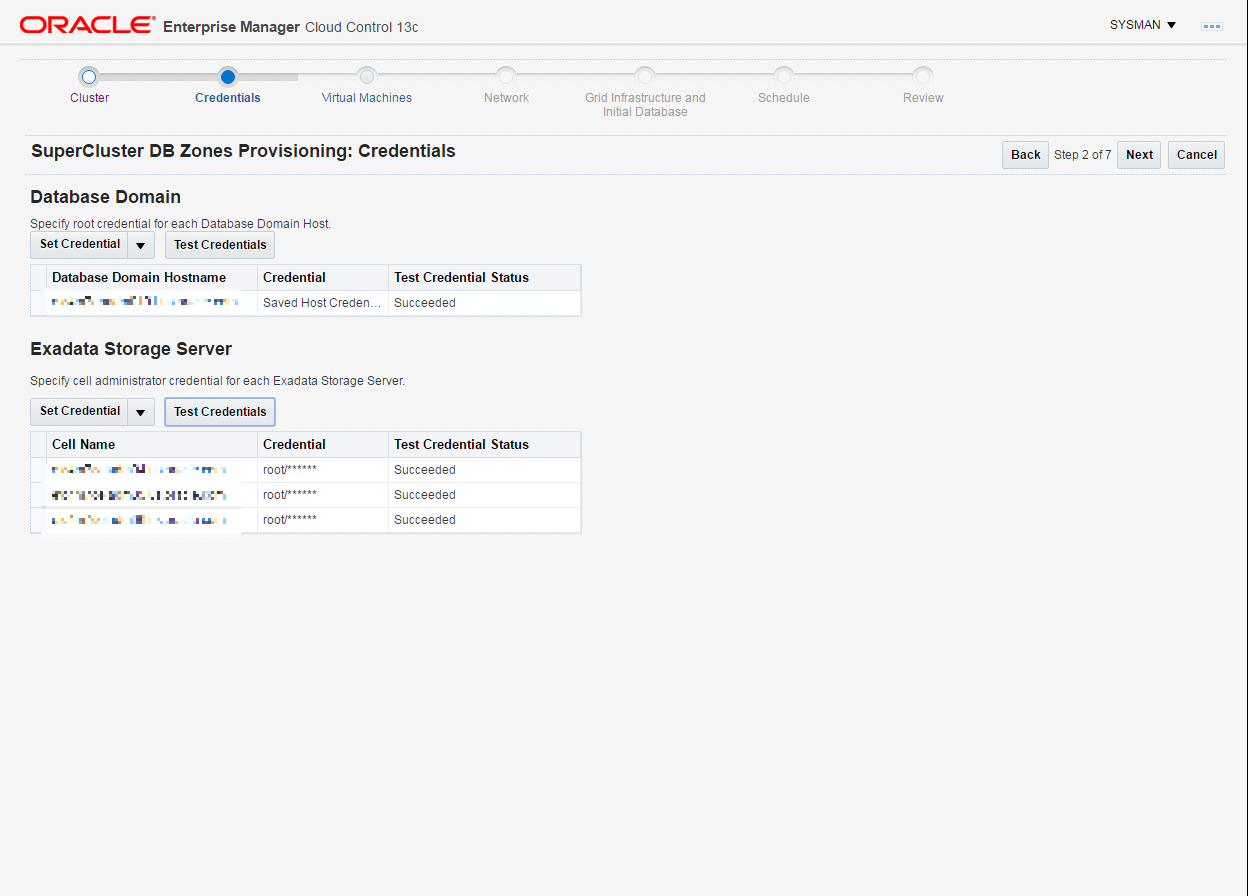
- Create Credentials by providing root credentials of Database Domains and administrator credentials of Exadata Storage Servers that were selected:
- Create a Virtual Machine Definition.
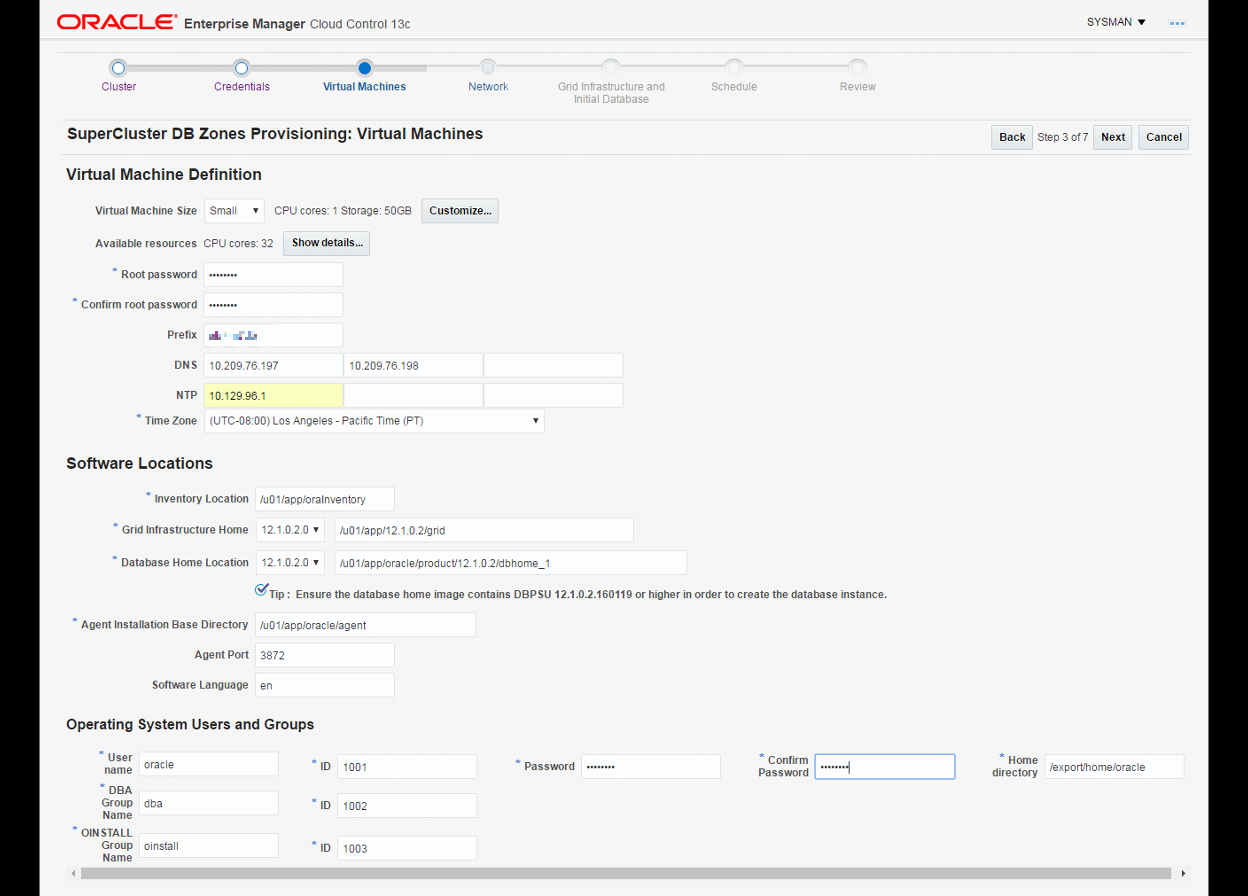
One Solaris Zone will be created on each selected Database Domain.
By default the Small Virtual Machine size is selected. This will allocate 1 CPU core to each Solaris Zone to create, and a quota of 50GB will be set on the ZFS filesystem mounted on /u01 on the Solaris Zone and used to store the Grid Infrastructure and Database. You can select another Virtual Machine size (Medium or Large) or click on Customize... to adjust the number of CPU cores and storage size. You can click on Show Details... to see the number of available CPU cores on each of the Database Domains selected. A certain number of cores should be set aside for the global zone (the Operating System instance on the Database Domain) depending on the size of the Domain: 2 cores could be set aside for the global zone on a small Domain of less than 32 cores, and 4 cores could be set aside for the global zone on Domains with more cores. The remaining cores can be allocated to new Solaris zones that will be created on this Domain.
-
Provide the root password for the root account that will be created on each Solaris Zone.
-
DNS IP addresses are pre-populated. Enter the IP address of a NTP (Network Time Protocol) Server.
-
Grid Infrastructure and Database Software versions are populated from the Gold Images in Software Library (see the Prerequisite section above).
-
Provide the password for new accounts that will be created on each Solaris zone.
-
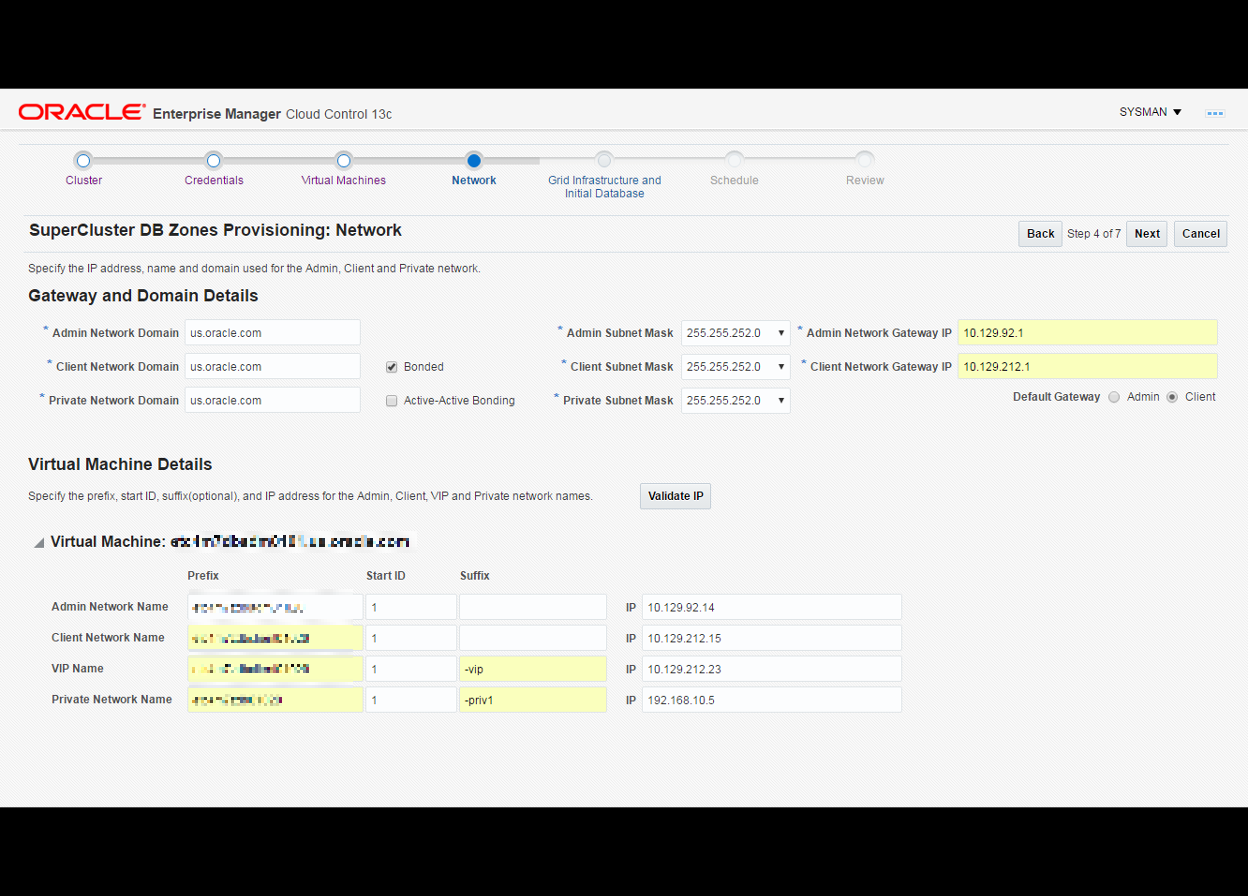
- Configure the Network.
Network Domains and Subnet masks are pre-populated.
Provide IP addresses for Admin Network Gateway IP and and Client Network Gateway IP.
Provide IP addresses and hostnames for each network (admin network, client network, Virtual IP on client network, private network) for the Solaris Zone on each Database Domain selected:
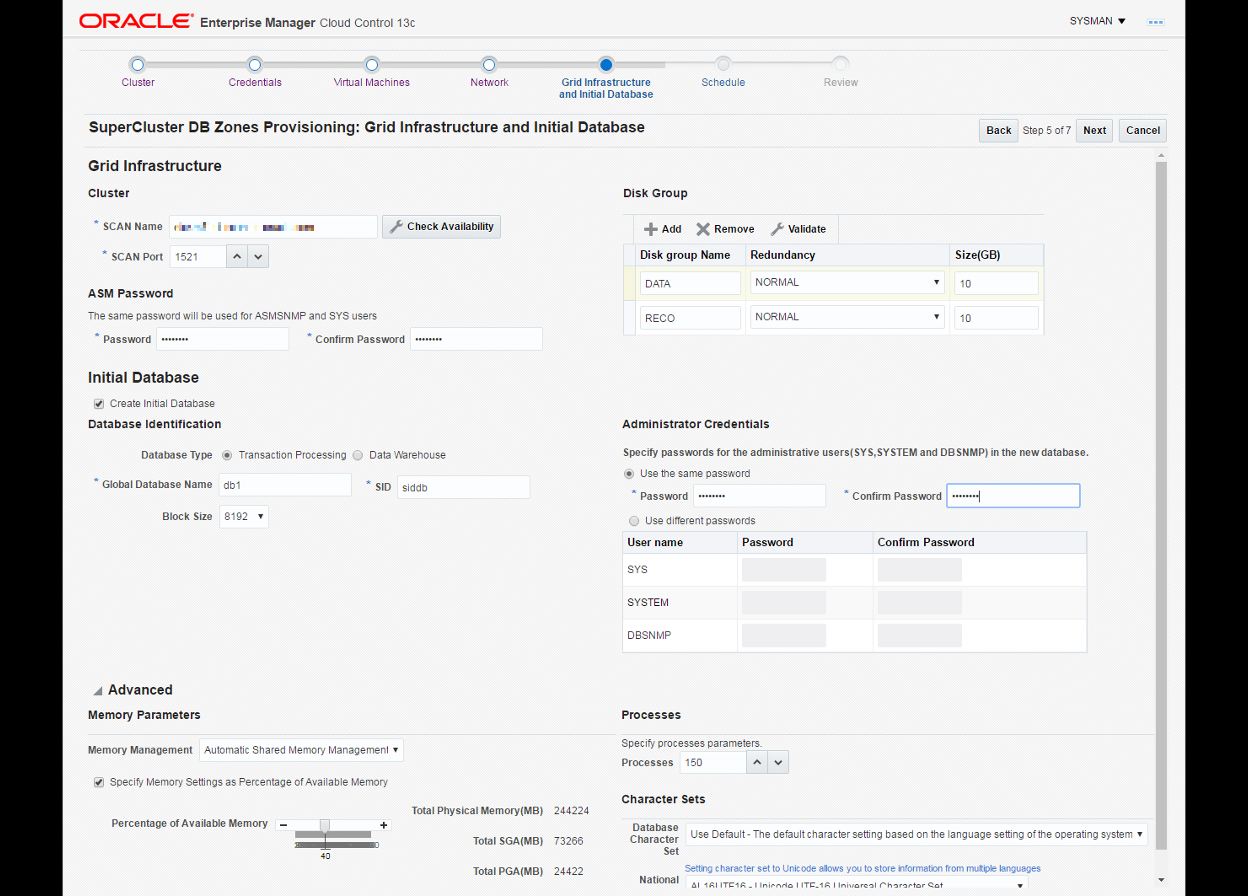
- Create a Grid Infrastructure and Initial Database.
Provide the SCAN hostname (Single Client Access Name that provides a single hostname for clients to access Oracle Databases running in the cluster), ASM password, Disk group names (must be unique, a check will be performed to verify no such disk group already exists), global database name and SID, and Administrative users passwords.
Click the check box to create the initial database and provide additional information for Database Identification and Administrator Credentials:
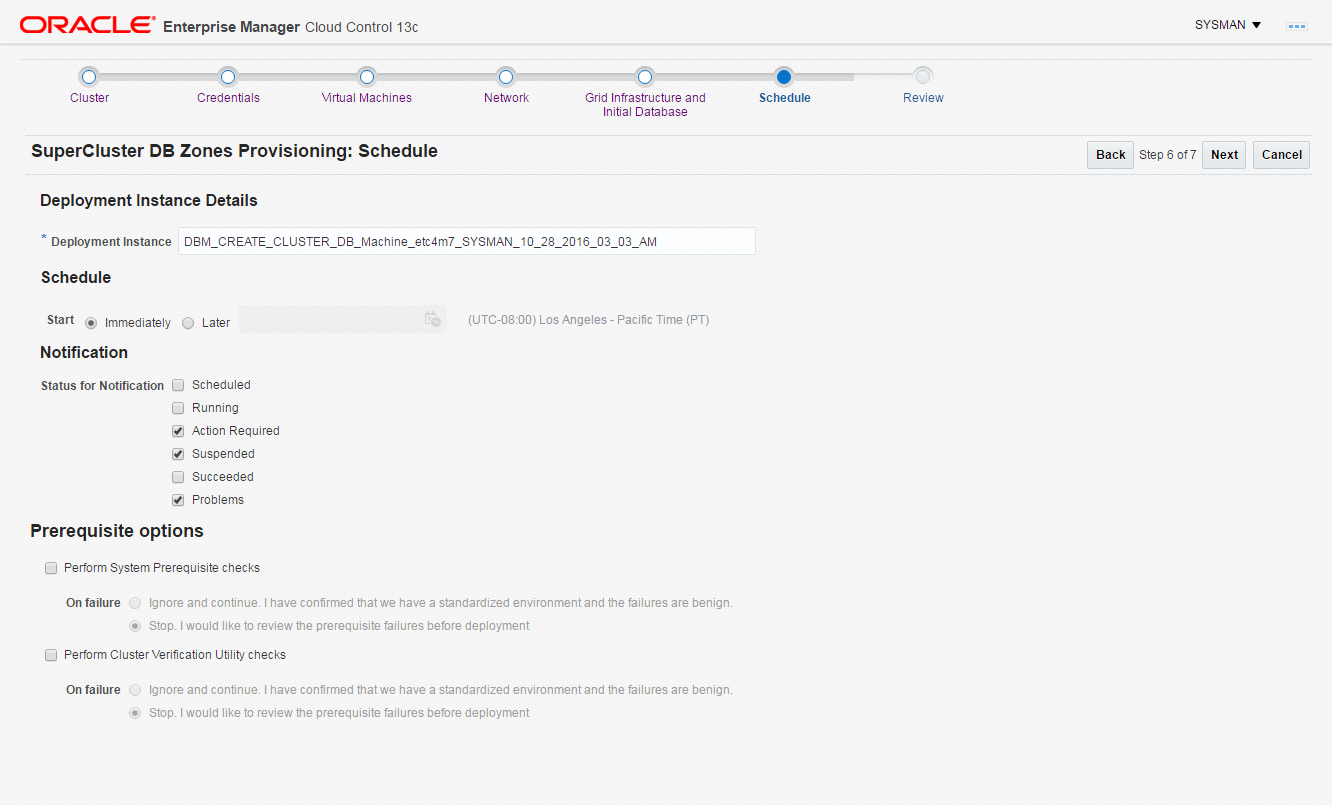
- Schedule a DeploymentSchedule the deployment, by default this is started immediately.
- Review and submit. Once submitted, the deployment procedure activity can be followed from the menu selecting Enterprise, then selecting Provisioning and Patching, finally clicking Procedure Activity.