- Exadata Server X11M Service Manual
- Servicing the Front LED Indicator Module
- Install the Front LED Indicator Module
Install the Front LED Indicator Module
-
Install the front LED indicator module.
-
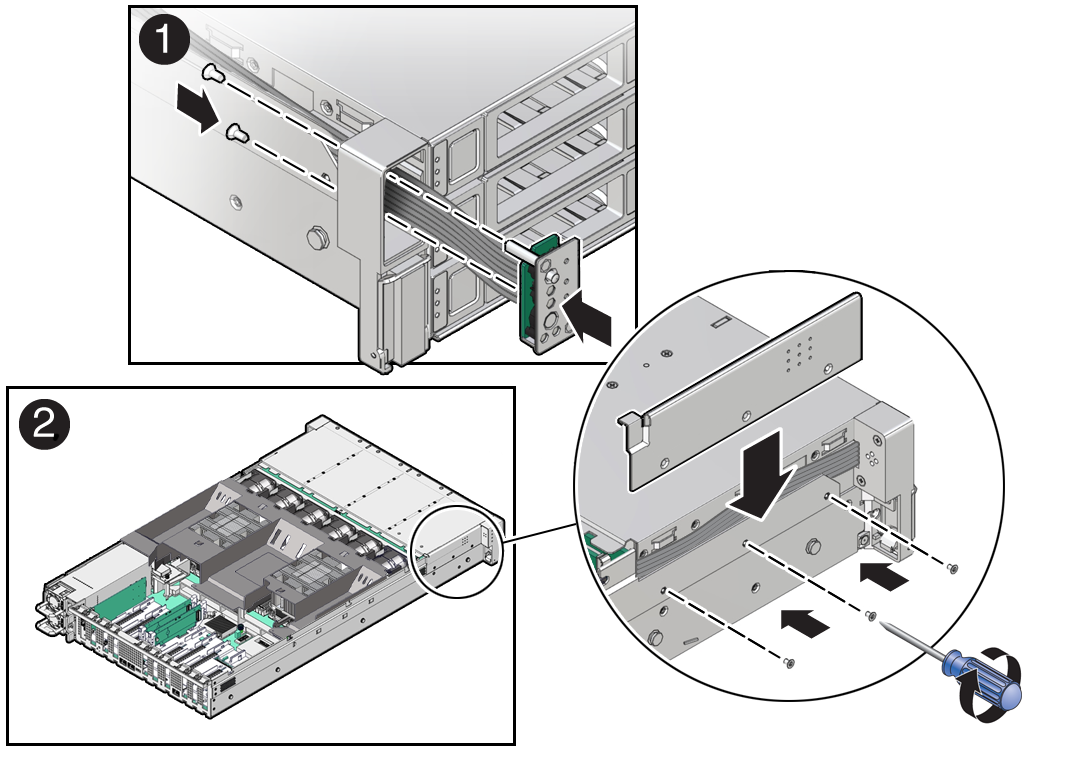
Push the LED indicator module and cable through the LED housing on the server front panel [1].

- Install the LED indicator module cable by carefully pulling the cable through the left-side cable trough.
Note:
To ease installation of the LED indicator module cable, you might need to lift the disk backplane auxiliary signal cable and SAS cable (if present) from the left-side cable trough. - Insert and tighten the two No. 2 Phillips screws to secure the LED indicator module to the server front panel [1].
- Install the FIM cable cover to the chassis by inserting it into the FIM cable cover slot [2].
- Install the three No. 2 Phillips screws to secure the FIM cable cover to the chassis [2].
-
Push the LED indicator module and cable through the LED housing on the server front panel [1].
-
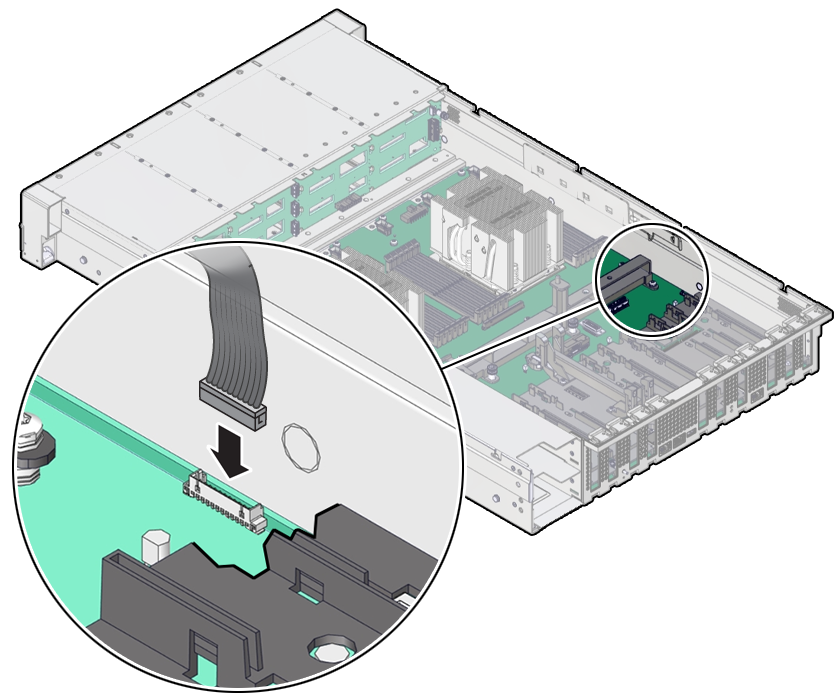
Reconnect the LED indicator module cable to the motherboard.

-
Return the server to operation.
- Install the server top cover.
- Return the server to the normal rack position.
- Reconnect the power cords to the power supplies, and power on the server.
- Verify that the power supply AC OK LED is lit.