Attach the Slide-Rails

Use this procedure to attach slide-rail assemblies to the rack.

Note:

Before you install the slide-rails, be sure to install the server right-angle AC power cables (part number 7079727 - Pwrcord, Jmpr, Bulk, SR2, 2m, C14RA, 10A, C13). In the 1000 mm rack, the standard rail kit slide-rails obstruct access to the front of the 15kVA, 22kVA, and 24kVA Power Distribution Unit (PDU) electrical sockets. If you use the standard AC power cables, first plug them in, and then install the slide-rails into the rack. After you install the slide-rails, you cannot disconnect or remove the standard AC power cables from the PDU but you can remove them from the system.
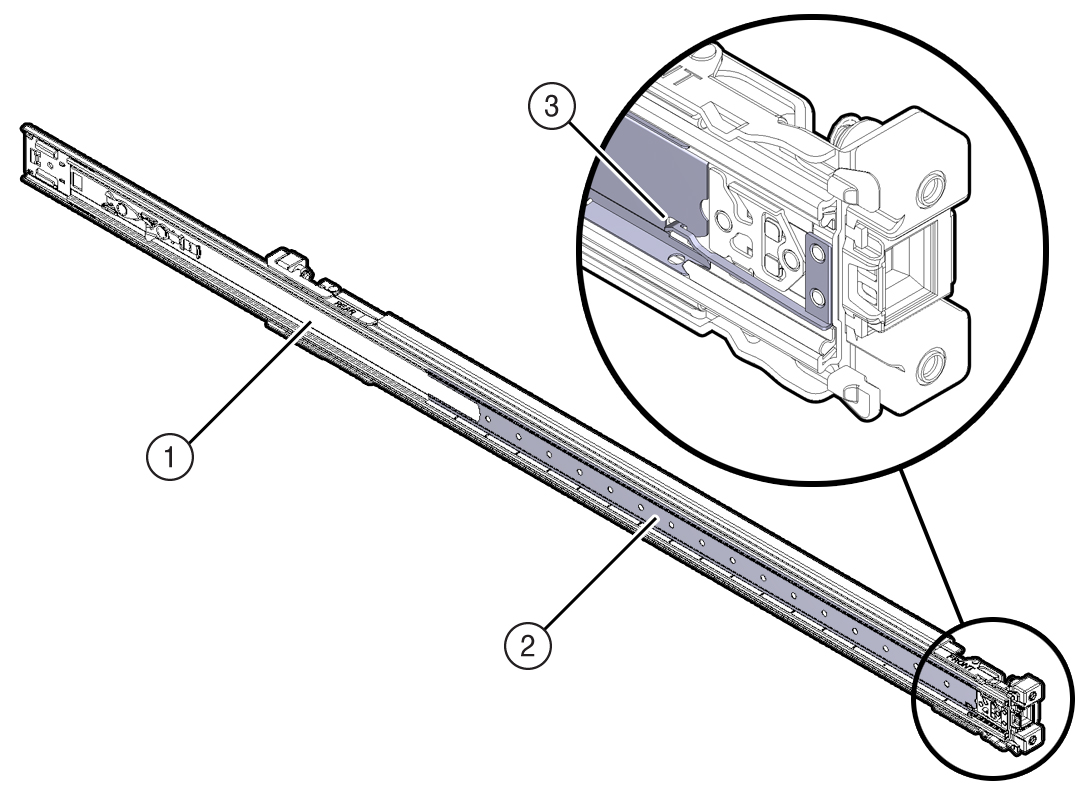
  1. Orient the slide-rail assembly so that the ball-bearing track is forward and locked in place.

    Figure showing the slide-rail being oriented with the ball-bearing track locked into place.
    Call Out Description

    1

    Slide-rail

    2

    Ball-bearing track

    3

    Ball-bearing locking mechanism

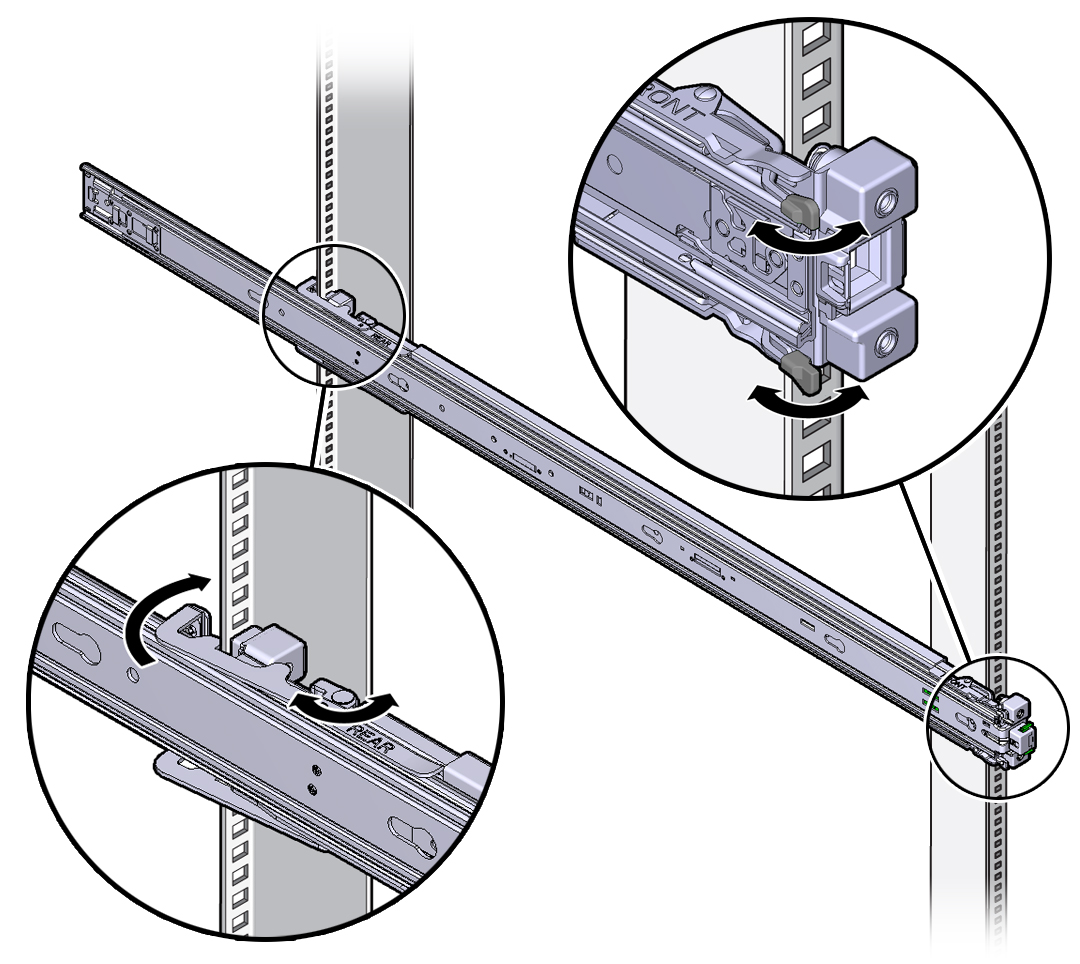
  2. Starting with either the left or right side of the rack, align the back of the slide-rail assembly against the inside of the back rack rail, and push until the assembly locks into place with an audible click.

    Figure showing the Slide-rail assembly being aligned with the rack.
  3. Align the front of the slide-rail assembly against the outside of the front rack rail, and push until the assembly locks into place with an audible click.
  4. Repeat Step 1 through Step 3 to attach the slide-rail assembly to the other side of the rack.