- Exadata Server X10M Service Manual
- Servicing DIMMs
- Identify and Remove a DIMM
Identify and Remove a DIMM
-
Prepare the server for service.
- Power off the server.
- Disconnect the power cords from the power supplies.
- Extend the server into the maintenance position.
- Attach an antistatic wrist strap to your wrist and then to a metal area on the chassis.
- Remove the server top cover.
- Remove the air baffle.
-
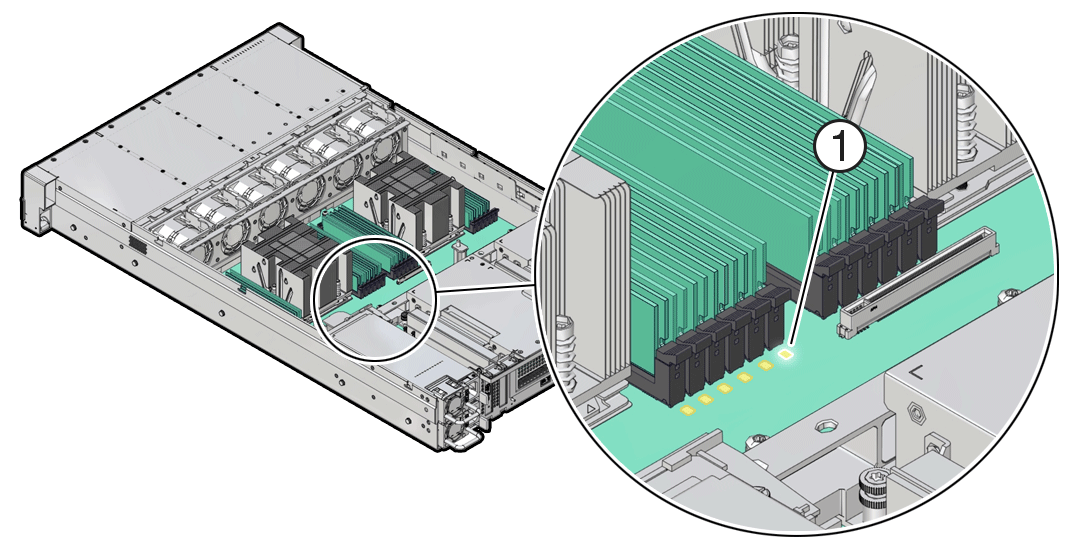
Identify and note the location of the failed DIMM by pressing the Fault Remind button on the motherboard.
See Using the Server Fault Remind Button.
Failed DIMMs are identified with a corresponding amber LED on the motherboard.
-
If the DIMM Fault LED is off, then the DIMM is operating properly.
-
If the DIMM Fault LED is on (amber), then the DIMM is failed and must be replaced [1].

-
-
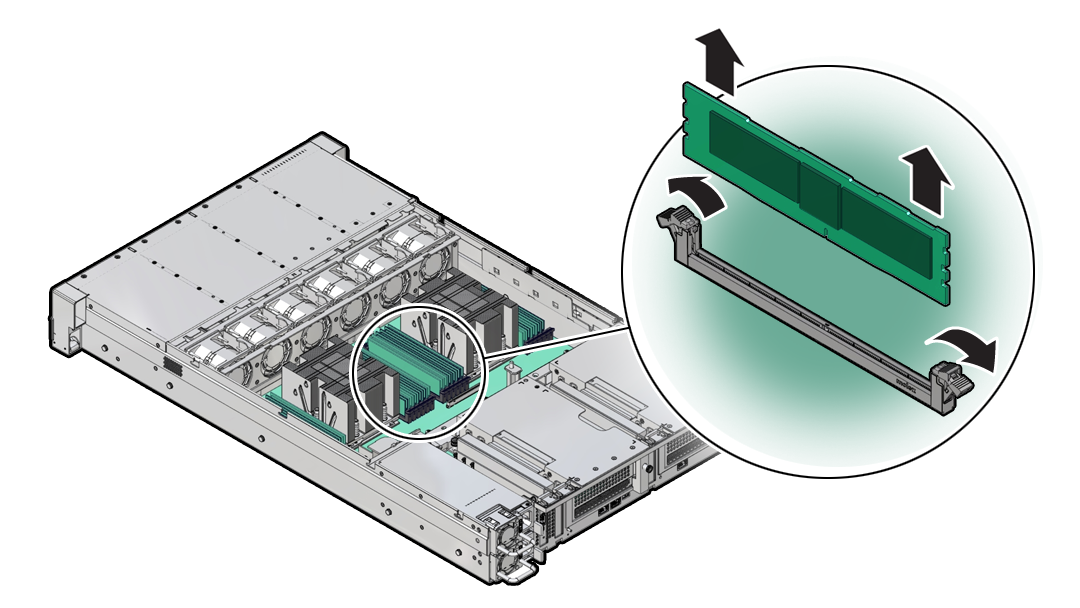
To remove the failed DIMM, do the following:
-
Rotate both DIMM slot ejectors outward as far as they go.
The DIMM is partially ejected from the slot.
-
Carefully lift the DIMM straight up to remove it from the slot.

-
Rotate both DIMM slot ejectors outward as far as they go.
-
Replace each failed DIMM with either another DIMM of the same rank size (quad-rank or dual-rank) or leave the slot empty.
For DIMM replacement instructions, see Install a DIMM.