Name Generations and Levels

You can create names for generations and levels in an Essbase outline, using a word or phrase that describes the generation or level. For example, you might create a generation name called Cities for all cities in the outline. You can define only one name for each generation or level.

Use generation and level names in calculation scripts wherever you need to specify either a list of member names or a list of generation or level numbers. For example, you can limit a calculation in a calculation script to the members of a specific generation.
  1. Open Dimensions.
    In the Redwood Interface:
    1. On the Applications page, open an application and then open the database (cube).
    2. Click Dimensions.
    In the Classic Web Interface:
    1. On the Applications page, expand an application.
    2. From the Actions menu, to the right of the cube name, click Inspect.
    3. In the inspector, select Dimensions.
  2. On the Dimensions page, select the dimension in which you want to name generations or levels.
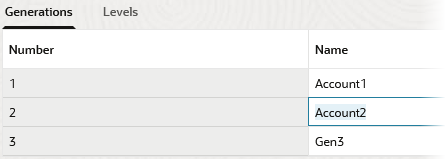
  3. Double-click a generation or level name placeholder (for example, Gen1 or Lev1) to enable editing of that field.
  4. Enter a generation or level name.
  5. Click Save.

    For example, you can replace the placeholder texts, Gen1, Gen2, and Gen3, with descriptive generation names.


    Image of the dimensions page in the web ui, showing generations for the measures dimension, with generations named Account1 and Account 2.

    If you add generation names, then they will be included on a Cube.Generations worksheet when you export your cube to an application workbook.