10.2 Create Jobs to Schedule Notebooks
You can create jobs to schedule your notebook with the notebook scheduling settings.
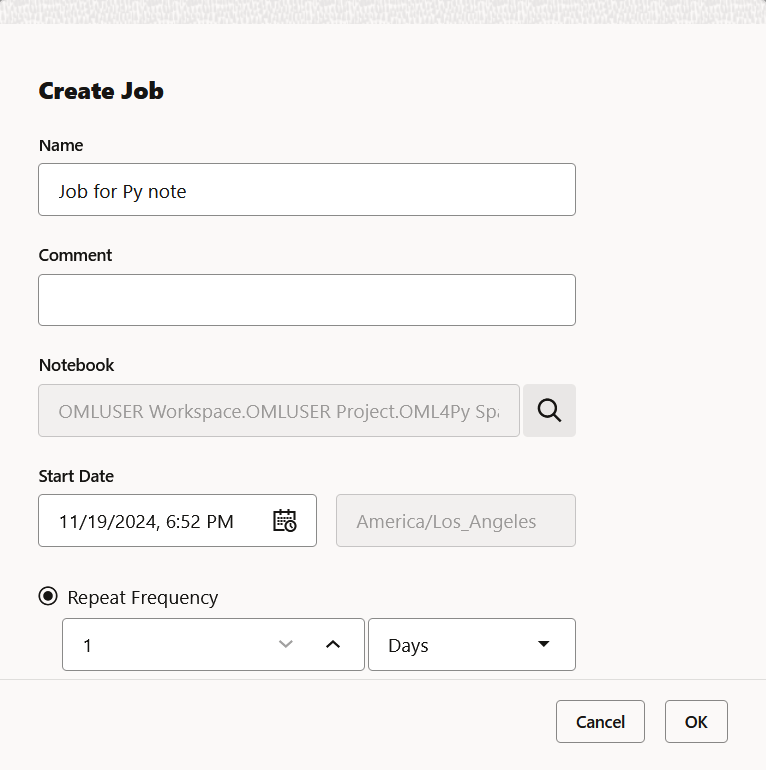
- On the Jobs page, click Create.
The Create Jobs dialog opens.
- In the Name field, enter a name for the job. The number of characters in the job name must not exceed 128 bytes.
- In the Notebook field, click the search icon to select a notebook to create a job.
Note:
Only notebooks that are owned by the user or shared are available for selection. - In the Start Date field, click the date-time editor to set the date and time for your job to commence. Based on the selected date and time, the next run date is computed.
- Optionally, in the Repeat section, select:
- Frequency: To set the repeat settings and frequency. You can set the frequency in minutes, hours, days, week, and month.
- Custom: To customize the job settings.
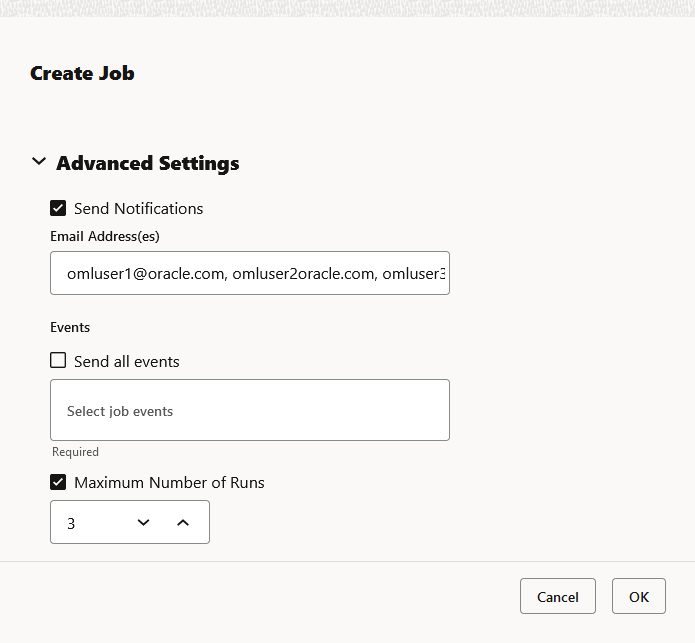
- Expand the Advanced Settings section, select one or more of the following options:
Figure 10-3 Advanced Settings in Create Jobs dialog
-
Send Notifications: Select this option to send email notifications to the specified users' email addresses about the selected events for the job.
Note:
Email server must be set up for notifications to work. - Email Address: Enter the email ID of the users. By default,
you can enter three email IDs, separated by comma. To send emails to
more users, contact your Administrator.
Note:
The email notification feature is only available to the paid customer. This feature is not available in the free trial account. - Events: Select the event for which you want to send the notification. The supported job events are:
JOB_START:Indicates that the job has started for the first time, or a job was started on a retry attempt.JOB_SUCCEEDED:Indicates that the job has completed successfully.JOB_FAILED:Indicates that the job resulted in an error, or was not able to run due to process death or database shutdown.JOB_BROKEN:Indicates that the job is marked broken after retrying unsuccessfully. It also indicates failed job run after 16 attempts.JOB_COMPLETED:Indicates that the job has a status ofCOMPLETEDafter it has reached its maximum number of runs or its end date.JOB_STOPPED:Indicates that the job has terminated normally after a soft stop or hard stop was issued.
-
Maximum Number of Runs: To specify the maximum number of times the job must run before it is stopped. When the job reaches the maximum run limit, it will stop.
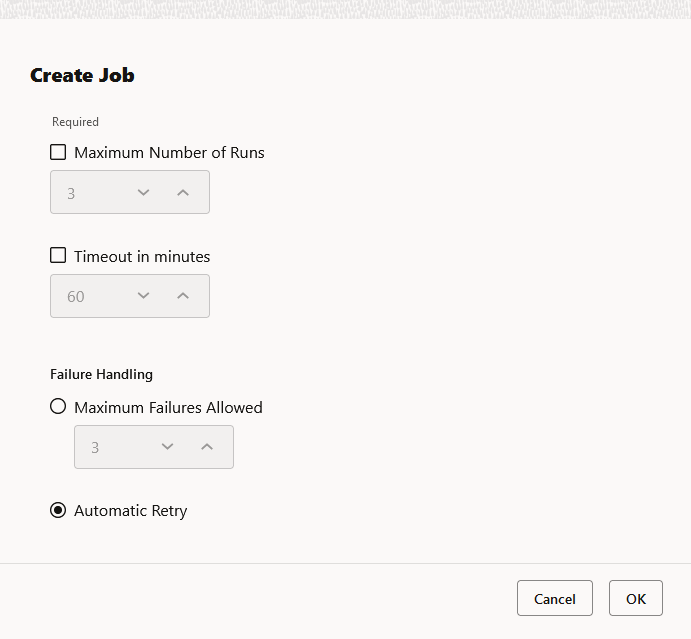
Figure 10-4 Advanced Settings-2 in Create Jobs dialog
-
Timeout in Minutes: To specify the maximum amount of time a job should be allowed to run.
-
Maximum Failures Allowed: To specify the maximum number of times a job can fail on consecutive scheduled runs. When the maximum number of failures is reached, the next run date column in the Jobs UI will show an empty value to indicate the job is no longer scheduled to run. The Status column may show the status as
Failed. - Automatic Retry: Select this option if you want the job to restart in case the job fails.
-
- Click OK.
Parent topic: Jobs


