Working with Lists
You can use NetSuite lists to access individual records or to work with multiple records at one time. The location and access of lists of records depends on the role you use to log in. Only the Administrator role has access to all record types. For more information about permissions, see NetSuite Permissions Overview.
To access lists of records, go to Lists tab and select a relevant list.
You can do the following with most lists:
-
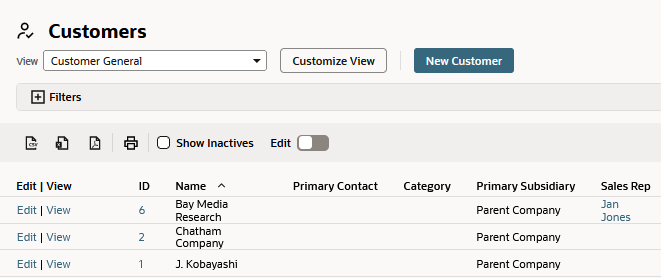
Select a preconfigured view from the View list or click Customize View to create your own. See Working with List Views, Sublist Views, and Dashboard Views.
-
Click a button near the top to create a new record to add to the list, New Customer in this example.
-
Expand the Filter area to show and use the filters provided.
-
Select an option from the Style dropdown list.
-
Use the controls in the row at the top of the list to do the following:
-
Click one of the export icons to export the list as a CSV, Microsoft Excel, or PDF file.
-
Click the print icon to print the list.
-
Check the Show Inactives box to see inactivated records.
-
Select an option in the Quick Sort list.
-
Large lists of records may be broken down into smaller sections. Use the dropdown list to see a different page of records. Use the left and right arrows to move forward and back in the list.
-
-
Click a column heading to sort the list by that column.
-
Click Edit next to a name to make changes to the record.
-
Click View or the name to view the record.
In NetSuite, you can also use customization tools to create your own components, including lists. For more information, see Customization Overview.
When the Inline Editing feature is enabled, click the Edit switch in the list toolbar to edit fields directly in the list. Inline Editing is available on the following lists:
-
Campaigns
-
Cases
-
Contacts
-
CRM Tasks
-
Customers
-
Employees
-
Events
-
Issues
-
Items
-
Leads
-
Partners
-
Phone Calls
-
Projects (Jobs)
-
Prospects
-
Solutions
-
Transactions
-
Vendors
For more information, see Using Inline Editing.
For more information about filling in the fields on a record page, see NetSuite Record Pages.