Monthly Item Demand Plan Import
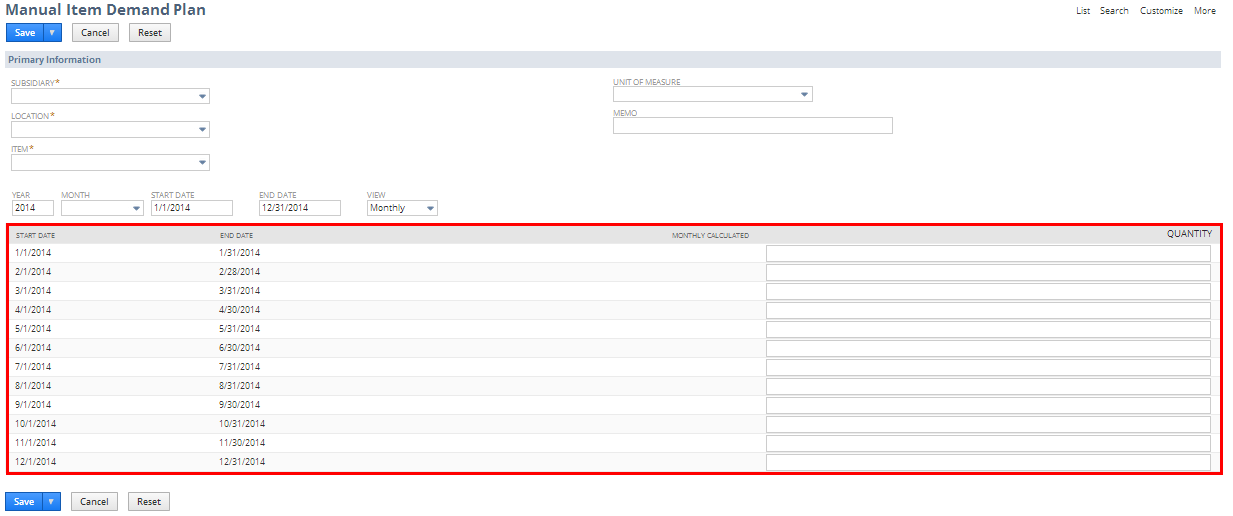
The following screenshot shows a monthly item demand plan in the NetSuite user interface, with sublist fields outlined in red. Each month included in the plan is represented by a row in this screenshot.
The preferred format in your CSV file for this sublist data is to include one column for each month, with a heading of Monthly Quantity:<date of first day of month> and the quantity value. For example, columns like the following should be included for a 3 month item demand plan:
|
Monthly Quantity:1/1/2011 |
Monthly Quantity:2/1/2011 |
Monthly Quantity:3/1/2011 |
|---|---|---|
|
100 |
200 |
200 |
Each quantity column corresponds to one month, meaning one sublist instance, for a monthly plan.
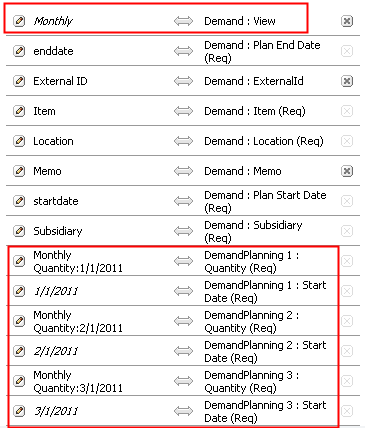
The following screenshot illustrates how the above columns are mapped in the Import Assistant:
-
The View body field is automatically mapped to a value of Monthly based on the Monthly Quantity keywords in the quantity column headings.
-
A Start Date field for each sublist instance is automatically mapped to the date of the first day of the month based on the date in each quantity column heading.
-
A Quantity field for each sublist instance is automatically mapped to a Monthly Quantity.
-
Sublist End Date fields don't need to be included in CSV files or Import Assistant mappings.
You can also move your sublist data to a separate import file, and upload multiple files. In this case, make sure that your primary file only includes body field data, and all the sublist data for the Demand Planning sublist is moved to the linked file.
The Import Assistant is available at Setup > Import/Export > Import Tasks > Import CSV Records. After you select the record type for import, choose the import character encoding. For more information, see Select a Record Type for Import and Choose Import Character Encoding.