Editing a Financial Statement Section
On the Financial Report Builder Edit Layout Page you can perform other edits to financial sections, in addition to defining selection criteria that determine the accounts to be included.
When you edit selection criteria for a section, you're creating a new section. See Creating a Custom Financial Statement Section.
To edit a section:
-
Start the Financial Report Builder, and ensure an editable custom layout is selected in the Edit Layout page. For information, see Accessing the Financial Report Builder.
-
In the Layout outline, select the section that you want to edit.
-
Complete any of the following tasks:
If you want to use a section to calculate % of Expense or % of Income column values for a custom income statement, set its Marker field to Expense or Income. See Adding a Percent of Expense Column to an Income Statement or Adding a Percent of Income Column to an Income Statement.
Editing Financial Section Labels
You can:
-
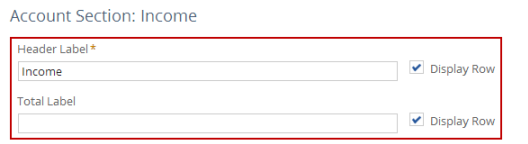
Edit the section's Header Label. This is the text in the section's header row.
-
Choose whether to display the Header row. To hide this row, clear the Display Row box.
-
- Edit the section's Total Label. This is the text in the section's total row that lists the total amount for the section. If this field is left blank, the default label
- Total - <Header Label> is displayed.
-
Choose whether to display the total row. To hide this row, clear the Display Row box.
Modifying Financial Section Hierarchy
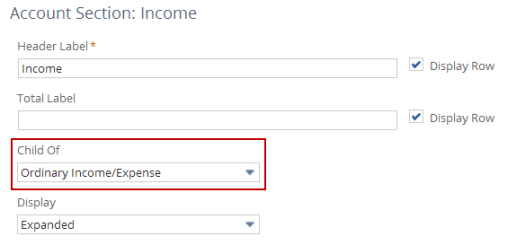
You can change a financial section's placement in the report hierarchy by selecting a different row in the Child Of list. The section is moved under the row you select here, as reflected in the Layout outline.
Alternatively, you can drag and drop a financial section in the Layout outline to change its hierarchy.
Modifying Financial Section Row Expansion
You can indicate the expansion of financial section data, by selecting from the Display list:
-
Expanded - the section is displayed in expanded format, showing all rows. Viewers can collapse it. This is the default.
-
Collapsed - the section is displayed in collapsed format, showing a header row with a summary amount. Viewers can expand it.
-
Cannot Expand - the section is displayed in collapsed format. Viewers can't expand it.

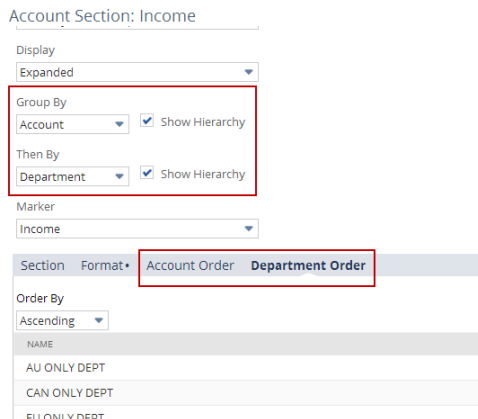
Modifying Financial Section Grouping
By default, financial section data are grouped by accounts.
-
You can select from the Group By dropdown list to change this primary grouping to be by class, department, location, customer/project, item, or if you're using NetSuite OneWorld, subsidiary.
-
You also can set an optional, secondary grouping in the Then By dropdown list to be by accounts, class, department, location, customer/project, item, or subsidiary.
The Show Hierarchy check boxes next to the Group By and Then By dropdown lists indicate whether full hierarchical names are used for group labels and sort order. Full hierarchical names are in the format of grandparent : parent : child. Non-hierarchical, or flat, names include only the child. By default, these boxes are checked and full hierarchical names are used.
Be aware of how grouping interacts with filtering to select accounts for a section. Your custom financial statement doesn't include multiple lines with a duplicate combination of account, department, location, class, customer/project, item, or subsidiary filtered values. This is because a financial statement can't display values for an identical account multiple times. To avoid incorrect totals, the statement displays correct values the first time the account is listed and displays zeroes for later listings of the same account.
Modifying Financial Section Sort Order
Within each grouping of financial section data, you can define the sort order of account rows on the Order subtab. Note that if you've defined a secondary grouping, two Order subtabs are provided.
For grouping by accounts, available sort orders include:
-
Account Name Ascending
-
Account Name Descending
-
Account Number Ascending
-
Account Number Descending
-
Custom
For grouping by class, department, location, item, or subsidiary, available sort orders include:
-
Ascending
-
Descending
-
Custom
For grouping by customer/project, available sort orders include:
-
Customer/Project Name Ascending
-
Customer/Project Name Descending
-
Customer/Project Number Ascending
-
Customer/Project Number Descending
-
Custom
The Custom sort order enables you to manually set the order of data rows. For example, you could set the order so that all new accounts display at the end of the section.
If a list used for grouping includes more than 200 records, the list is truncated and custom sort order isn't supported. This scenario is most likely to occur when grouping by item or customer/project.
Modifying Financial Section Format Options
You can modify the formatting of text, lines, and background color for section rows, including the header row that displays a description of the section, account rows that display data amounts, and the total row that displays the total amount for the section. Note that the same format options are applied to all account rows in a section. You also can indicate whether to show currency symbols, reverse signs, or include text, such as USD, before or after amounts for the account rows and total row.
You can't change whether account numbers are displayed. Account names include account numbers when the accounting preference Use Account Numbers is checked.
You can make these edits on the Format subtab.
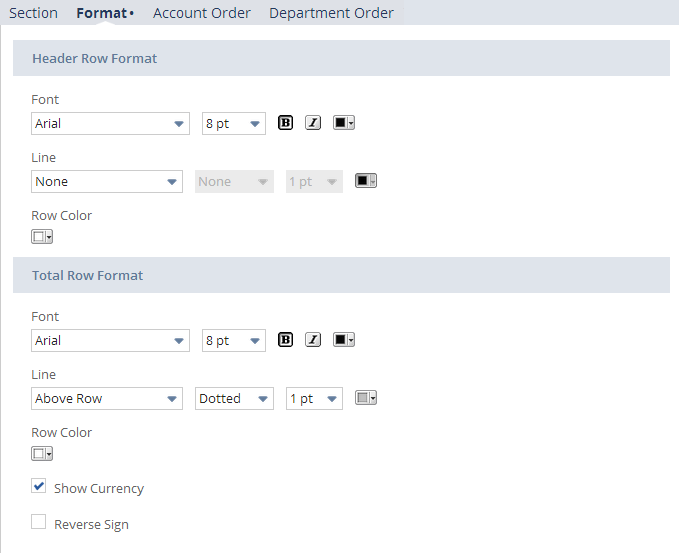
Checking the Reverse Sign box for a row affects all dynamic total calculations that include that row's value. Always run the report and review the accuracy of all total rows if you use this option.
For more information, see Setting Financial Statement Formatting Options.
You need both the Financial Statements permission and the Report Customization permission to customize reports in the Financial Report Builder. If you don't have necessary permissions, contact your account administrator. See Giving Access to Financial Statements for more information.