Assign Customers to Websites
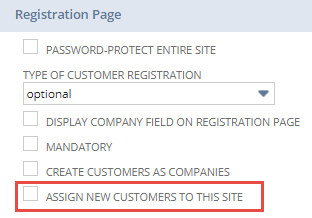
If you run multiple websites, you may want to ensure that a customer who registers on a website only has login access on that particular site. To ensure that customers are automatically assigned to the website where they registered, you must first check the Assign New Customers to this Web Site box on the Web Site Setup page in NetSuite.
Before you check the Assign New Customers to this Web Site box, customers aren't assigned to any site. After you check the box, only new customers are assigned to the website. The checkbox doesn't affect existing customers.
Viewing the Source Website
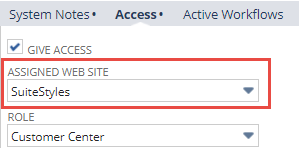
You can use the Source Web Site field on each customer record to view the website where the customer has registered. Also, on the System Information subtab of the customer record, you can use the Assigned Web Site field, to change the customer's website assignment. If you want to change the website assignment for multimple customers, use a mass update operation.
If you use custom customer record forms, you may not see the Source Web Site and Assigned Web Site fields on your custom form. You must customize the default customer form to enable these fields.
To enable automatic website assignment for customers:
-
Go to Commerce > Websites > Website List.
-
Click Edit next to the website you want to modify.
-
Click the Shopping subtab.
-
Check the box next to Assign New Customers to this Web Site.
-
Click Save.
After a customer is assigned to a website, login access is only allowed to that one site. You can't assign a customer to more than one website. If you want to assign a customer to more than one website, leave the Assigned Web Site field empty and allow the customer access to all of your websites.
To change a customer website assignment:
-
Go to Lists > Relationships > Customers.
-
Click Edit next to the customer record you want to modify.
-
Click the System Information subtab.
-
Make a selection In the Assigned Web Site list.
To use Mass Update to change the customer website assignments in bulk:
-
Go to Lists > Search > Mass Update > Mass Updates.
-
Find Customer Web Site Assignment in the list, and then click Update Customer Web Site Assignment.
-
Make a selection in the Assigned Web Site list.
-
Select the criteria for the records you want to change.
-
Click Save.
After clicking Save, all customer records will be changed based on the criteria you selected.
For example, if you want to change all customers from Website A to Website B, then select Website B in the Assigned Web Site list (Step 3). In the Criteria list (Step 4), select Assigned Web Site for the filter, and then select Website A for the description.
Managing Customers and Website Assignments
After you start using customer website assignment capabilities, new customers are automatically restricted to having a customer account for the site on which they registered. Customers can register on more than one website, but they'll have more than one customer account. A new customer record is created with a different source web site when customers register on more than one website associated with your NetSuite account. You can set up duplicate website customer email detection to identify and manage duplicate customer records. For more information, read, Detect Duplicate Customer Email.
Website Specific Customers and OneWorld
For companies that use OneWorld, a customer must be assigned to a website associated with a subsidiary that is online. For example, suppose you have two subsidiaries: Subsidiary A and Subsidiary B. Only Subsidiary B is marked online and associated with Website B. The customer linked to Subsidiary A can't log into Website B when the Assigned Web Site is set to B or empty. Subsidiary A must be marked online for the customer to enable the customer to log in to a website.