Configure Windows Kiosk Mode
You can configure the Windows operating system (OS) to run in Windows Kiosk mode. Kiosk mode is a Windows lock-down feature in which only designated applications - such as NSPOS Kiosk - can run for most users. All other Windows functionality is locked and unavailable to users who aren't Windows administrators.
Support for kiosk mode is limited to these operating systems:
-
Windows Enterprise editions, including LTSC and loT
Minimum requirements are Windows 10 Enterprise 2019 LTSC.
To configure a workstation to run in Windows Kiosk mode:
-
Log into Windows as an administrator on the computer used as an NSPOS kiosk workstation.
-
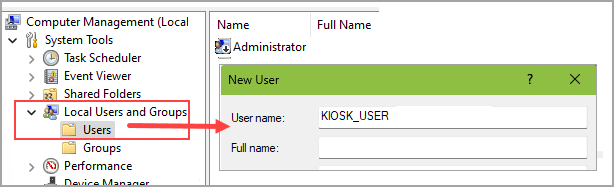
Enter Computer management in the Windows Start search field.
-
Expand the Local Users and Groups list.
-
Right-click the Users folder and select New User.
-
Create a new user with the User Name: KIOSK_USER.
-
Log out as administrator and log in as KIOSK_USER. Wait for the new user profile to be set up.
-
Log out, then log in as an administrator user.
-
Download and unzip the PsExec tool from the Microsoft Store.
-
Run PsExec in an elevated command prompt.
-
Go to the PSExec folder and run the following commands:
powershell.exe -Command "Set-ExecutionPolicy RemoteSigned"powershell.exe -Command "Unblock-File 'C:\Program Files (x86)\NetSuite\Kiosk Agent\Kiosk Mode\KioskModeSetUp.ps1'"psexec.exe -i -s powershell.exe -File "C:\Program Files (x86)\NetSuite\Kiosk Agent\Kiosk Mode\KioskModeSetUp.ps1" -
Restart the computer.
-
Log in as KIOSK_USER. Windows will now function as a kiosk when this user is logged in.
To return a workstation to standard Windows mode
-
Log into Windows as administrator on the computer used as an NSPOS kiosk workstation.
-
Go to Computer management.
-
Expand the Local Users and Groups list.
-
Expand the Users list.
-
Delete the Windows user KIOSK_USER.