Steps to Perform by Non-curated Trading Partners (Seller)
If you're a noncurated trading partner, complete the following steps.
Registration and Setup
The Oracle Business Network has a self registration process for trading partners to register their company and begin sending and receiving transactions. To perform business transactions with a NetSuite customer using the SuiteProcurement SuiteApp, you must be a registered trading partner on the OBN.
-
If your company is already registered, and has an OBN account, then follow the next steps.
-
If you don't have an account on OBN, register your company to create one. To register as a trading partner on OBN, follow the steps in Trading Partner User Guide available in OBN.
-
If you are not sure whether your company has an OBN account, contact your company administrator.
After registering your company with OBN, define the primary identifier.
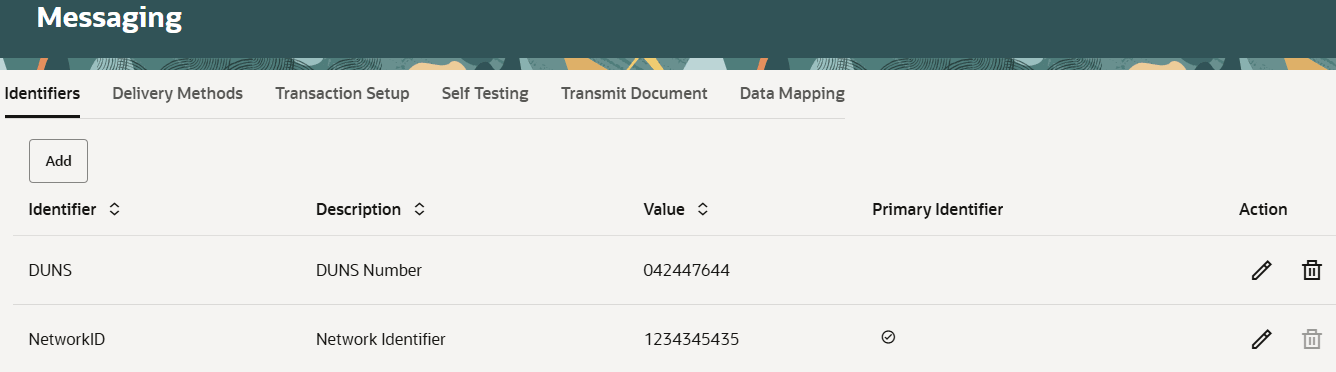
Defining Your Primary Identifier
Each trading partner registered on OBN is required to select a unique identifier. The sending and receiving trading partners use this identifier for any transaction (such as business documents, punch-out). You (trading partners) can use multiple identifiers for your account, but you must designate one of them as the primary identifier.
Defining Identifier for your Company
-
Log in to your OBN account.
-
At the bottom of the page, click the Messaging tab.
-
Click Add to open the Add Identifier window.
-
In the Identifier Type field, select an identifier type.
-
Enter an identifier value.
-
Click Add.
To set an identifier as primary:
-
Click Edit next to the identifier that you want to set as primary.
-
Check the Mark as Primary? box.
-
Click Update.
Setting Up Delivery Methods
For each trading partner, OBN requires the details of the destination server; the trading partner uses the destination server to receive business transactions from OBN (or other services).
This destination server needs to be configured for trading partners accounts. A trading partner can provide a destination server address for each delivery method. This is used for transmission of different transaction types. Each delivery method allows for separate URL addresses to be used for the test and production modes supported on OBN.
To set up a delivery method:
-
Log in to your OBN account.
-
At the bottom of the page, click the Messaging tab.
-
At the top of the page, click the Delivery Methods tab.
-
Under Receive from OBN tab, click Add.
-
In the Add Business Document window, complete the following fields:
-
In the Delivery Method Type field, select a delivery method.
-
In the Delivery Method Name field, enter a name.
-
-
Configure the settings for both Production and Test modes.
-
Click Add.
Activating Transactions
The OBN lets you manage the document types to be exchanged between buyers and suppliers. You can choose the document types that you want to support, specify the delivery method for each type of document, and specify whether you will send or receive the document.
The SuiteProcurement SuiteApp supports the following transaction types:
-
Advance Shipment Notice
-
Invoice
-
Purchase Order
-
Purchase Order (PO) Acknowledgment
To activate the transactions:
-
Log in to your OBN account.
-
At the bottom of the page, click the Messaging tab.
-
At the top of the page, click the Transaction Setup tab.
-
Under the Send: Setup documents you want to send from your ERP system through OBN to your customers section, edit the following business documents:
-
Advance Ship Notice
-
Invoice
-
Purchase Order Acknowledgement

-
-
In the Add Business Document popup window, complete the following:
-
In the Status field, select Active.
-
Under Document Format, in the Production Mode and Test Mode fields, select cXML 1.2x.
-
Click Add.
-
-
To transmit documents from your server to OBN, under the Receive: Setup documents you want to receive in your ERP system through OBN from your customers section, edit Purchase Order.

-
In the Add Business Document popup window, complete the following:
-
In the Status field, select Active.
-
-
Under Production mode, complete the following fields:
-
In the Document Format field, select cXML 1.2x.
-
In the Delivery Method Name field, select a value.
-
-
Under Test Mode, complete the following fields:
-
In the Document Format field, select cXML 1.2x.
-
In the Delivery Method Name field, select a value.
-
-
Click Update.
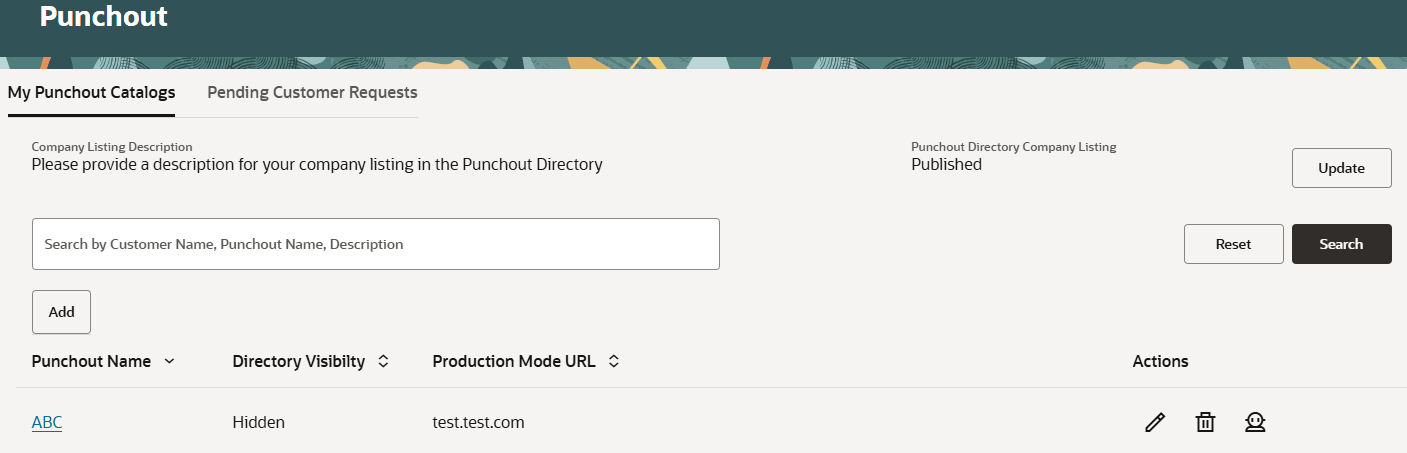
Configuring a Punchout Catalog
Punchout is the process using which a buyer can browse a trading partner's online catalog of goods or services, select them for purchase, and add them to a purchase requisition. After submission and approval of the purchase requisition, a purchase request is generated. The purchase request is then sent to the trading partner for the delivery of the goods and services.
You must set up at least one catalog to enable NetSuite customers to punch out to the online catalog and select items for purchase.
Approving Punch-out Request from NetSuite Customers (Buyer)
Before you can start exchanging documents and conducting transactions with your NetSuite customers, you must approve the punch-out request sent by them. When a NetSuite customer selects your company, you receive a notification request to review.
Trading partners that initiated the request appears with the status Pending Acknowledgment in the following locations on OBN. You can choose any of the locations to approve the request.
-
On the Partners tab, in the Pending Requests table.
-
On the Punchout tab, in the Pending Customer Requests table.
The request contains the company contact, email address, OBN ID, customer identifier, and others.
To accept the request:
-
Select the customer from the Partners or Punch-out tab.
-
Under the Action column, click the Review icon.
-
In the Review Punch-out Request window, do the following
-
In the Assign Punch-out Catalog field, select a punch-out catalog. This is the catalog that your NetSuite customers will access when procuring goods or services from you.
-
(Optional) In the Note from Customer field, enter a comment.
-
-
Click Acknowledge. This action leads to the following steps.
After you acknowledge a request from your buyer, the following actions takes place.
-
The NetSuite customer is accepted as a trading partner but the punch-out connection is still pending.
-
A notification is sent to your NetSuite customer informing them about the acknowledgment of the request.
-
The request status changes to Pending Activation.
-
The customer is added to the Your Trading Partners table on the Partner tab.
To activate the punch-out connection:
-
Click the Punchout tab.
-
Locate the NetSuite customer and under the Action column, click the Review icon.
-
In the Activate Punchout window, do the following:
-
(Optional) In the Note from Customer field, enter a comment.
-
In the Assign Punchout Catalog field, select a punchout catalog.
-
In the Identifier Type & Value field, select the identifier received from the NetSuite customer.
-
Click Activate. This action enables your NetSuite customers to access your catalog for procurement.
-
The identifier type and value received from your NetSuite customer is the same in both the Partners and Punchout tab. If the value differs, ensure to update the identifier as per the identifier type and value received from your NetSuite customer.
Transmitting Documents
As a trading partner, you must use the following cXML formats for exchanging documents with your NetSuite customer. To download the cXML standard, see Cxml.org/.
For more information about each of the request types, see: