Restage NSPOS From the Register
Instead of provisioning a workstation for restaging using the RA-Workstation record in NetSuite ERP, you can download and run the staging client directly from the register.
When you use this process:
-
The same staging package downloads that you receive from using the Provisioning > Installation URL link in NetSuite ERP
-
The NSPOS application closes so that restaging can start
-
The staging client opens and starts automatically
-
The same staging options that are available when downloading from NetSuite ERP are available when restaging from the register
-
When you start NSPOS after restaging, the register will use the version you installed
To restage NSPOS from the register:
-
Sign on to NSPOS as a manager or administrator (Resource ID 9070 or greater).
-
Press Ctrl+F12 to open the Function List.
-
Search for and tap Restage.RunStagingClient.
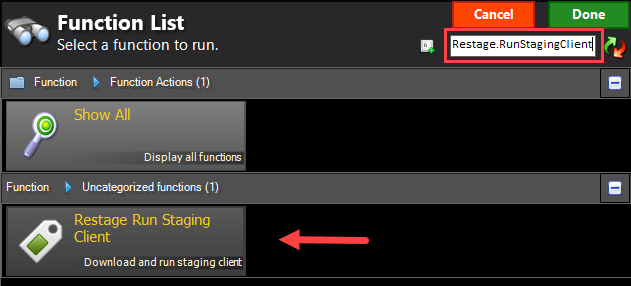
The staging client downloads and the verification step begins automatically. For information about the staging process and options, see Stage a Register in NSPOS 2020.1.X or 2024.1.X.
-
Manually start NSPOS when the staging process is complete.
If desired, you can assign the restaging function to a button that is available only to managers and administrators. Running restaging from a button eliminates a few steps from the process.

To assign Restage.RunStagingClient to a button:
-
Press Ctrl+F12 to open the Function List.
-
Search for and tap Button Edit.
-
Tap Main (bottom) or Side and then tap Pages.
-
Under Button Page, tap Other Functions or a different page on which to place the button.
-
Tap Activate so that you can see the changes immediately.
-
Tap Buttons.
-
Tap New to create a new button or tap an existing button to remap it.
-
Search for and tap Restage.RunStagingClient.
-
Tap Done.
-
Enter a Caption for the button, such as Restage.
-
Choose a button Style, Width, Height, and other options as desired. See Configure Button Bars for more information.
-
Close the button window when your setup is complete.