Cell Styles
Set Cell Styles to control the display of members and data with respect to cell background color and precedence.
Cell Styles control the Smart View formatting for forms and ad hoc grids.
- For forms, you can directly set the cell styles as explained in this topic.
- For ad hoc grids, you need to first enable cell styles. See Using Smart View Formatting (Cell Styles) for enabling cell styles in ad hoc grids.
To set cell styles:
- In the Smart View ribbon, click Options
 , to launch the Options panel.
- In the Options panel, select the Formatting tab.
- In the Formatting tab, click Cell Styles.
-
Set the desired cell styles:
-
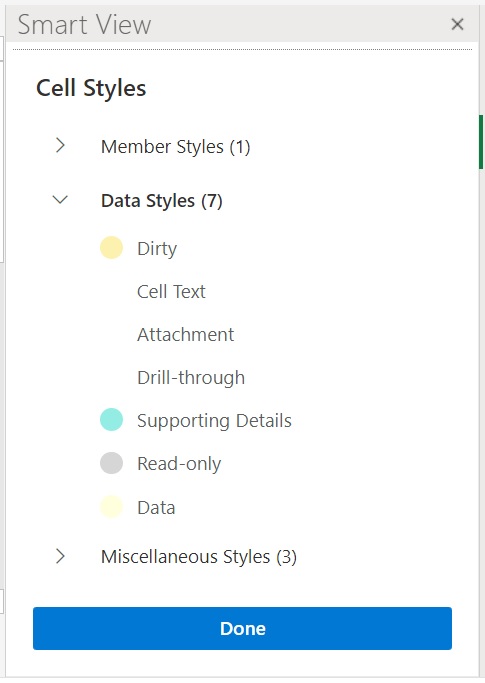
Expand a cell style group.
Note the three groupings of cell styles: Member Styles, Data Styles, and Miscellaneous Styles. In this example, the Data Styles group is expanded to show the available data types to which you can apply styles or change them. The example show these available cell styles: Dirty, Cell Text, Attachment, Drill-through, Supporting Details, Read-only, and Data.

-
Click a cell style to change.
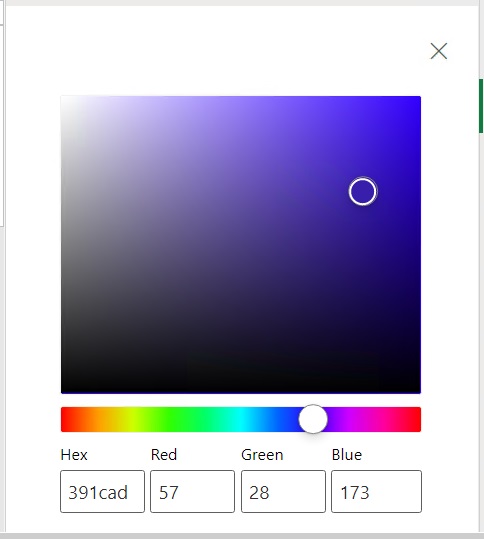
A color picker control opens
-
Drag the color controls (the circles in the top left corner of each color block) till you arrive at the color you want.
Following is the default color control. Move the bottom circle to choose a color category and move the top circle to choose a color shade within that category:

Following is an example of changing the color to a category and shade of blue:

-
When finished, click the X in the top right corner to close the pane and return to the Cell Styles panel.
-
-
In the Cell Styles panel, click Done to return to the Options panel.
- To re-order precedence of cell styles, use the Move Up and
Move Down buttons
 or drag and drop the cell styles at the desired position.
Note:
- If a cell belongs to multiple member or data types, then the order of precedence determines the style that is applied to the cell. For example, a cell is an editable data cell and also contains supporting details. The Data cell style color is set as Orange, whereas the Supporting Details cell style color is set as Blue. If the Supporting Details style appears above the Data style in the Cell Style panel, then the Supporting Details style takes precedence and the cell appears in Blue color. Conversely, if you move the Data style up and place it above the Supporting Details style, then the Data style takes precedence and the cell appears in Orange color.
-
The Move Up and Move Down buttons appear on hovering over a cell style.
- Click
 in the top right corner to close Options.