Selectively Display a Field
Within a dynamic form, you can hide a field by default and make it visible only after something else happens in the page.
For example, suppose you’ve created a dynamic form for entering data about films with these fields:
- Film title, which is an input field
- Director, also an input field
- Year of release, input field
- A toggle switch, which indicates whether subtitles are available
- An input field for entering the available subtitle languages.
In this scenario, you want the field for entering subtitle languages to be hidden when no subtitles are available, like this:
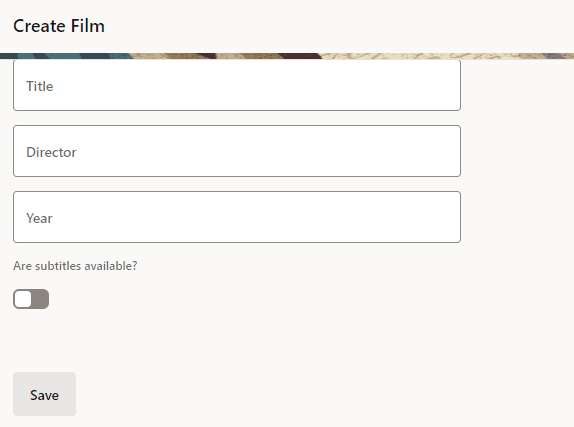
Description of the illustration hiddenfield-createform-hidden1.png
When the user changes the Are subtitles available? toggle to On, the field for entering subtitle languages becomes visible:
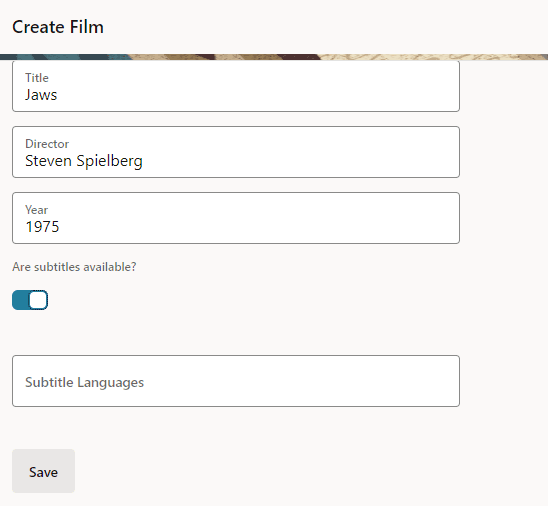
Description of the illustration hiddenfield-createform-visible1.png
Dynamic forms are controlled by the display logic you specify in a rule set. A rule specifies both a condition—in this case, whether the toggle switch is set to On—as well as a layout to apply to the dynamic form at runtime. In this case, that layout will show the Subtitle Languages field in the form.
After reading through this topic, you should have a basic understanding of how rule sets and layouts work, which you can apply to real-world tasks you may have at your site.
-
In the Page Designer, click anywhere in the form to display its properties in the Properties pane, then click Go to Rule Set.
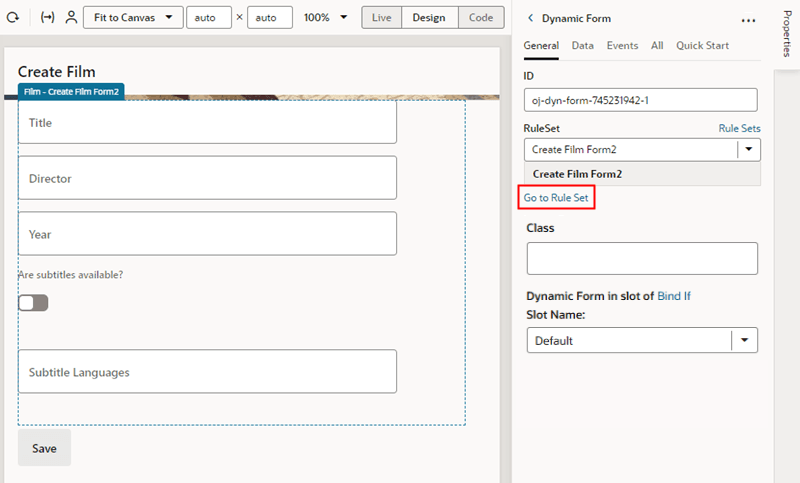
Description of the illustration hiddenfield-goto-ruleset.png
-
In the form’s rule set, click default in the Layouts pane to open the layout:
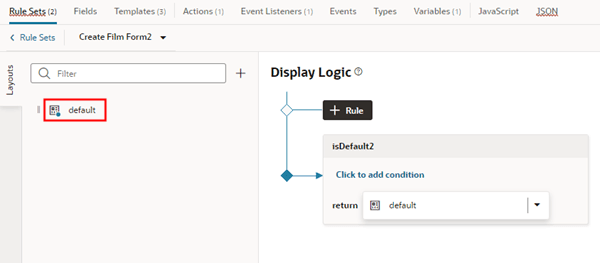
Description of the illustration hiddenfield-ruleset-default.png
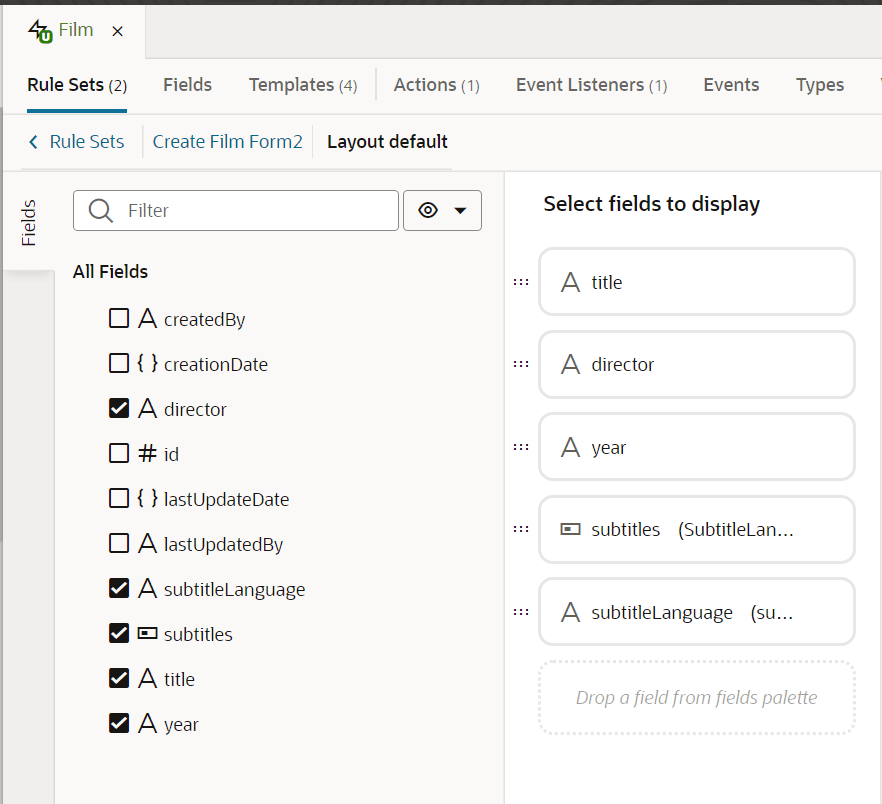
The Fields tab opens:
Description of the illustration subtitlelayout.png
In this tab, you can see all the fields that could be added to this dynamic form on the left, as well as the fields that are included in the default layout:
title, director, year, subtitles, andsubtitleLanguage.Only a few field properties can be set directly in a dynamic form’s layout. When you need full control over how fields are rendered in a form, you need to use a field template instead.
- Let’s create a field template for the
subtitleLanguagefield to give it the hide/show behavior we’re after.-
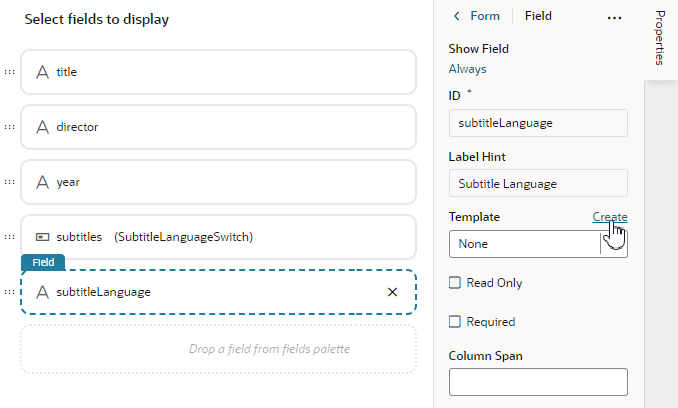
In the rule set layout, click subtitleLanguage in the center pane,then click Create next to Template in the Properties pane:
Description of the illustration hiddenfield-layout-createtemplate.png
-
In the Create Template dialog box, enter a label for the new template, like
subtitleLanguageField, then click Create: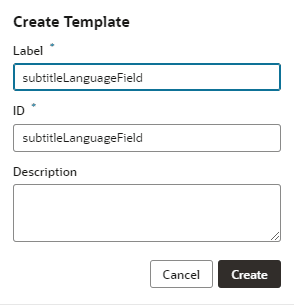
Description of the illustration hiddenfield-layout-newtemplate1.png
The new template opens in the template editor.
subtitleLanguageFieldis a text field, so the first thing VB Studio does is to add an Input Text component to the template: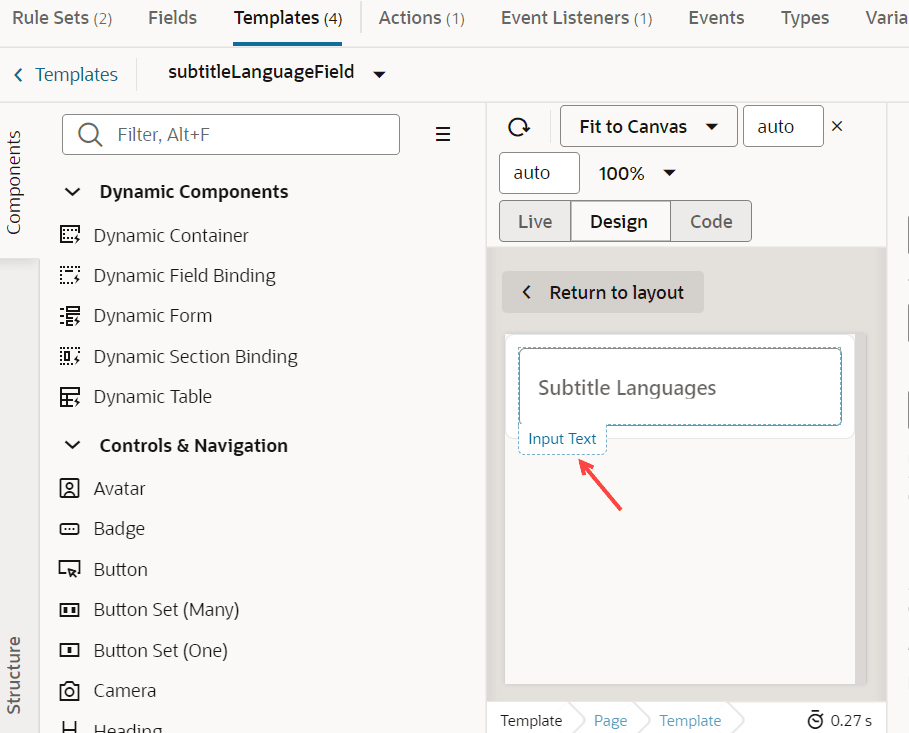
-
- Now let’s edit the template to hide
subtitleLanguageFieldwhen the switch is set to Off.-
In the template editor, right-click the Input Text component, then select Surround > If in the pop-up menu:
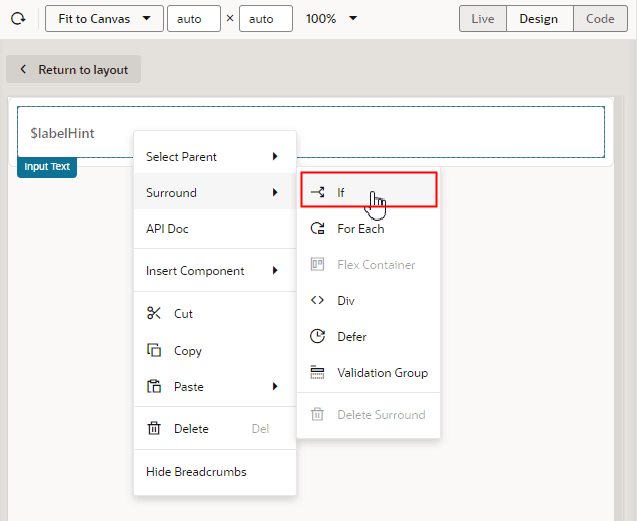
Description of the illustration trigger-action-surround1.png
This wraps the Input Text component in a Bind If component, which is better suited for controlling the visibility of a component. Bind If comes with a Test property; any content surrounded by Bind If is displayed only when the Test property is true. Let’s set up the Test property next so we can see how this works.
- Click the Structure tab so you can work with the Bind If component more easily.
-
Click Bind If in the Structure view:
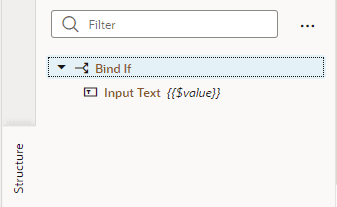
Description of the illustration hiddenfield-template-bindif.png
-
In the Properties pane, hover to the right of the Test property and click
 to open the Variables picker.
The Test property is used to hide or display the content surrounded by a Bind If component—which, in this case, is the Input Text field for selecting languages. The Test property type is Boolean, so the value must be either true (which displays the contents of the Bind If component) or false (which means the contents are not rendered). True is the default.
How are we going to hook up the user’s action—that is, switching the Subtitles toggle from On to Off—to actually hiding or showing this field as a result? By defining a variable to represent the toggle’s current state, then using that variable in an action chain. When you want something to happen on a page based on the behavior of another component, either on that page or elsewhere, it almost always involves an action chain.
-
Click Create:
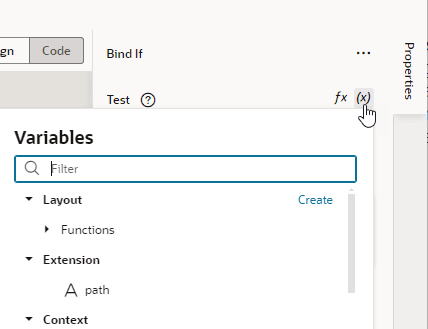
Description of the illustration trigger-action-displayvar1.png
-
Specify a name for the variable, for example,
showLanguageInput, set the type to Boolean, then click Create: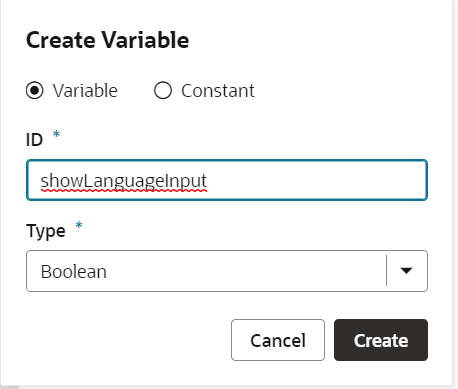
-
Open the Variables picker again and click Edit next to the
showLanguageInputvariable to open the Variables tab in the Designer: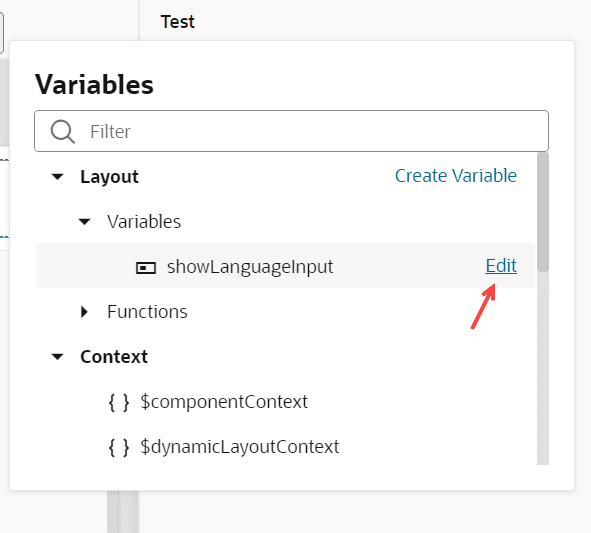
-
In the Variables tab, set
showLanguageInput'sdefault value from true to false, so that the Bind If’s component (theSelect Languagesfield) is hidden by default: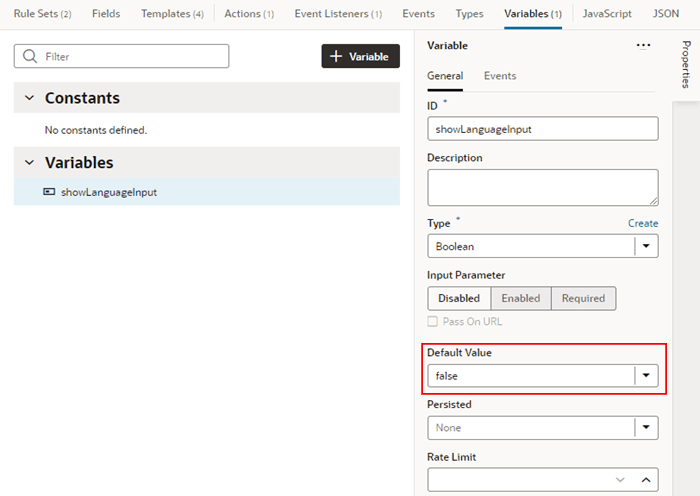
Description of the illustration hiddenfield-variables-defaultvalue1.png
Now we’re going to use this value in an action chain, to change its value when the toggle moves from Off to On, which in turns sets the display value from true to false.
-
- Let’s create the action chain.
- Click the Rule Sets tab in the Designer to go back to the default layout.
-
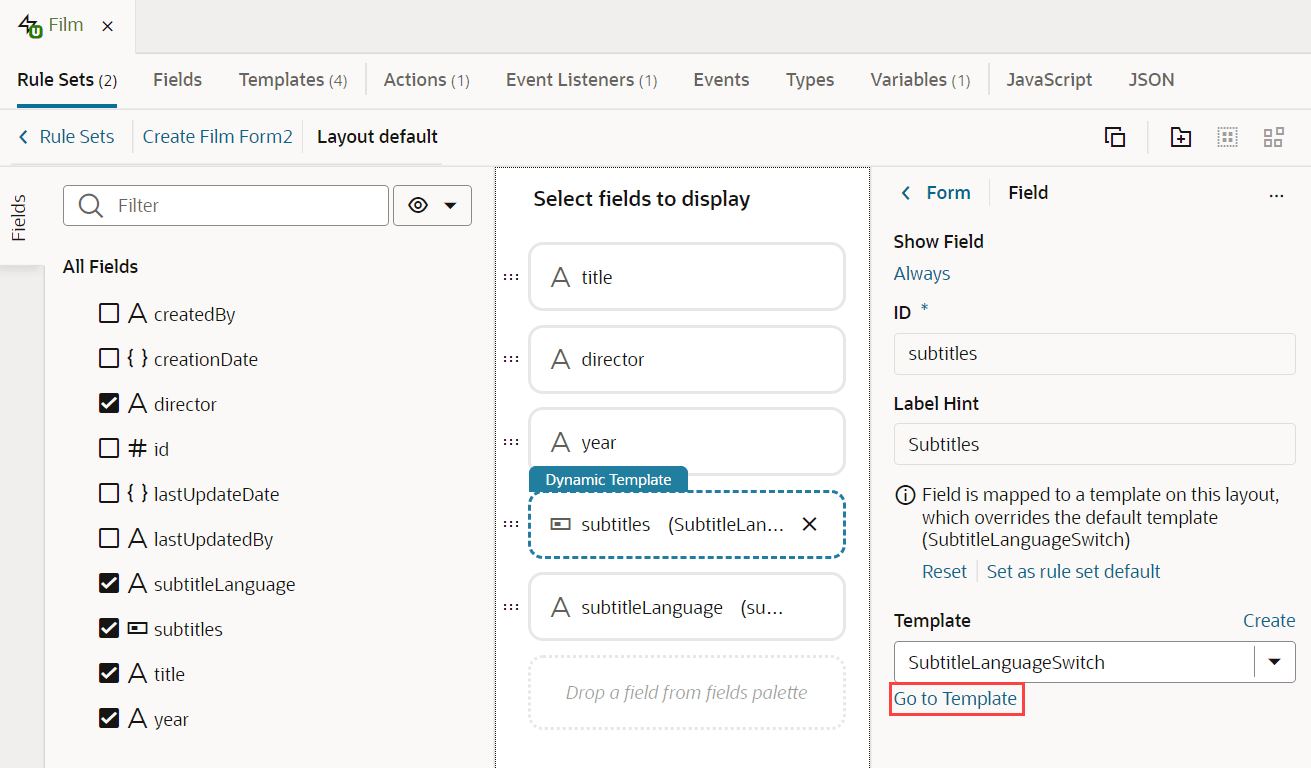
Select the
subtitlestoggle field in the center pane.Notice that a developer has already created a field template, called (
SubtitleLanguageSwitch), and applied it to the toggle field. The template name appears both in parentheses after the field name in the center pane, as well as in the drop-down list in the Template section of the Properties pane.We can edit this field template, so there’s no need to create a new one.
-
Click Go to Template in the Properties pane to open its template in the editor:
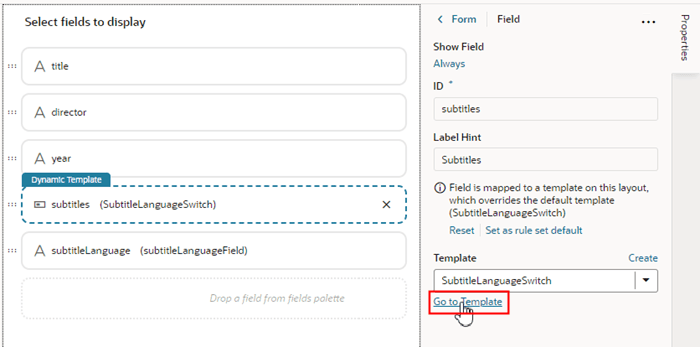
Description of the illustration hiddenfield-layout-gototemplate1.png
- In the template editor, select the Switch component on the canvas, then click the Events tab in the component’s Properties pane.
-
Click New Event, and then select On ‘value’ when prompted:
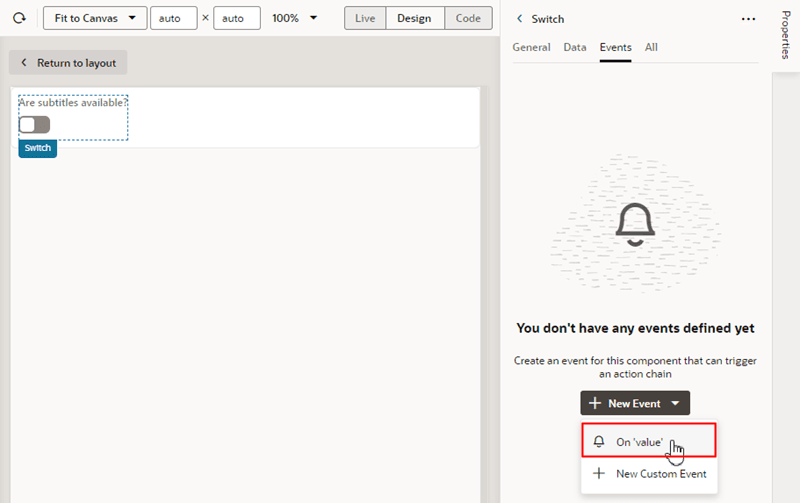
Description of the illustration hiddenfield-template-addevent.png
When you create the
On 'value'event, VB Studio automatically creates a new action chain for you (in this example, it’s calledSwitchValueChangeChain), as well as an event listener that listens for theOn 'value'event. When the event listener ‘hears’ the event, it will start a sequence of actions defined in the action chain.In this example, the
On 'value'event happens when a user uses the switch component to change thesubtitlefield’s default value. - In the Action Chain editor, drag an Assign Variables action from the Actions palette and drop it onto the plus sign under Start.
The Assign Variables action assigns a value to a variable. The value could be an expression, but in this example we want to set the value of our
showLanguageInputvariable to true, which is a static value. -
Select the Assign Variables action in the editor, then click Assign in the Properties pane to open the Assign Variables window:
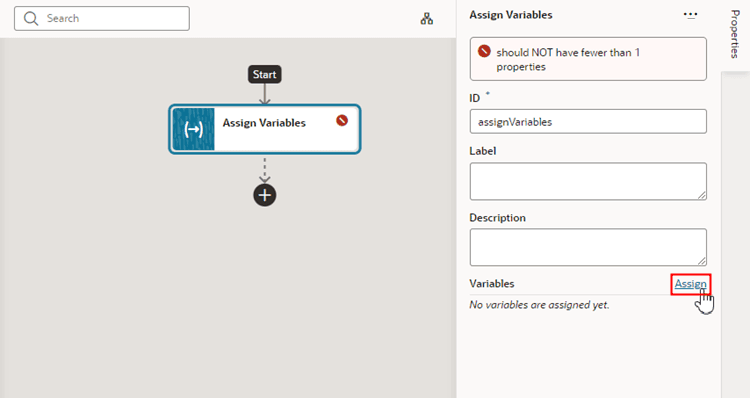
Description of the illustration hiddenfield-action-assignvariables.png
-
In the Assign Variables window, select
showLanguageInputin the Target pane, then type true at the bottom of the window. Make sure that Static Content is selected, then click Save: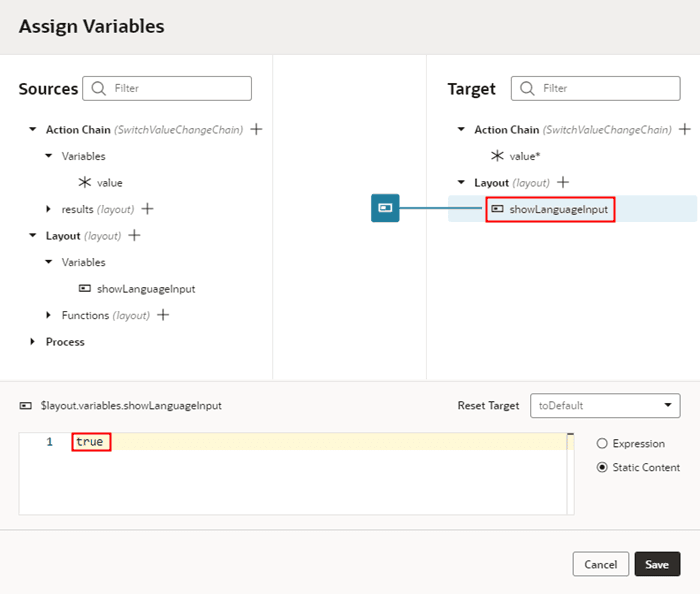
Description of the illustration trigger-action-display1.png
In the Properties pane, the Variables section shows that the
showLanguageInputvariable is now mapped to a value: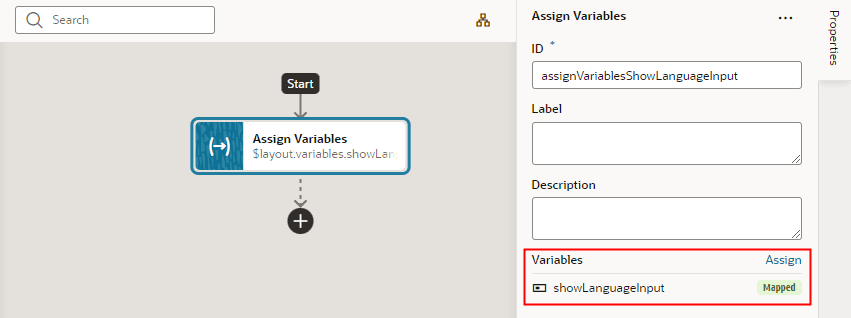
Description of the illustration hiddenfield-action-mappedvariable.png
You can now view the page in Live view to check your work. Notice that the Subtitle Languages field is hidden by default. If you toggle the Are subtitles available? switch to On, the Subtitle Languages field is displayed:
Description of the illustration hiddenfield-createform-visible1.png
Let’s do a quick re-cap of what’s happening behind the scenes:
- The user toggles the
Are subtitles available?switch to On. - The event listener detects that an
On 'value-item'event has occurred, and fires off theSwitchValueChangeChainaction chain. - The action chain has one action, which is to assign a value of true to the
showLanguageInputvariable. - Because the Bind If component’s Test property is set to the value of
showLanguageInput, and that value is now true, theSubtitle Languagesfield (which is wrapped in the Bind If component) can now be displayed.