Populate a List of Values Based on Another LOV
Within a dynamic form, you can use one drop-down menu to determine what appears in a second menu.
For example, suppose you want to present a list of states as a List of Values (LOV). When the user selects a state, a second LOV is populated with the cities in that state.
Here’s what this might actually look like in your application: the first field, Select State, displays a list of states for users to select from:
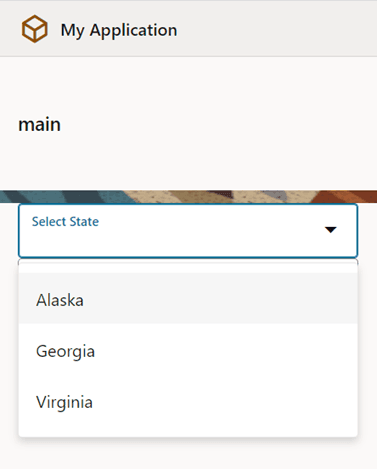
Description of the illustration selectstate.png
Once the user chooses a state—say, Alaska—the next field displays a list of Alaskan cities for the user to choose from:
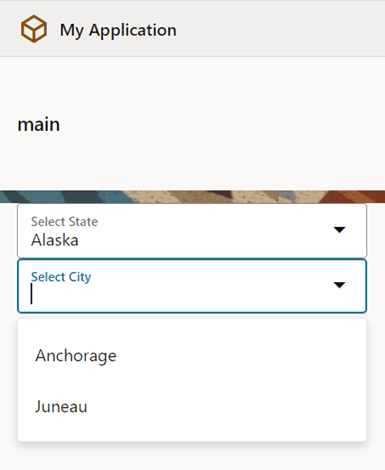
Description of the illustration selectcity.png
For this to work, there must be a relationship between the data sources associated with each drop-down list. In this example, the data sources are two business objects (but they could come from another source as well, such as a service connection): state and city. Here’s an excerpt of data from the state business object:
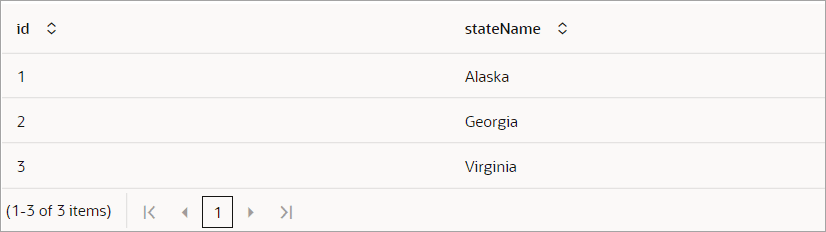
Description of the illustration statebodata1.png
And here’s some data from the city business object:
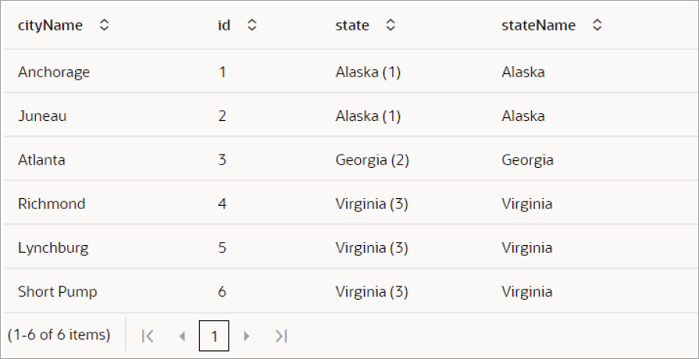
Description of the illustration citybo1.png
Let’s take a closer look at the city business object—specifically, the state field. The person who created this business object set up this field as a reference type. A reference type field refers to a key field (in this case, the id field) in the state business object, to link the two business objects together.
Notice that the id field in the state business object assigns a unique number to each state, and that this number also appears in the city business object’s state field. For example, Alaska has a value of 1 in the state business object, while cities IN Alaska have the value “Alaska (1)” in the city business object’s state field. When VB Studio sees a city with Alaska(1) in the state field, it knows to grab the state with a value of 1 in the state business object. It’s important to understand this relationship a bit so you’ll understand what’s going on as we move through this procedure.
To populate a list of values in a drop-down menu when an item in another LOV is selected:
-
In the Page Designer, add a drop-down list component for each business object by dragging two Single Select (
<oj-select-single>) components from the Components palette onto the canvas: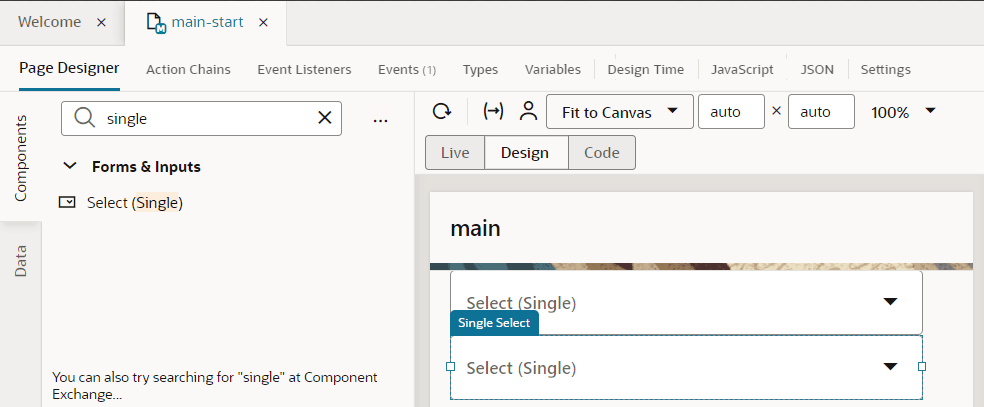
- Now we need to tie these components to the data provided by the two business objects. Let’s start with the first Single Select component:
-
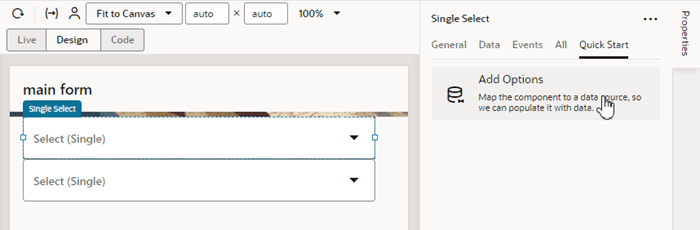
Select the top component on the canvas, then click Quick Start in the Properties pane. Click Add Options:
-
On the Locate Data page, select the
Statebusiness object, to indicate that we want this list of values populated with state names: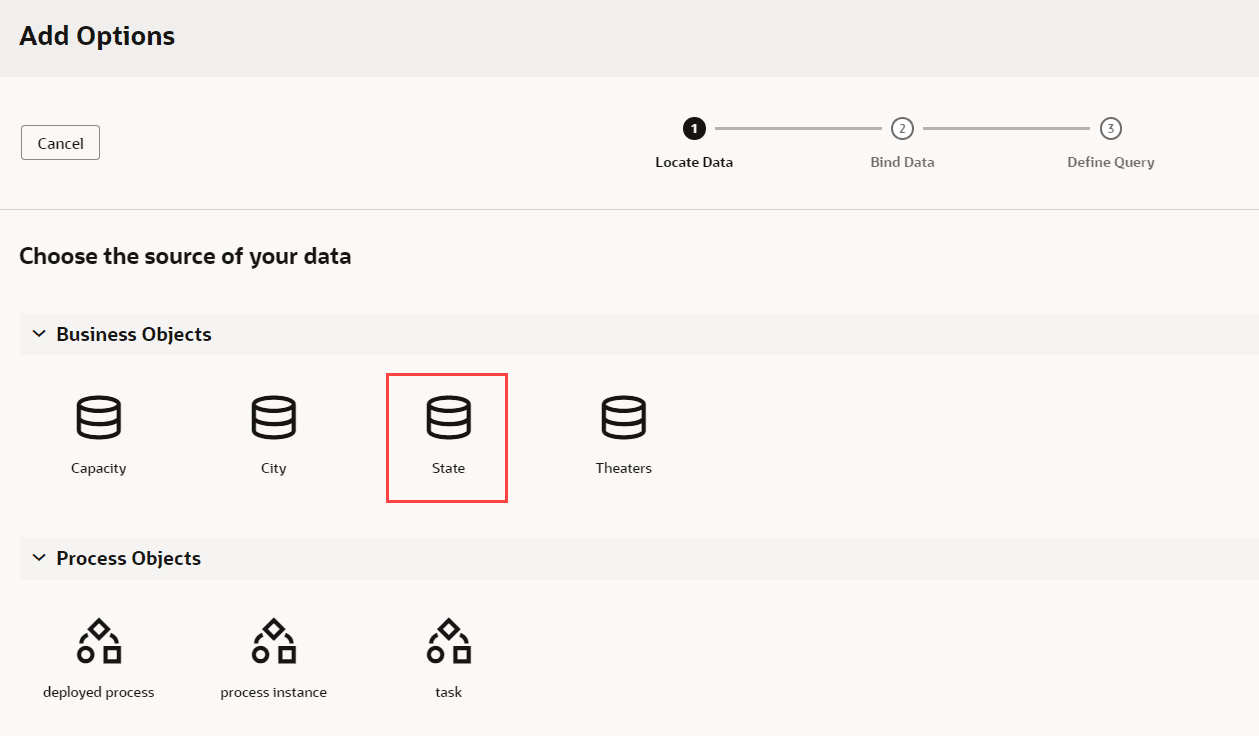
- Click Next.
- In the Bind Data page, drag the
stateNamefield from the Endpoint Structure pane into the Label field. -
Drag the
idfield into the Value field.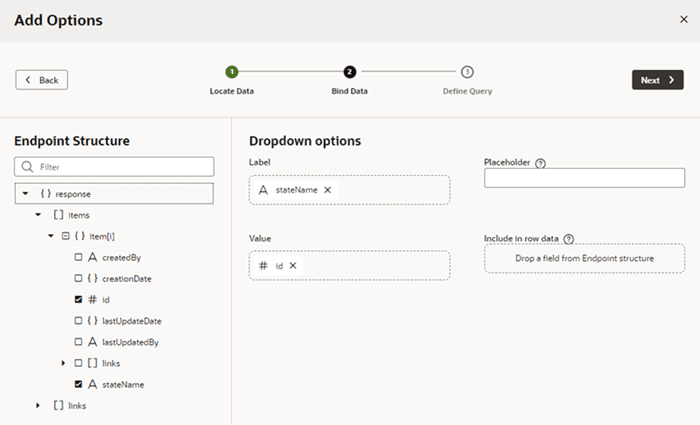
Description of the illustration trigger-action-binddata1.png
Remember that the
idfield is the one that will tie this business object to thecitybusiness object. - Click Next.
- Click Finish on the Define Query page to close the Quick Start.
-
-
Repeat these steps for the second Single Select component, this time choosing the
citybusiness object.What actually retrieves the data from the business object? In this case, a Service Data Provider (SDP), which the Quick Start created for you. You can check this for yourself by checking the Data tab in the Properties pane:
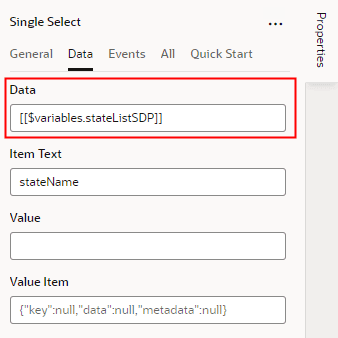
Description of the illustration trigger-action-datatab1.png
Getting data from a data source can be tricky, so the Quick Starts automate this process by creating a special type of variable known as a Service Data Provider (SDP). Simply put, the SDP does whatever is required to fetch the correct data from the correct source.
- To create the action chain that filters the list of cities, we’ll need a page variable that’s assigned the selected state’s ID after each selection. We’ll use this variable to create a filter criterion for the city SDP (
cityListSDP).- Select the
stateSingle Select component, and on the Properties pane’s Data tab, hover over Value and click to open the Variables picker.
 - Click the Page node’s Create link to create a new page variable.
-
For ID, enter
stateID, and for Type, selectNumber.Now, each time a state is selected, its ID is saved to this variable.
- Select the
- Next, we need to create an event for the
stateSingle Select component to start an action chain when the component’s value changes. The action chain will filter out cities from thecitycomponent that aren’t in the selected state.- On the canvas, select the
stateSingle Select component. -
In the Properties pane, click Events, then click New Event. Select On ‘value-item’ when prompted:
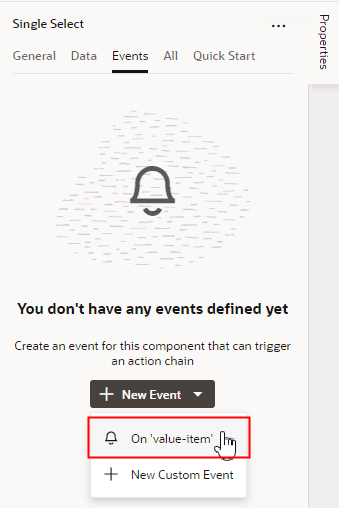
Description of the illustration trigger-action-eventtab.png
When you create the event, VB Studio automatically creates a new action chain and event listener for you. The event listener will listen for an event, which in turn will trigger a sequence of actions defined in the action chain.
- On the canvas, select the
- Let’s create the action chain to filter the list of cities shown in the second drop-down based on the state selected in the first drop-down.
- In the Action Chain editor, add an Assign Variables action to the canvas.
-
In the Properties pane, type
cityin the Variable field, then select cityListSDP.filterCriterion:
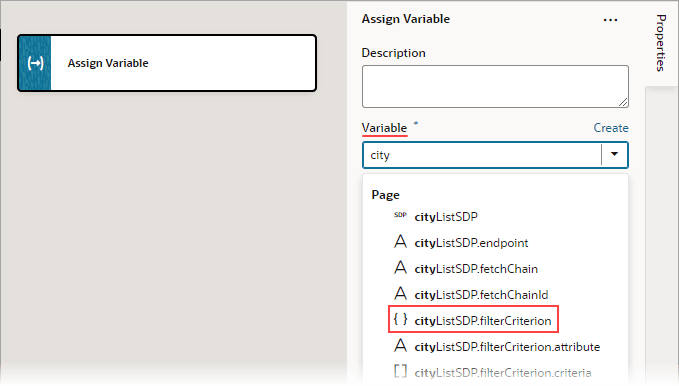
Description of the illustration assign-var-filter-criterion1.png
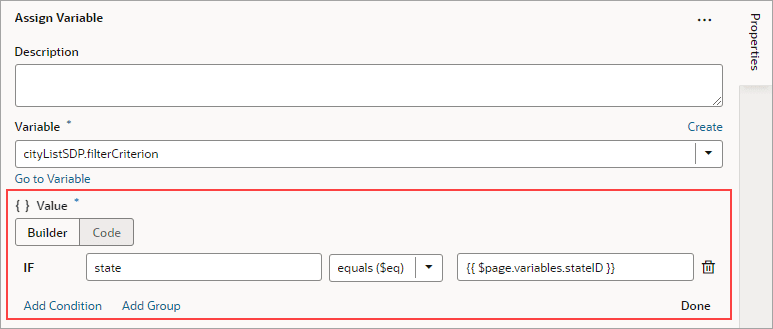
- For the Value property, click its Click to add condition link to create a criterion to filter out the cities that aren’t in the selected state.
- In the condition builder:
- Select
statefor the first Attribute drop-down list. - Select
equals ($eq)for the Operator drop-down list. - Type
stateIDin the second Attribute field, then select$page.variables.stateID. Recall, whenever a state is selected, this variable gets assigned its ID.
Description of the illustration trigger-action-conditionbuilder.png
This condition essentially says, “For each row in
cityListSDP, if the state ID equals the ID stored in thestateIDpage variable, add the row to the displayed list of cities.” Remember the city business object from earlier? - Select
-
Click Done in the condition builder.
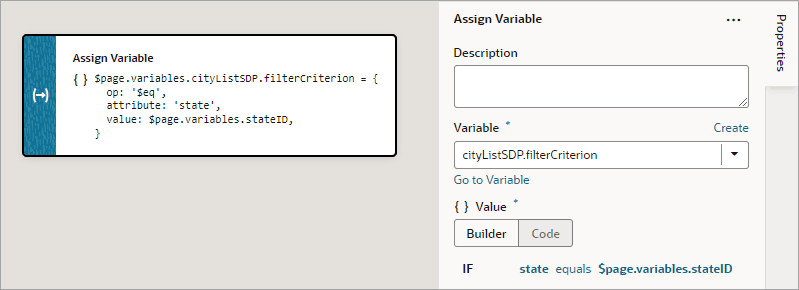
Description of the illustration trigger-action-assignvariables1.png
Let’s preview the page by selecting the Page Designer’s Live view. Select a state, then notice how the city drop-down list shows only the cities in that state:
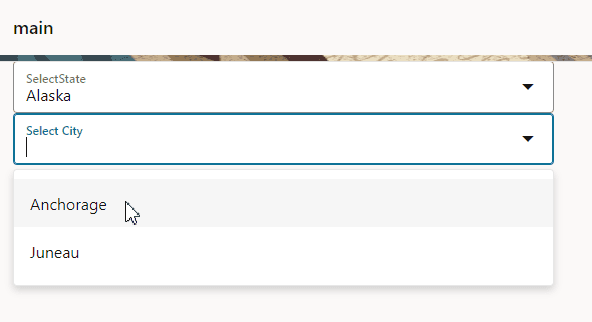
Description of the illustration trigger-action-city1.png
If you open the list of cities without first selecting a state, the action chain won’t be triggered, so the list won’t be filtered. In other words, you’ll see all the cities for all the states.