Create Custom Events that Emit to a Fragment’s Parent Container
One way to pass data from a fragment to its parent container (say, a page or another container like a different outer fragment) is by raising custom events that “emit” to the container.
Let’s extend the employee contacts use case to see how to do this. Here, the employee contact information fragment lets you specify whether home is the employee’s preferred work location. A user who toggles the Work from home? switch in the fragment will see a notification that the employee’s preferred work location has been set to home:
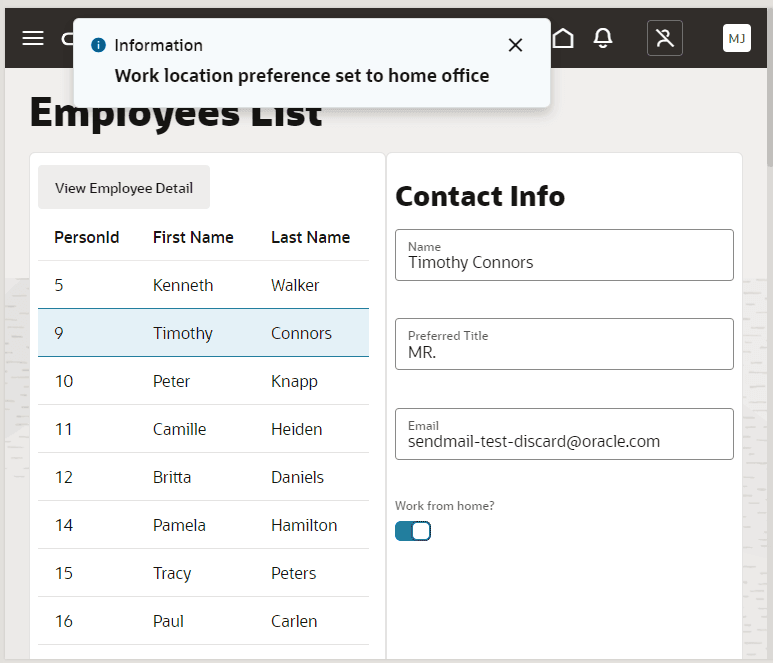
Description of the illustration fragment-data-email-scenario-test1.png
Behind the scenes, when the user toggles the Work from home? switch, an action chain defined on the fragment fires an event that “emits” the event’s payload to the fragment container. An event listener on the fragment container, watching for this fragment event to fire, triggers a page-level action chain to perform some action—which, in our example, is firing a notification that the selected employee’s work location preference has been set to home.
-
Configure your fragment to raise a custom event that the parent container listens to. Here’s an example of a page that pulls in the
employee-contact-detailsfragment: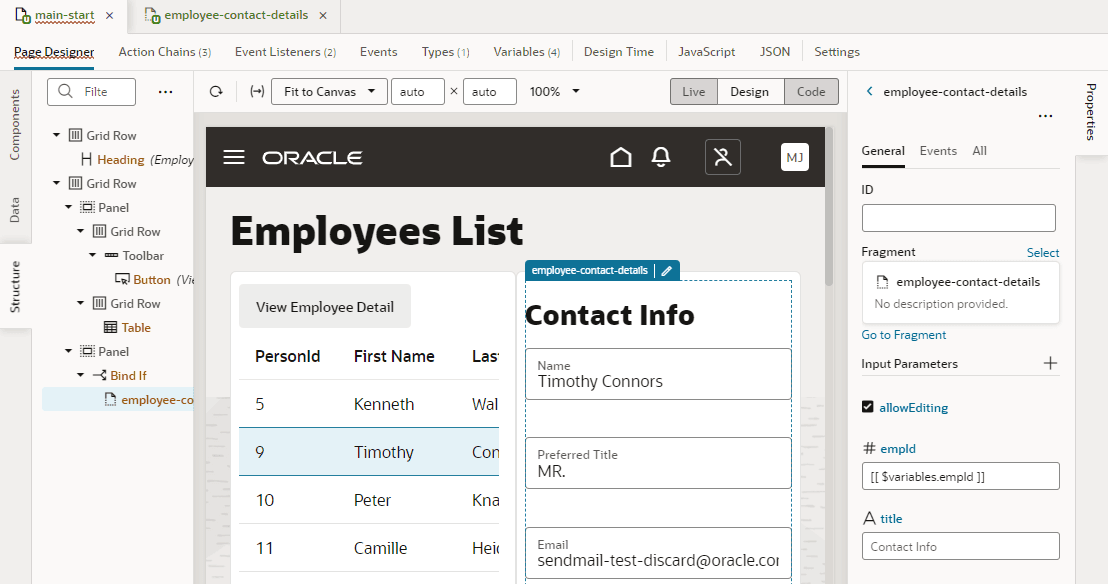
Description of the illustration fragment-pagesetup.png
- From the fragment’s Properties pane on the page, click Go to Fragment to access the Fragment Designer. You can also click the
 icon that appears next to the fragment name on the canvas.
 - Drag and drop a Switch component in your details fragment.
-
In the Properties pane, change the Label Hint text in the General tab to
Work from home?.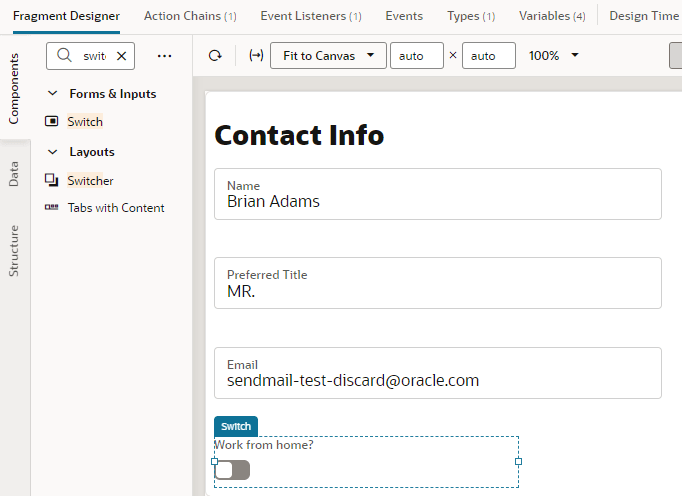
Description of the illustration fragment-designer-switch-data.png
-
Switch to the component’s Events tab, then click + Event Listener and select On ‘value’.
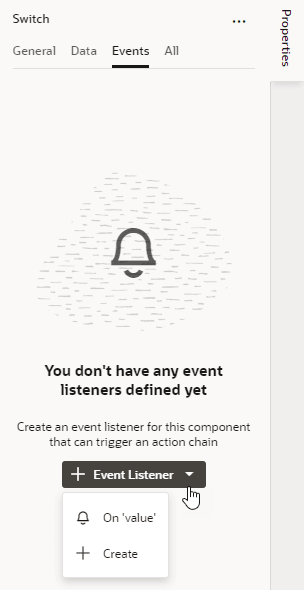
Description of the illustration fragment-designer-switch-event.png
- In the
SwitchValueChangeChainaction chain, drag and drop a Fire Event action. - Click Create next to Event Name in the Properties pane.
-
With the Scope set to Fragment, enter an ID (for example,
wfhPreferenceSet), and select Emit event to container. Make sure the event name starts with a lowercase letter, though camel case is allowed. Hyphens are not supported. Click Create.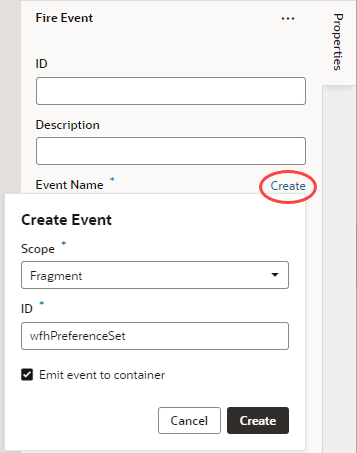
Description of the illustration fragment-data-preferenceset-fireevent.png
- When the new event is created, click Go to Custom Event under the new event to go to the Events editor and define the event’s payload.
-
In the
wfhPreferenceSetevent’s Properties pane, click Add Parameter next to Payload. In the Add Payload Parameter dialog, enter an ID (say,shouldwfh), select the type as Boolean, and click Create.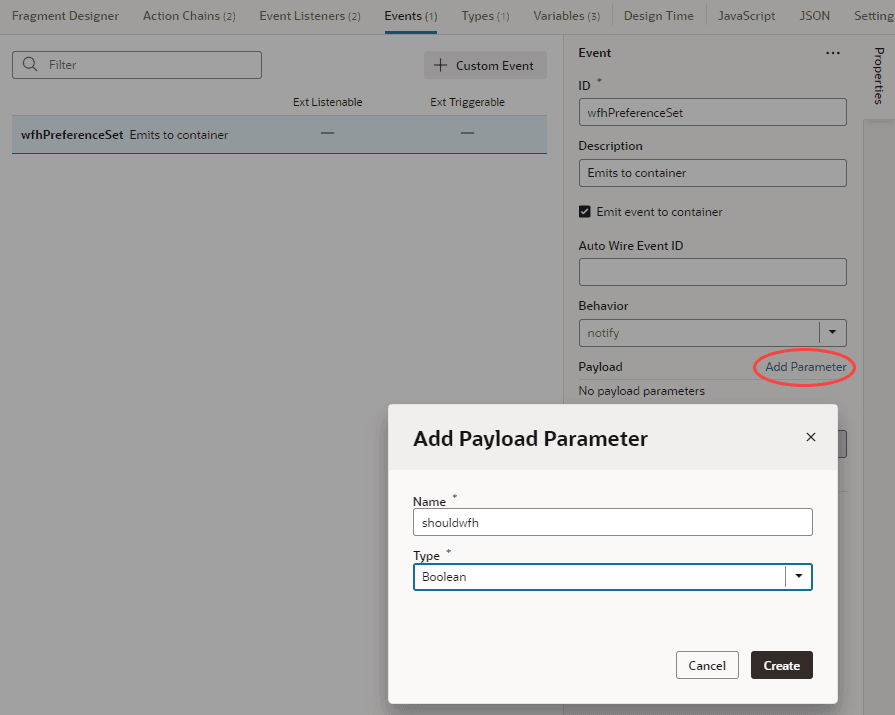
Description of the illustration jsac-fragment-event.png
Tip: To simplify the task of creating an event listener for this event on the fragment’s parent container, you can choose to enter an Auto Wire Event ID (for example,
wfhPreferenceSetAutoWire). This option enables thewfhPreferenceSetevent to be listed under Fragment Events when you create a listener for the event from the Event Listeners tab on pages that use the fragment. See Automatically Wire a Fragment’s Custom Event to the Parent Container. - Under Triggered by, click SwitchValueChangeChain to return to the action chains editor, and switch to Design view.
-
In the Fire Event action’s Properties pane, hover over the
shouldwfhproperty under Parameters, click to open the Variables picker, and select value under Input Parameters.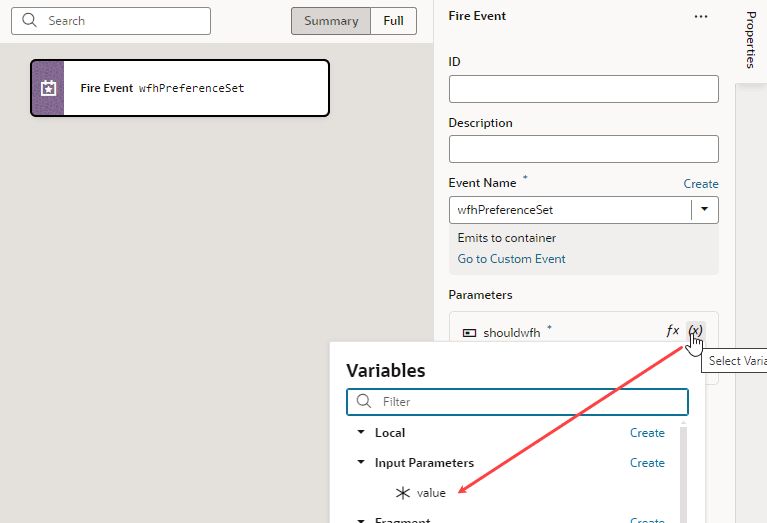
Description of the illustration jsac-fire-event-param-fragment1.png
- From the fragment’s Properties pane on the page, click Go to Fragment to access the Fragment Designer. You can also click the
- Configure your page’s fragment container to receive and process the fragment’s custom event.
-
In the Page Designer, select the fragment, then in its Properties pane’s Events tab, click + New Event and select the On ‘wfhPreferenceSet’ custom event.
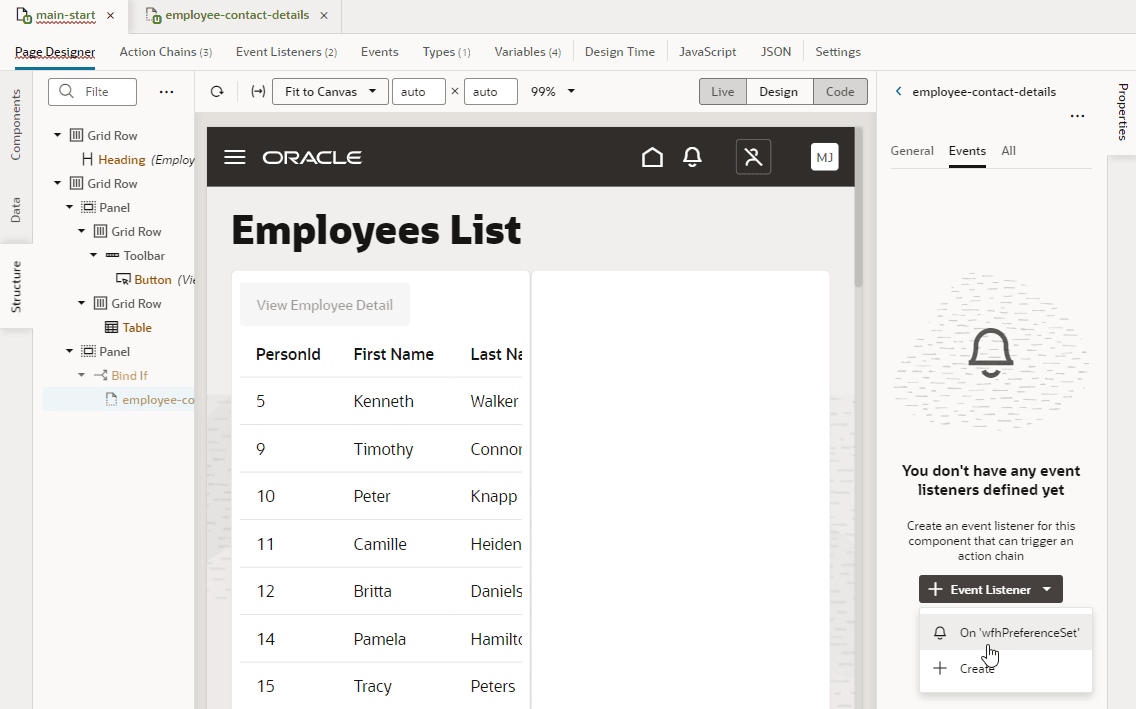
Description of the illustration fragment-data-container-emailpreferenceevent1.png
- Drag and drop a Fire Notification action to the
FragmentWfhPreferenceSetChainaction chain. -
Enter a summary in the Properties pane, something like
Work location preference set to home office, then select Info as the Notification type.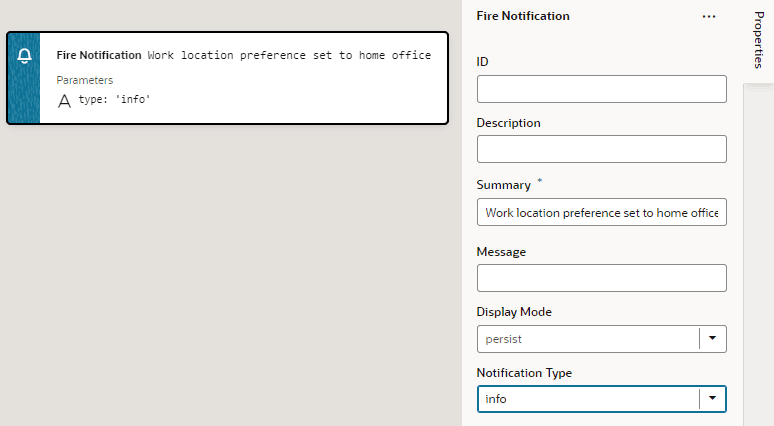
Description of the illustration fragment-data-container-actionchain-firenotification1.png
- Now drag and drop an Assign Variable action under the Fire Notification event.
-
In the action’s Properties pane, click Create next to the Variable property. In the Create Variable dialog, add a new page-level variable (for example,
containerParam) of type Boolean and click Create.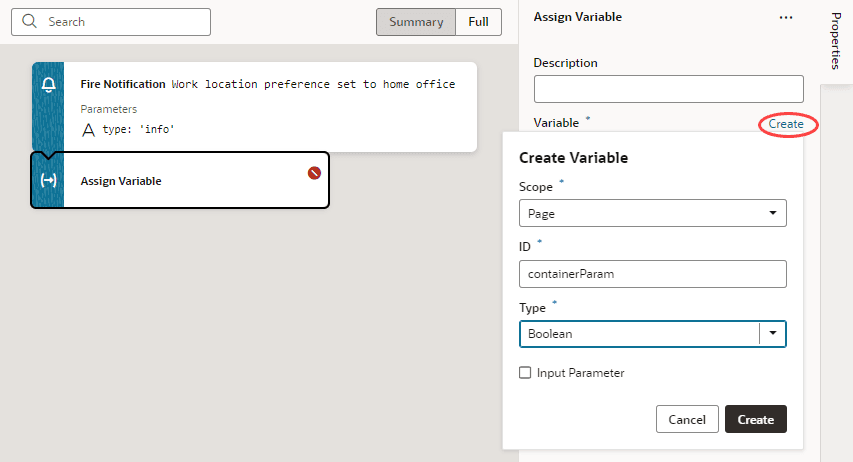
Description of the illustration fragment-data-container-actionchain-assignvariable1.png
-
Hover over the Value property and click
to open the Variables picker, then select shouldwfh under Input Parameters.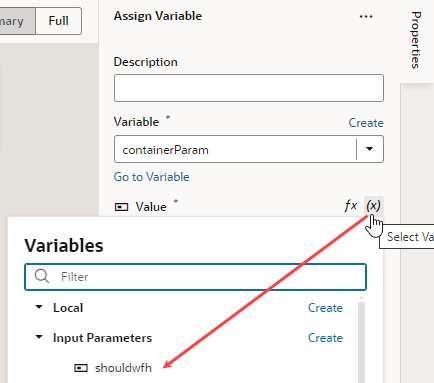
Description of the illustration fragment-data-container-actionchain-assignvariable-mapping1.png
-
- Now return to the Page Designer, click Live in the toolbar, select an employee, and toggle Work from home?. You’ll see a message that the employee’s work location preference is set.