Configure Progressive Web App Support

You can enable and configure Progressive Web App (PWA) support for your web applications from the app's Settings page.

Note:

Mobile apps are no longer supported, but you can convert an existing mobile app to a web app and deploy it as a PWA.

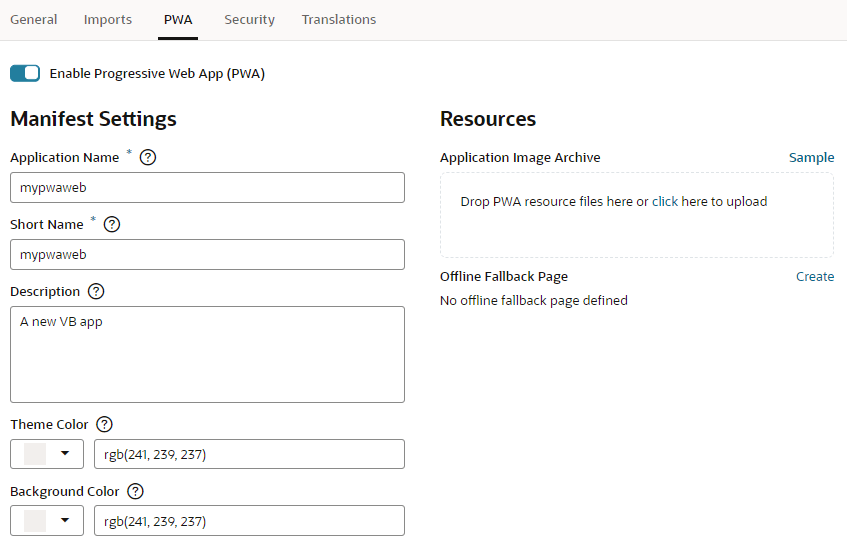
When you enable an application for PWA, VB Studio adds the necessary files to your project such as a web manifest file (a JSON configuration file) as well as required icons and splash screens. The web manifest stores configuration settings required by the PWA. You can modify these settings from the Manifest Settings section of the PWA page. For more information on this file, see this page.

Oracle provides Redwood-themed icons and splash screens for your app. You can replace these images with your own branded versions if desired. For PWAs that run on Android 8.0 and higher devices, you can also use adaptive icons that display as a variety of shapes on different device models.

You can also add an offline fallback page to your PWA and customize it to suit your needs. This offline fallback page is displayed when the user performs an action that requires a connection but the device is offline.

  1. Click Web Apps to navigate to the app that you want to configure as a PWA.

    Note:

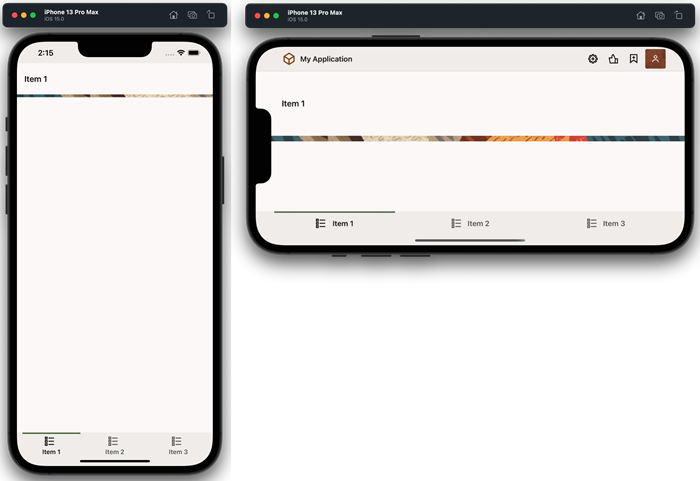
    Responsive web app templates are designed to be visual appealing and can adjust to the size of the user's screen, ranging from small phones to wide-screen desktops. Here's how a web-enabled PWA that uses the Bottom Tabs navigation template renders in portrait and landscape modes; notice how the header items adapt based on device orientation:

  2. Click your app's <app name> node, then click Settings.
    The General tab is displayed.
  3. Select the PWA tab.
  4. Click Enable Progressive Web App (PWA).

    The Manifest Settings and Resources sections are displayed. VB Studio also adds the necessary PWA resources to your app's folder tree.

    Description of mob_pwa_tab-png.png follows
    Description of the illustration mob_pwa_tab-png.png
  5. Review and edit, if needed, the information in the Manifest Settings section.
    1. Specify the Application Name.
      The application name appears on the dialog that displays to prompt you to install the application.
    2. Review the short name of the application.
      If both application name and short name are specified, the short name is used on the Home screen (below the app icon), launcher, and other places where space is limited.
    3. Change the background color and theme color, if needed, by clicking the currently selected color and choosing a new color in the color picker or by entering a RGB value in the text field.
  6. (Optional) Customize the splash screen and icons to use with your app.
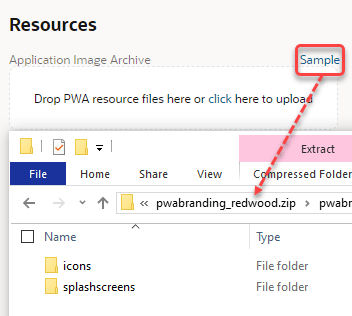
    1. From the Resources section, click Sample to download the pwabranding_redwood.zip archive file.
    2. Modify the icons and splash screens as needed.
      When you design adaptive icons, ensure that important information is within a "safe zone" circle, with a radius equal to 40 percent of the image size. By default, Redwood theme icons generated for PWAs in VB Studio follow this guideline, as do the icons included in the sample archive. It is recommended that you download the sample from the Resources section and use the images within as a guideline to create your adaptive icons.
    3. Upload your modified application image archive either by dragging it to the drag-and-drop area or by clicking the link to launch the Open dialog box.
  7. If you are using adaptive icons, modify the web manifest file to include the "purpose": "any maskable" setting as follows:
    {
     "sizes": "512x512",
     "src": "resources/icons/icon-512x512.png",
     "type": "image/png",
     "purpose": "any maskable"
    }
  8. To include an offline fallback page for your application, click Create next to Offline Fallback Page.
    VB Studio adds a Redwood-themed offline page (offlinePage.html) to your project and provides a link under Offline Fallback Page. If you want to customize the offline fallback page, click the link to open it in the Designer and modify it as required.

After you enable PWA support, you can share and deploy your app to distribute it as you would any web app. See Preview, Share, and Deploy Visual Applications. Once you do that, you can generate a QR code that users can quickly scan to install the app on a laptop or device. See Generate a QR Code for a PWA-Enabled App.