Prerequisites to Use OCI Vault Secret Credentials

Before you begin to use Oracle Cloud Infrastructure (OCI) Vault secret credentials in Graph Studio, you must first perform a few prerequisite steps.

The following steps describe the process to configure an OCI Vault and secrets in your Autonomous Database instance, enable the resource prinicipal, and attach the vault credential in Graph Studio. Ensure you are the default ADMIN user of the Autonomous Database instance to access resources and run OCI operations at tenancy level or at the compartment level.
  1. Create a Vault in your Autonomous Database instance.
    See Creating a Vault for more information.
  2. Create a Master Encryption Key for the vault.
    See Creating a Master Encryption Key for more information.
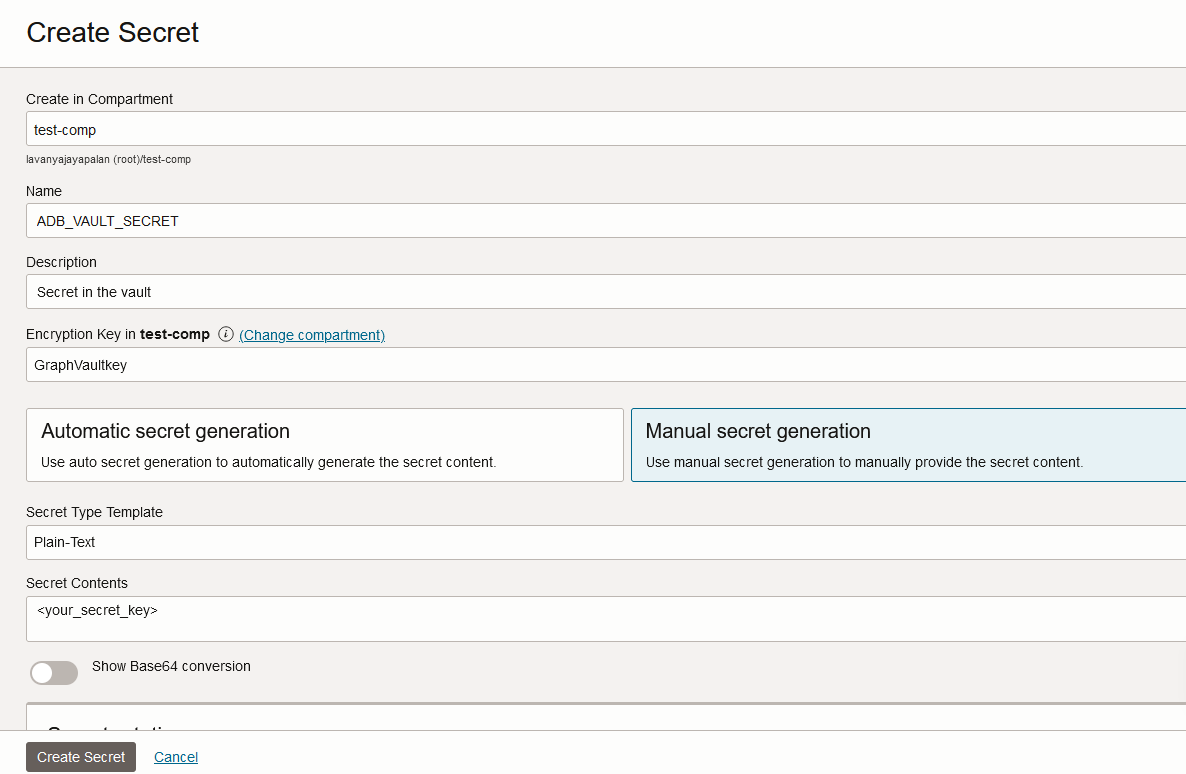
  3. Create a Secret specifying the encryption key created in the previous step.
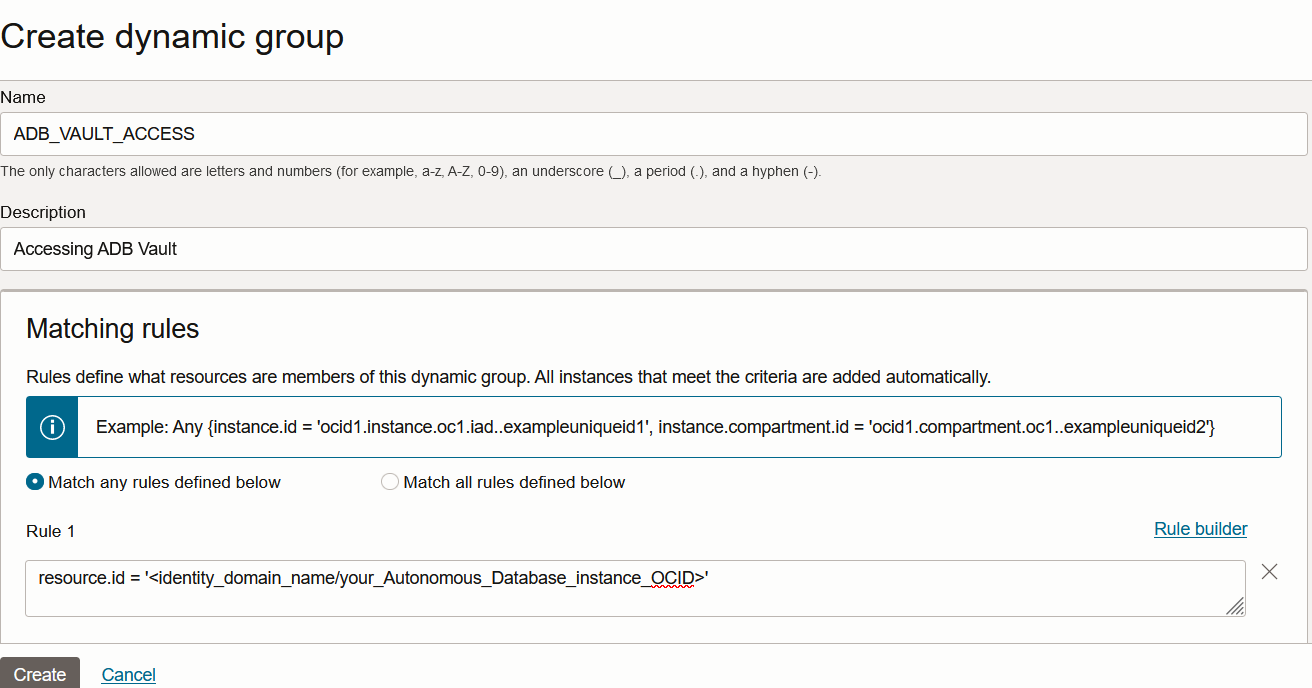
  4. Create a Dynamic Group to provide access to the vault in your Autonomous Database instance.
    1. Click Identity & Security in the OCI Console.
    2. Click Domains under Identity and select the required domain.
    3. Click Dynamic groups under Identity domain.
    4. Click Create dynamic group.
      1. Enter Name and Description.
      2. Add a Rule to specify that your Autonomous Database instance is part of the dynamic group as shown in the following code:
        resource.id = '<your_Autonomous_Database_instance_OCID>'

        In case the tenancy uses an identity domain, then you need to also include the domain name as shown:

        resource.id = '<identity_domain_name/your_Autonomous_Database_instance_OCID>'


        Note that you can find the database OCID on the Autonomous Database details page under General Information in the OCID field.

        See Use Resource Principal with Autonomous Database for more information on how to define a rule.

      3. Click Create.
  5. Create a Policy for the dynamic group (created in the previous step) to allow access to the vault, keys, and secrets.
    1. Click Identity & Security in the OCI Console.
    2. Click Policies under Identity.
    3. Click Create Policy.
      1. Enter Name and Description.
      2. Select the required Compartment.
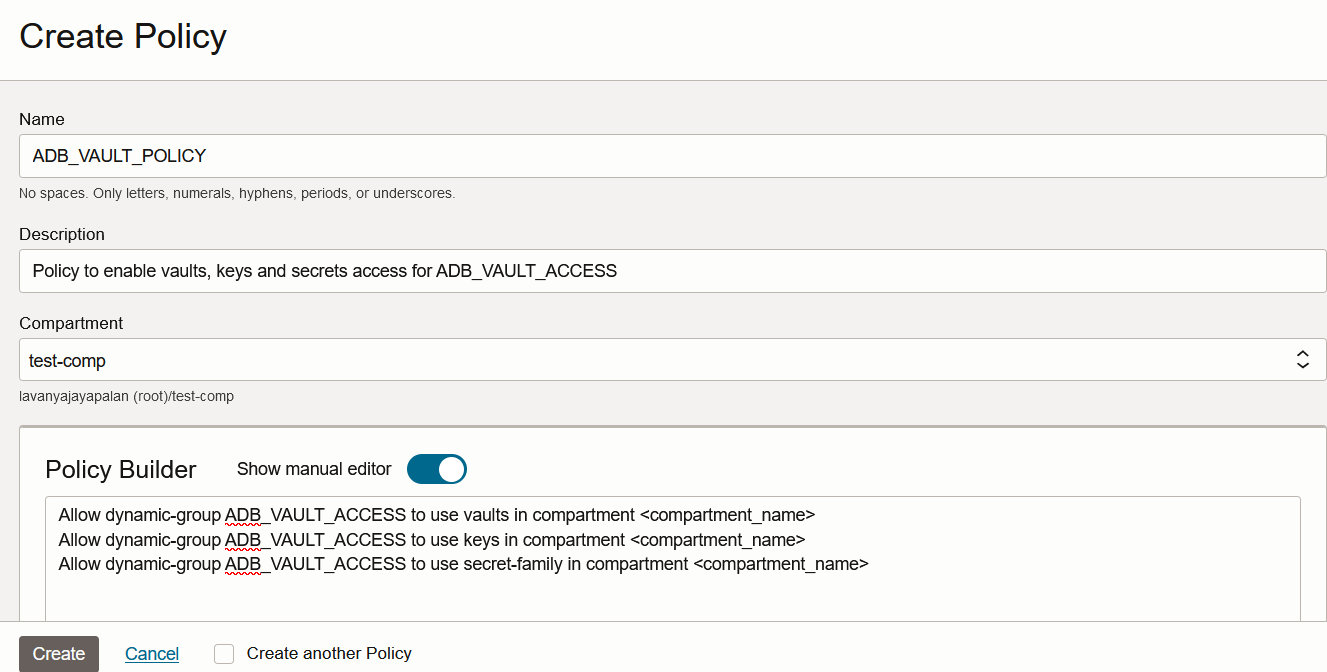
      3. Add the policy statements (as shown in the following figure) using the Show manual editor option:


        Description of setup_policy.png follows
        Description of the illustration setup_policy.png

      4. Click Create.
  6. Copy the OCID for the secret from the Secret Details page under Secret Information in the OCID field.
  7. Login to Graph Studio as the ADMIN user, and enable the resource principal (see Use Resource Principal to Access Oracle Cloud Infrastructure Resources) by running the following code in a SQL paragraph.
    %sql
    BEGIN
        DBMS_CLOUD_ADMIN.ENABLE_RESOURCE_PRINCIPAL();
    END;

    Alternatively, you can connect to Database Actions on your Autonomous Database instance, and run the preceding code on the SQL page.

  8. Attach the secret credentials to Graph Studio by following the steps in Attach Vault Secret Credentials to Graph Studio.