Consolidated Income Statement Case Study Task: Add the Percent of Change Calculated Column
When you planned your consolidated income statement, you decided that you want to reverse the sign of the revenue accounts so that the output shows revenue balances as a positive value instead of in the negative values in which the revenue balances are stored in the EnterpriseOne tables.
The steps in this section describe one set of steps to create a formula to achieve the desired results. In your production environment, you might choose to use a different set of steps to create the formula.
To add the percent of change calculated columns for the Revenue section:
Locate the Last Year to Date Actual column in the Revenue section of the Data Model.
Place a copy of the Last Year to Date Actual column in the far right-side of your layout.
Change the column name to % of Chg.
Select the cells in the column, and then click the Define Custom Formula icon in the Formula section of the Column tab.
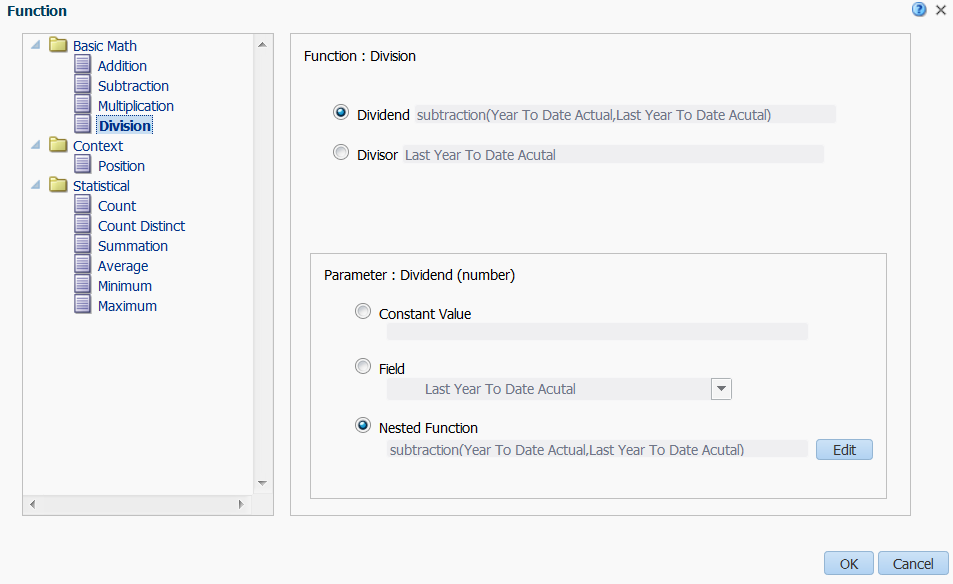
In the Function window, select Division.
In the Function: Division section, select the Dividend option.
In the Parameter: Dividend section, select the Nested Function option, and then click the Edit button next to the Nested Function option.
The system opens a second Function window.
On the second Function window, select Subtraction from the Basic Math section.
Select the Minuend field, and in the Parameter: Minuend section, select Year to Date Actual from the appropriate section in the list for the Field option.
Click OK on the Function form.
The system closes the second Function window and returns you to the first Function window.
Click OK on the Function window.
After you complete the steps for the percent of change column, your formula should look like the following image:
Click the Arrow for the Data Formatting option on the Column tab, and then select Percent.
Change the column width to 50.
You access the Appearance section on the Properties tab to change the width of the column.
Remove the grid lines.
Click the Save icon to save your layout.
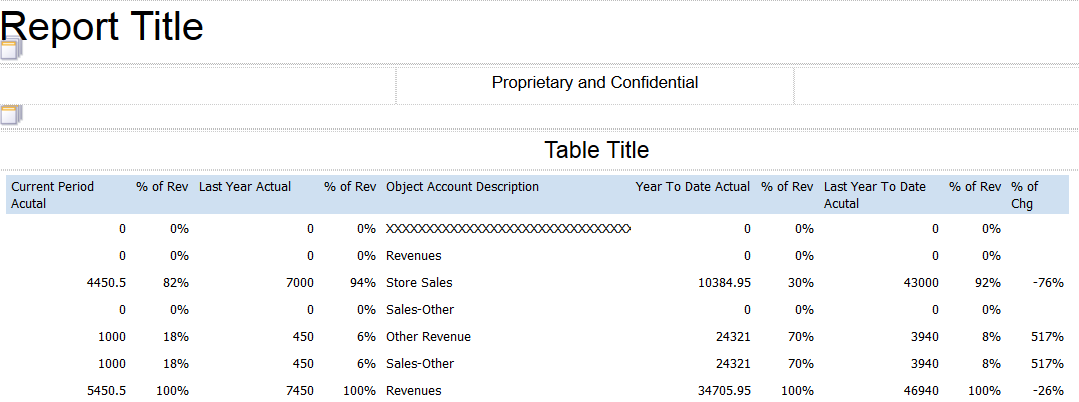
After you complete the steps in this section, you layout will look like the following image: