Installing Oracle WebCenter Portal
When you install the WebCenter components on your machine, be sure to enter the correct data (machine name, ports, and so on) for your configuration. When you download the software from the Oracle Software Cloud, note the directories to which you downloaded the software and replace the directory location specified in this chapter with your directory locations. Be sure to install the executable files for your platform.
Use these steps to install Oracle WebCenter Portal 11.1.1.8.0.
Download and unzip the WebCenter installation file:
Oracle WebCenter Portal 11g (11.1.1.8.0), part number = V38995-01
Execute the install process from the Disk1 folder:
On Windows: setup.exe with Run as administrator option
On UNIX: ./runInstaller as a non-root user
Enter the JRE location when prompted.
Review the Welcome page information. Click Next.
Select your Software Updates option.
The installer performs prerequisite checks.
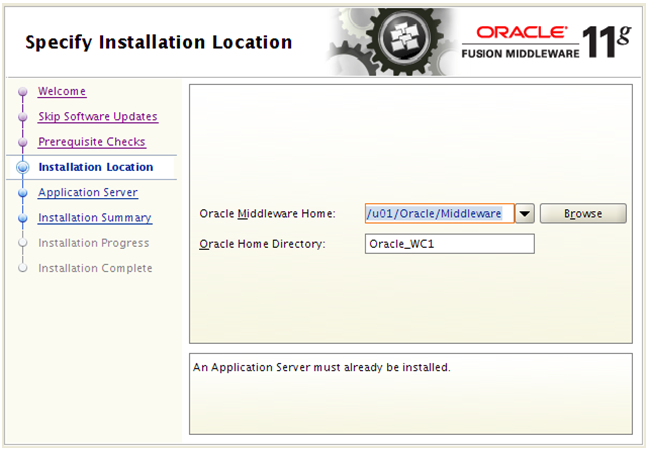
Enter a Middleware Home and a WebCenter Home Directory.
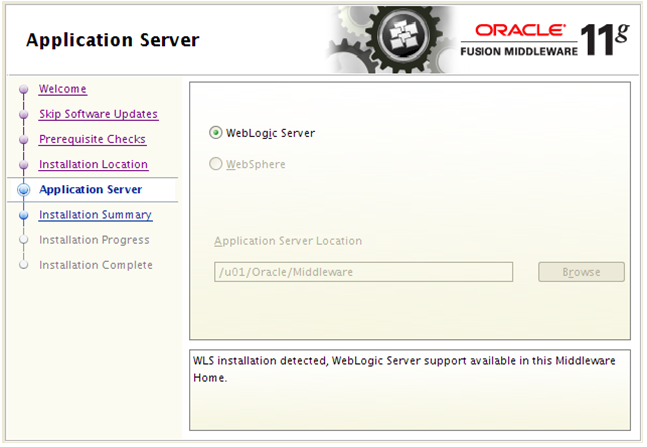
Select WebLogic Server as the application server and click Next.
Note:EnterpriseOne supports only a WebLogic Server as the application server.
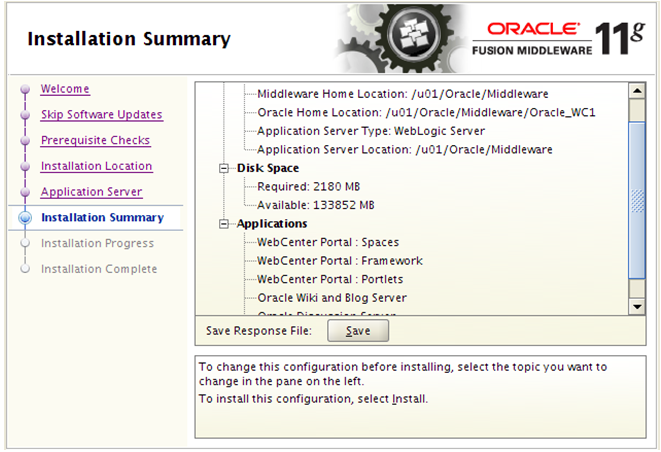
Review the Install Summary.
Click Install to start the install process.
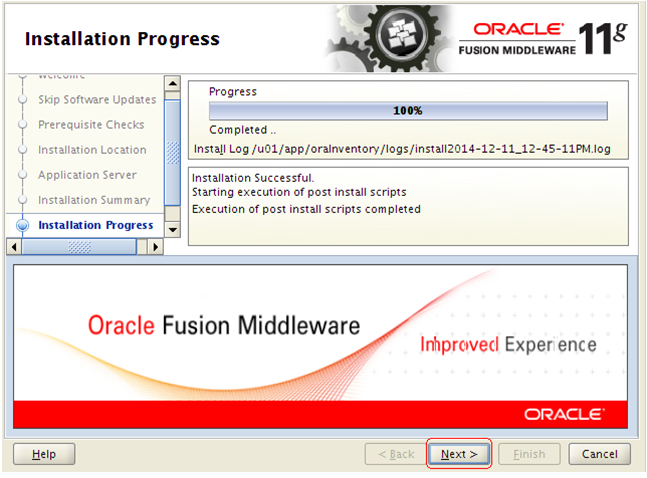
Click Next to continue when the install has completed.
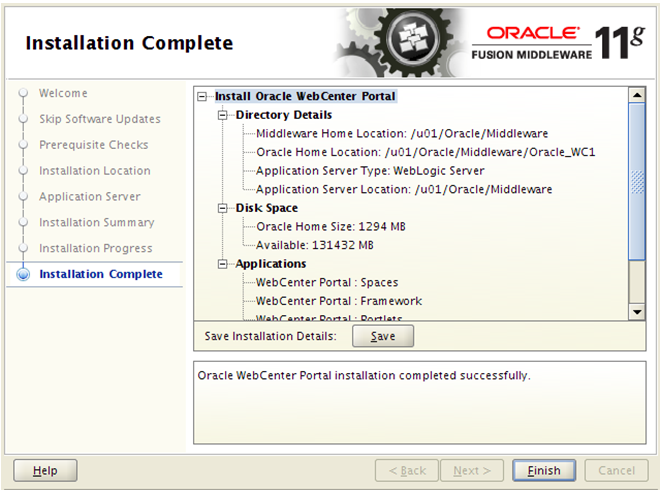
Click Finish when the install process is completed.
Run config.sh (.cmd) from <MW_Home>/Oracle_WC1/common/bin folder to create the WebCenter domain.
Select Create a new WebLogic domain option and click Next.
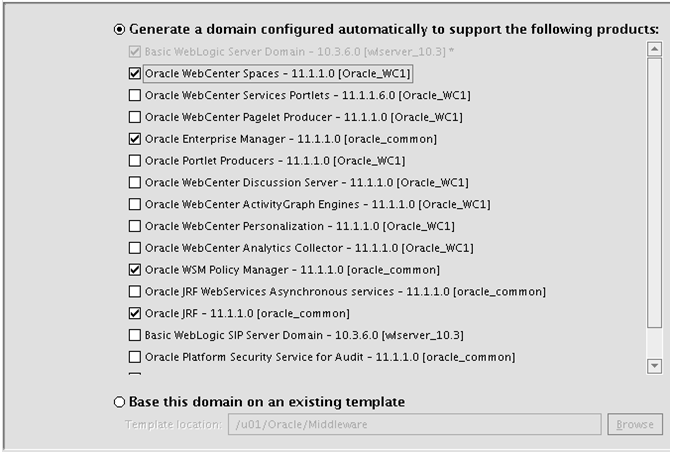
Select Oracle WebCenter Spaces to be part of this domain. Other required products will be selected automatically. You can add more products later if needed.
Click Next.
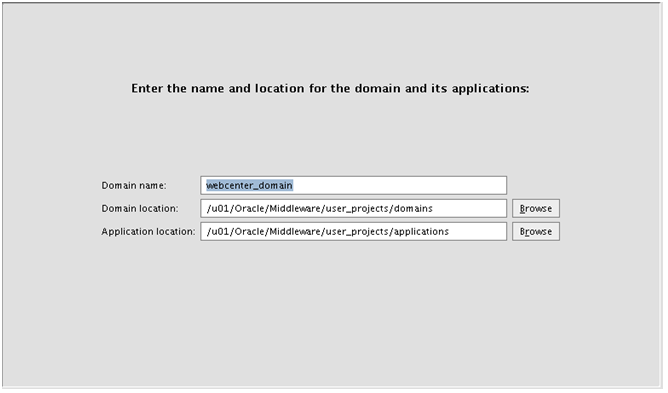
Enter the domain name. For example: webcenter_domain.

Enter the domain Administrator user and password.
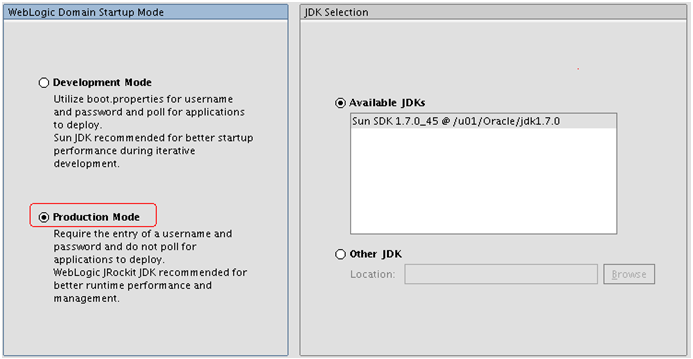
Select Production Mode and verify the available JDK.
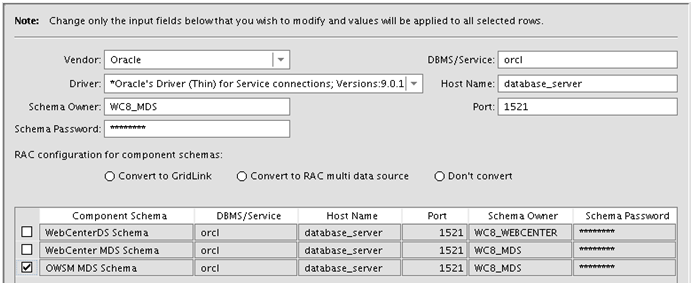
Enter the JDBC Component Schema database connection.
Note:If you are not using the default Schema Owner, you must modify them one line at a time.

Test the JDBC Schema connection.
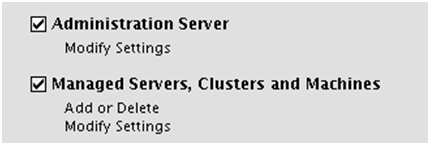
Select the Administration Server and Managed Server, Cluster and Machine.
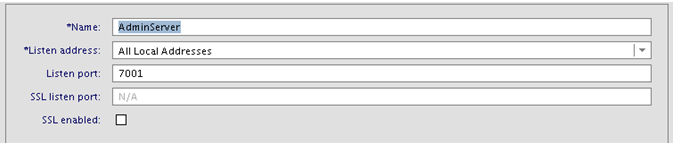
Enter the Administration Server name and Listen port.

Accept the default Managed Server name and port.
Click Next to skip the cluster configuration.

From the Configure Machines page, select your platform and click Add to create a Machine name.
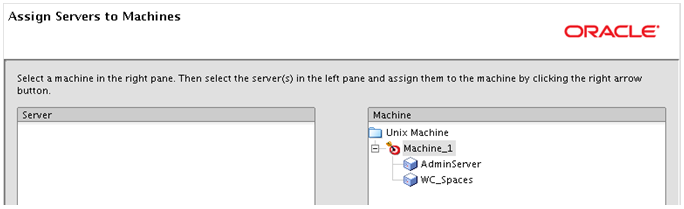
Assign Server to the Machine by moving the server in the left to the right under the Machine name.
Review the Configuration Summary and click Create.

Click Done when the domain is created.