Installing WebLogic Server
Prior to installing WebLogic Server, ensure an appropriate JDK is installed. For details, refer to the preceding section entitled: Installing a JDK for WebLogic Server.
This procedure assumes you followed the instructions in the previous section of this chapter for obtaining the WebLogic installer and that you extracted the download.
The following installation screen shots are captured during installation of WebLogic Server 12.1.3. In case of WebLogic Server 12.2.1 installation, the screens will be similar with different WebLogic Server version.
To install WebLogic Server on the Development Client:
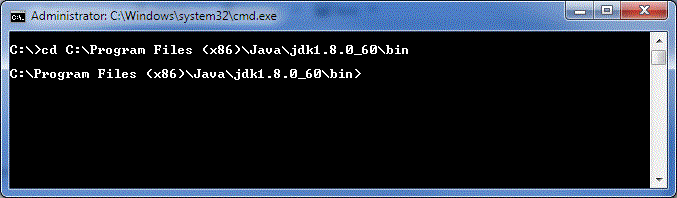
Open a command prompt window with Run as Administrator.
Run this command in the command prompt window to change directory:
cd
                    <Java_installation_dir>\bin
where
<Java_installation_dir>is the directory where you installed the JDK.For example:
For more details on supported versions of the JDK, refer to the section of this chapter entitled: Installing a JDK for WebLogic Server.
Run this command in the command prompt window to launch the WebLogic Server installer:
For WebLogic Server 12.1.3:
java -jar
                        <path_to_wls_file>\fmw_12.1.3.0.0_wls.jar
For WebLogic Server 12.2.1:
java -jar <path_to_wls_file>\fmw_12.2.1.0.0_wls.jarFor WebLogic Server 14.1.1:
java -jar <path_to_wls_file>\fmw_14.1.1.0.0_wls.jarFor example:
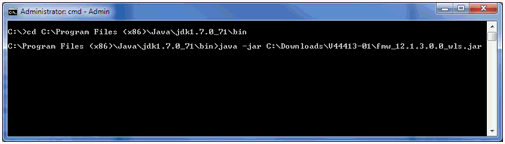
The Java command executes and displays the Welcome screen for the Oracle Fusion Middleware.
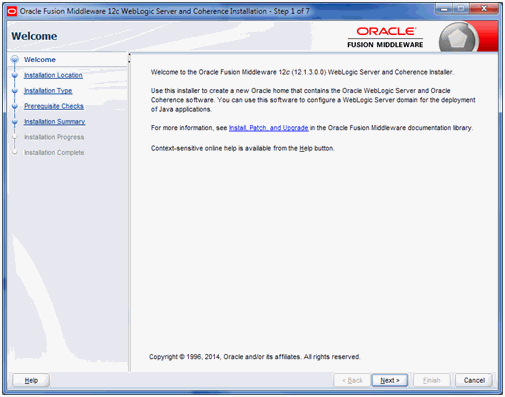
On Welcome, click the Next button.

On Installation Location, in the Oracle Home field, enter or browse to a path into which you want to install WebLogic Server.
Important:
Oracle recommends that you install WebLogic into its own root directory and not into any other Oracle base directory used by another Oracle product, such as
c:\ORACLE. For example, you should specify a directory such asc:\WebLogic\WLS12c.Note:You can choose any install location; however, using a location that contains "space" characters in the path may cause problems.
Click the Next button.
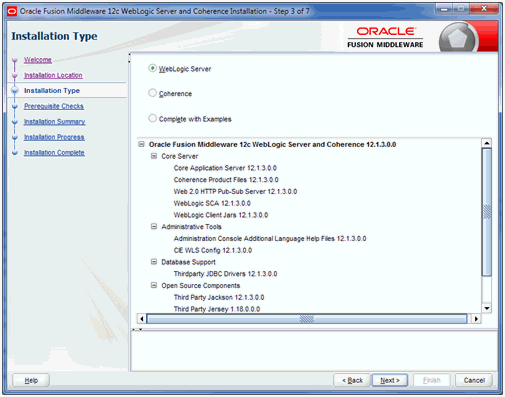
On Installation Type, select this radio button:
WebLogic Server
Click the Next button.

On Prerequisite Checks, verify the installer checks complete successfully.
Click the Next button.
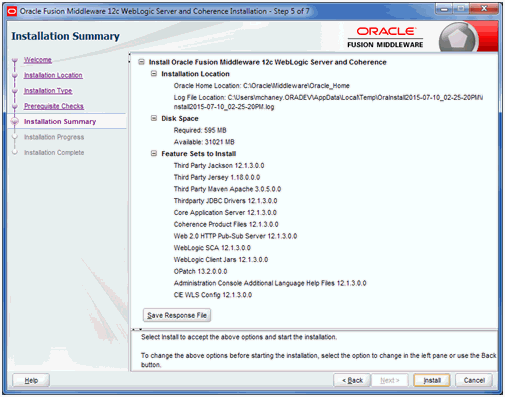
On Installation Summary, review the summary information.
Click the Next button.
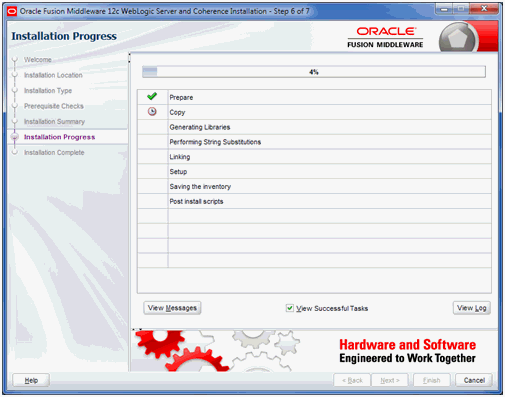
The installer displays the Installation Progress as a percentage in the progress bar.
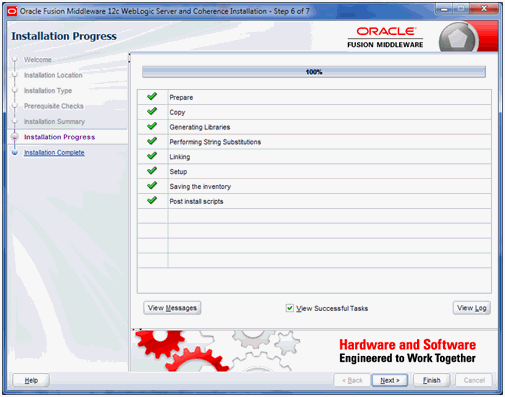
On Installation Progress, the installation is complete when the progress bar indicates 100%.
Click the Next button.
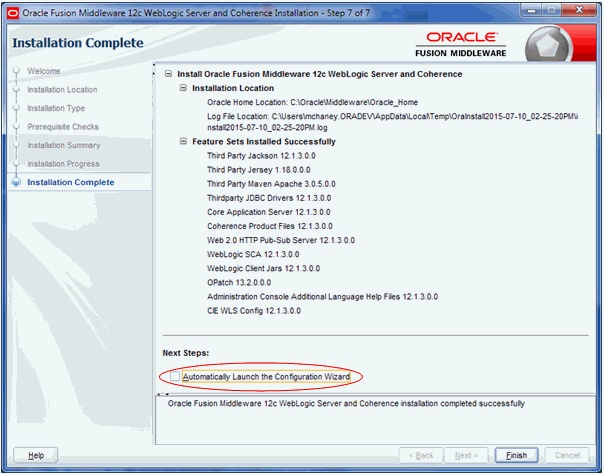
On Installation Complete, turn off this checkbox:
Automatically Launch the Configuration Wizard
Click the Finish button.
There is no additional manual configuration of the WebLogic Server. The remainder of the requisite configuration is handled programmatically by the WLSH4A installer.
Troubleshooting. If after you click the Finish button you receive the following screen, you did not turn off the checkbox in the previous screen. To proceed you can simply click Cancel button to exit.
WebLogic 12.2.1. . You must apply a mandatory Opatch after WebLogic Server 12.2.1.1.0 has been successful installed. This is described in the Oracle support document entitled:
E1: WLS: For JD Edwards EnterpriseOne HTML Server to run Oracle WebLogic Server 12.2.1.1.0 a Mandatory Patch is Required (Doc ID 2192375.1)