Installing WebSphere 7.0 from a workstation (recommended)
To install WebSphere 7.0 from a workstation:
Insert the CD for WebSphere Application Server Network Deployment v7.0 for i5/OS into the CD ROM drive of any PC with a Windows operating system.
The launchpad will start if autorun function is turned on. If not, navigate to the
x:\WASdirectory (where x is the letter of the CD ROM drive), and start the launchpad by executing theinstall.exefile.Click the link entitled: Launch the installation wizard for WebSphere Application Server Network Deployment.
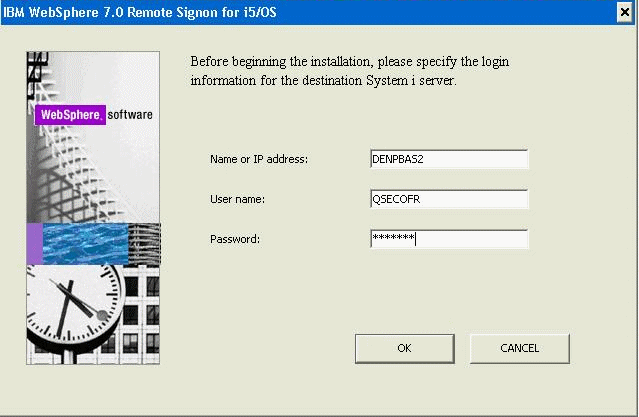
When prompted by the wizard, enter the name of the machine, username, and password. For example:
Field
Value
Name
DENPBAS2
Username
QSECOFR
Password
YOUR_QSECOFR_PASSWORD
On the login screen, after you have entered the login credentials, click the OK button to login.
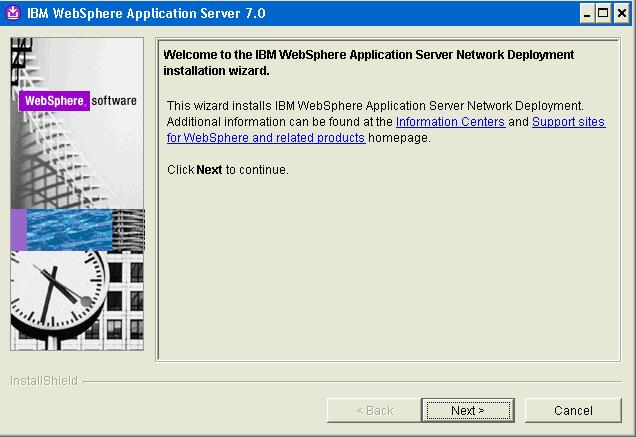
On the Welcome screen, click the Next button.

On Software License Agreement, accept the License Agreement and click the Next button.
The installer performs a System Prerequisite Check.
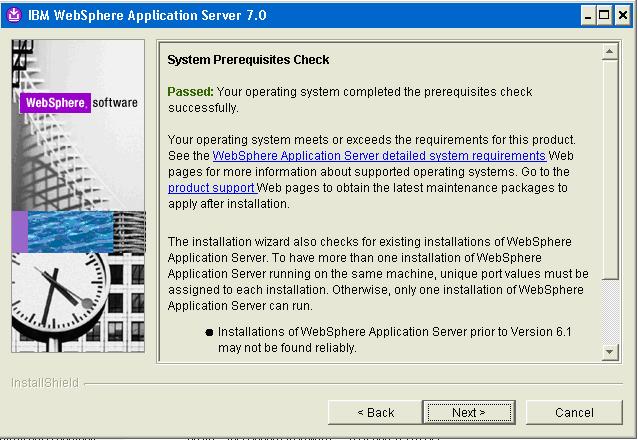
On System Prerequisites Check, if the system indicates the check passed click the Next button.

On Detected JDKs, select the radio button for IBM Technology for JDK6 - 32bit.
Note: The IBM WebSphere 7 installer detects and displays the available JDKs on the IBM i machine. For this installation intended for use with JD Edwards EnterpriseOne you must choose IBM Technology for JDK 6 - 32 bit. After installation, you should only run WebSphere 7 in the 32-bit mode only. For more information, refer to the section of this guide entitled: Enabling IBM Technology for 32-bit Java Virtual Machines.Click the Next button.
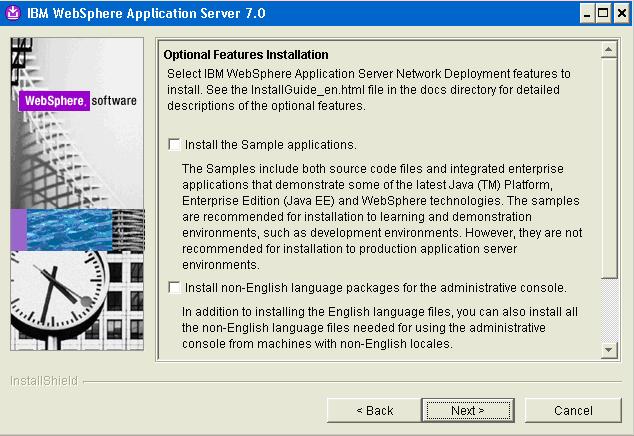
On Optional Features Installation, ensure that the Install the Sample applications checkbox is cleared. Install non-English language support as necessary.
Click the Next button.
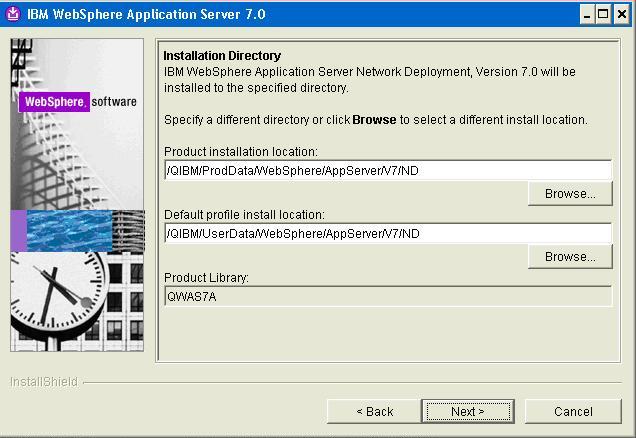
On Installation Directory, accept the default installation location, or enter a different path and click the Next button.
Tip: It is recommended that you select the default installation location unless otherwise required.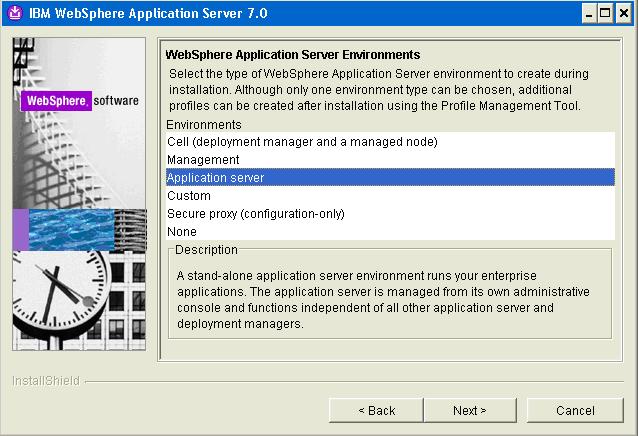
On the WebSphere Application Server Environments, select Application Server to create an Application Server profile. This will create a standalone application server profile called default.
Note: If you are setting up in a federated nodes (that is, cell) configuration, you can create one of two basic types of environments:Cell (deployment manager and a managed node)
Management > Deployment Manager
Click the Next button.
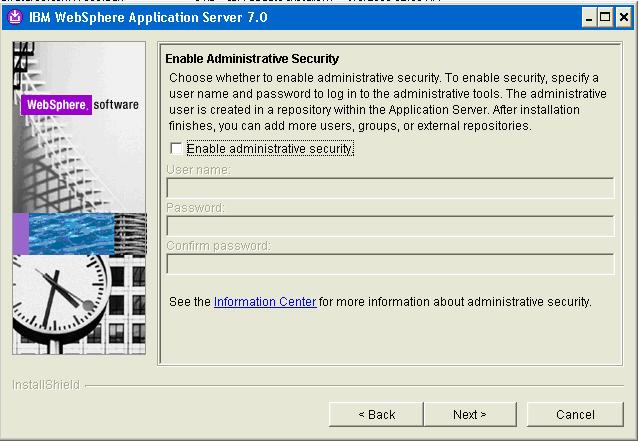
On Enable Administrative Security, the checkbox for the application server profile is checked by default. You can choose either to:
Clear the checkbox for Enable administrative security to disable server administrative security, or
If the checkbox is enabled for Enable administrative security, server administration security will be enabled and you must enter the User ID and Password
When you enable the checkbox the fields on this screen are enabled and you must enter valid credentials for the WebSphere administrator for this installation.
Tip: JD Edwards EnterpriseOne Business Services Server. If you are using these instructions to install a JD Edwards EnterpriseOne Business Services Server into this WebSphere instance, you must enable administrative security.Click the Next button.
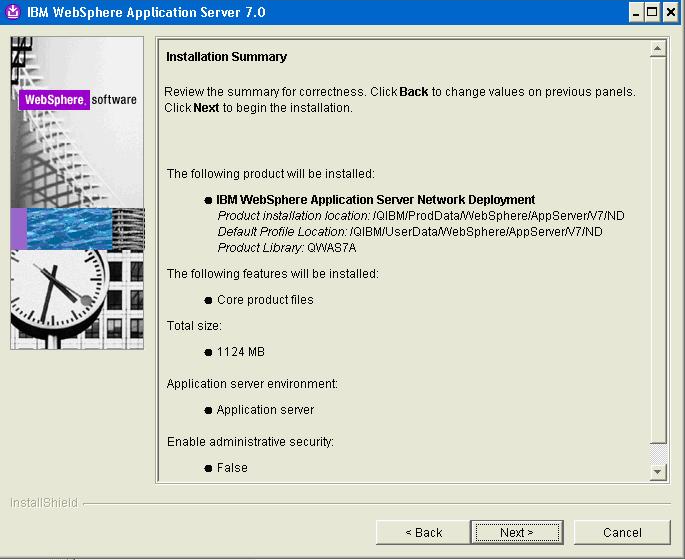
On Installation Summary, review the information summary and click the Next button to start the installation process.
Tip: The installation process can take a while to complete and the time taken is dependent on the sizing of your IBM i hardware.
On Installation Results, you can click on the AboutThisProfile.txt link to see the port assignment for this profile. Note the Administrative console port on which AppSrv01 will be running (for example, 9060). You can use Profile Management Tool to create as many profiles as you like. Each profile is a separate instance of the WebSphere running on a different set of ports.
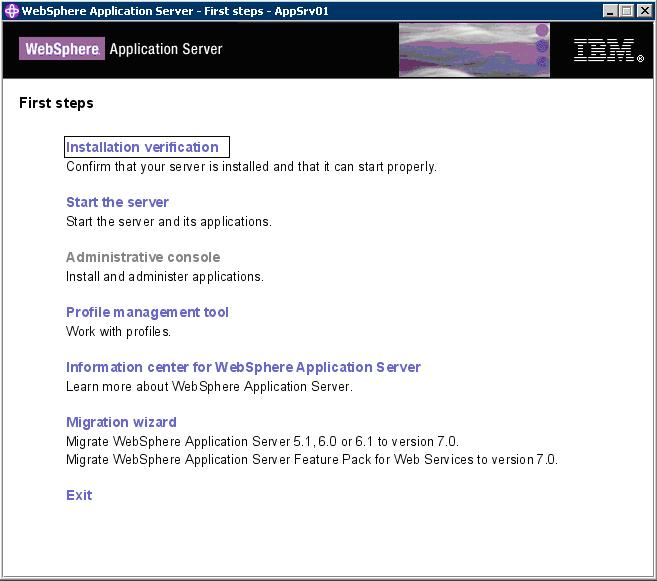
The First steps menu is launched.
On the First steps menu, click Installation verification to verify the installation.
After you click Installation verification, you can verify the success of the installation by reviewing the contents of the resulting display. For example:
Ensure that the Installation Verification utility completes with a success message.
Close the First steps output and click Exit on the First steps screen.
This completes the profile creation activity.