Configuring the WebSphere Plug-in for a Standalone Profile
To configure the WebSphere plug-in for a standalone profile:
Click on the Manage tab.
In the left pane, click the WebSphere Application Server link.
Note: If the link is not visible, use the slider bar to scroll down.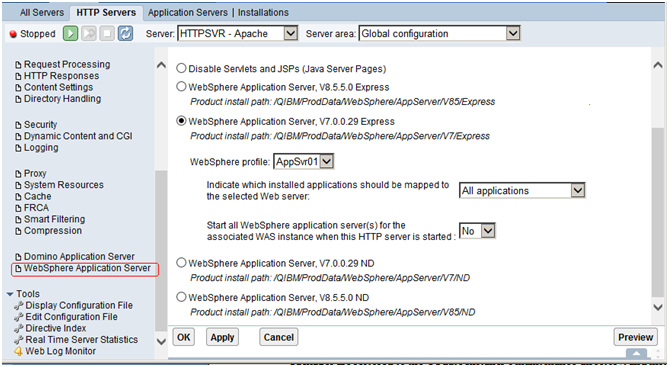
On WebSphere Application Server, on the General tab, select the WebSphere Application Server to which you want to associate.
Select the profile from the profile drop down box.
In the field Indicate which installed applications should be mapped to the selected Web server:, use the pulldown to select All Applications.
In the field Start All WebSphere application server(s) for the associated WAS instance when this HTTP server is started:, you can accept the default value of No in the drop down box.
Click the Apply button.
The program configures the plug-in for WebSphere, and returns to the first default screen.
Click the OK button.
The configuration can take several minutes to complete.
The above steps enable the HTTP server to pass requests to WebSphere.
Access the WebSphere Administration Console. For example: (for example at ), and click on the servers -> webservers.
http://<server_name>:9060/adminOn the WebSphere Administration Console, click on Servers > Webservers.
The program should display the new webserver you created. By default, the server is named:
IHS_<HTTP_SERVER_NAME>If you following the recommendation in this procedure, the webserver is named:
IHS_HTTPSVR