Exporting Business Data from a Configuration Program
Enter P01RS01 in the Fast Path.
On the Configuration Utilities form, select the Business Data tab and then select the type of business data that you want to set up and configure.
For business units, accounts, and Financial AAIs, continue to step 3. Otherwise, continue to step 4.
On the <name of configuration> form, do one of the following:
Enter a code from UDC 01/LP in the Language field. If you have translated descriptions, this field is required.
Leave the Language field blank if descriptions are in your domestic language only.
On the <name of configuration> form, click Find to view the data.
If applicable, the form displays translated descriptions for the language identified in step 3.
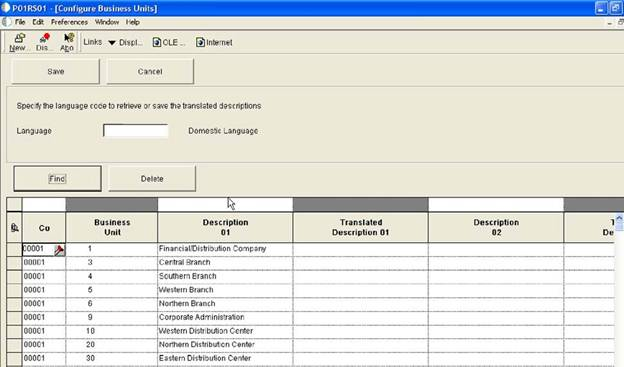
In the grid, select and highlight all rows.
You can select and highlight a range of rows; however, JD Edwards recommends that you select all rows when you configure business data based on a country-specific configuration solution.
To export data:
(Windows) Right-click in the grid, select Export and then Microsoft® Excel®.
(Web) Click the up arrow that is on the right side of the form above the grid.
Although there are four formats available, only Microsoft® Excel® and Lotus 1-2-3 have both export and import capabilities.
Under Options:
If you select Export to a New Workbook, complete steps 8 through 13.
If you select Export to an Existing Workbook, complete steps 14 through 21.
Export to a New Workbook (spreadsheet)
On the Export Assistant form, select the Export to a New Workbook option.
Specify the spreadsheet cell in which to begin the data export.
The default value A1 begins with the column headings in A1 and the data in A2.
Click Continue.
The system creates a spreadsheet with the name Book1 and loads the data into Sheet2.
Add, revise, and delete data, as required.
From the File menu in the spreadsheet, select Save As and enter a new file name.
Keep track of the location of the saved file so that you can easily retrieve the file when you import the data.
Export to an Existing Workbook (spreadsheet)
On the Export Assistant form, select the Export to an Existing Workbook option.
Enter the path for the existing spreadsheet or click Browse and locate and select the file.
Specify the spreadsheet cell in which to begin the data export.
The default value A1 begins with the column headings in A1 and the data in A2.
Specify a worksheet name.
When you export data, the system loads the data in Sheet2. If you do not want to override the existing data, specify a different worksheet name, such as Sheet3 or Sheet4.
Click Continue.
The system loads the data in the worksheet that you specified in the previous step.
Add, revise, and delete data, as required.
Save the spreadsheet.
Keep track of the location of the saved file so that you can easily retrieve the file when you import the data.