Creating Assignments
Oracle recommends that you create all assignments for a process or allocation in sequence to ensure that all elements are captured. After you create all assignments, the model structure is validated to verify that no appropriate driver selections are missing.
To create assignments:
- From Oracle Hyperion Enterprise Performance Management Workspace, select Navigate, then Applications, then Profitability, and then select the application that you want to view.
- In an open model, from
Task Areas, select Manage Allocations, then Assignments. - On the Assignments screen, select a POV for the selected model, and then click Load the POV status
 .
.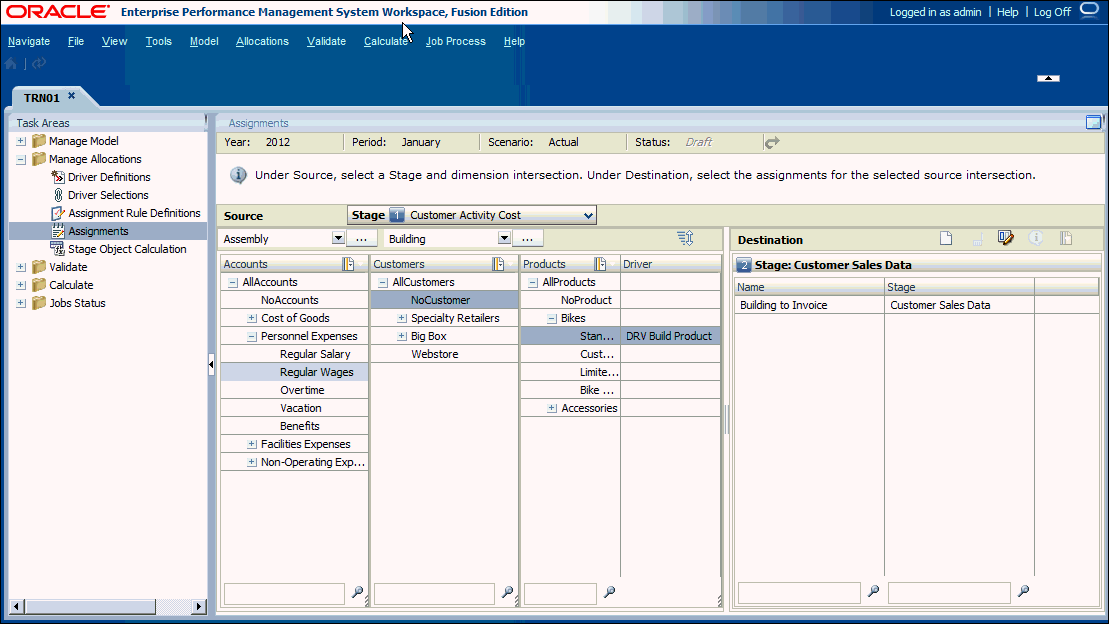
- Under Source, select a member from each dimension to create the intersection for the source of the assignment. The Source stage is pre-selected.
The first two dimensions for the source stage are displayed directly above the displayed dimensions, while the last three dimensions for the source stage are displayed with full member lists.
Note:
To find a member in the hierarchy, type the member name in the text box at the bottom of the column, and then click Search.
- Optional: To rearrange the dimensions that are displayed on the Assignments screen, click Reorder Dimensions
 .
. Use the arrow keys to move the dimensions up or down into the required sequence, and then click OK. To revert to the original sequence, click Use Default Order.
- Optional: Under Destination, select Member Selector
 to filter the list of available destinations:
- Select Filter
 to display the Filter dialog box.
 - Enter the filter criteria in Name or Stage, and then click OK.
Enter the exact name of the required item, or use a trailing asterisk (*) as a wild card to select a range of items, or a trailing question mark (?) to select a single character. For example, to find all destination assignment rules with names that begin with the letter "M", enter "M*" in the Name field. Entering the asterisk before the letter does not work, for example "*M."
- Select Filter
- Under Destination, click Open Assignment Rules Management
 .
.
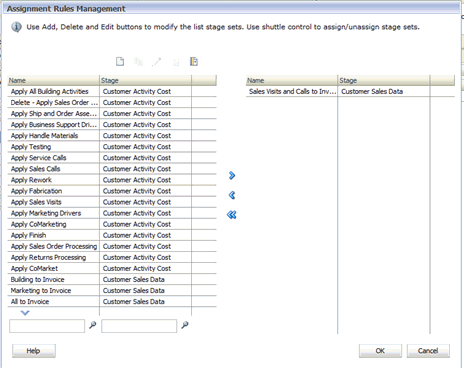
- On the Assignment Rule Management screen, click Add new assignment rule
 . See Creating Assignment Rules
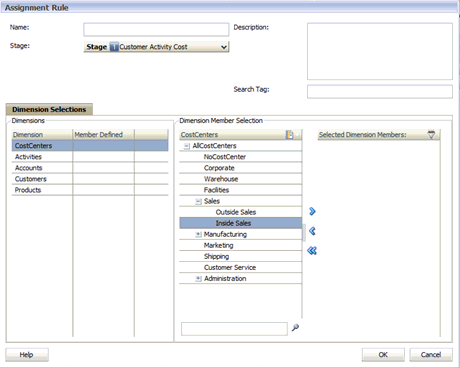
- On the Assignment Rule screen, enter details for the new assignment rule:
-
In Name, enter the name for the new assignment rule.
-
From Stage, select the stage.
-
Optional: In Description, enter a brief description of the purpose of the new assignment rule.
-
Optional: Enter a Search Tag to help you locate the assignment rule at a later time.
-
- Under Dimensions and Dimensions Selection, use the arrow keys to move the dimension members to the Selected Dimension Members column.
- Optional: To filter the Destination stage on the Data Filters tab:
- From Stage, select the Destination stage.
The Data Filters tab is displayed.
- Click the Data Filters tab.
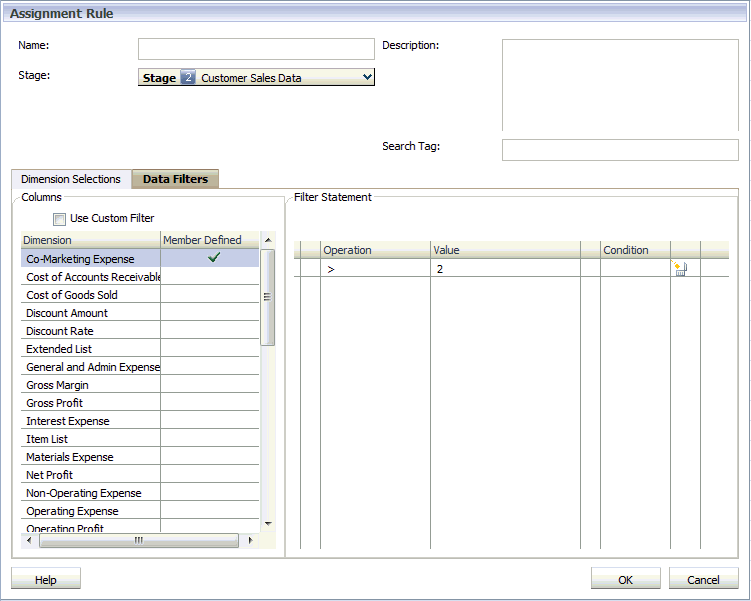
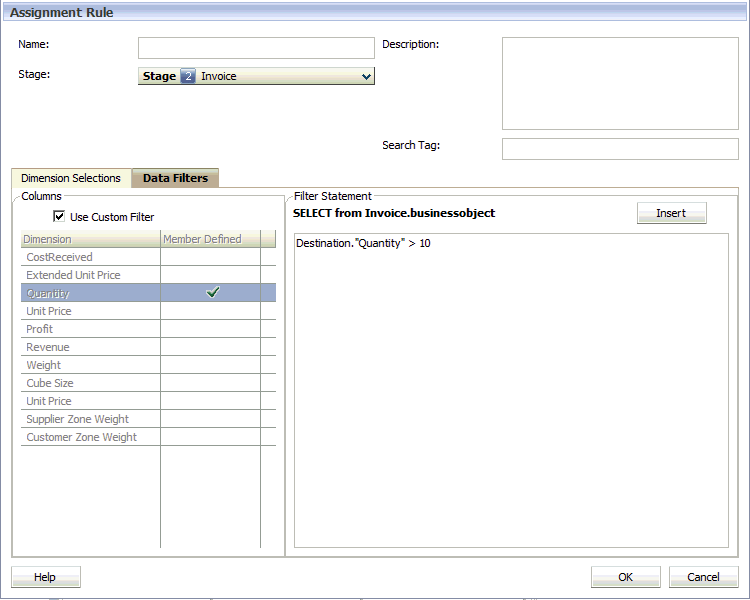
- On the Data Filters tab, under Columns, select the dimension to be used for the assignment rule.
The Filter Statement is displayed in the right pane. For example, SELECT from Customer Zone Weight.
- Optional: To create a standard type of filter, double-click each field to enter the parameters for the filter:
-
Under Operation, select the type of operation to be used, such as <, >, Equal, Not Equal.
-
Under Value, double-click the field to enter the appropriate value.
-
Under Condition, double-click the field to select OR or AND from the drop-down list to append additional filter statements.
-
- Optional: To create a custom filter, click Use Custom Filter. A Filter Statement and blank edit pane are displayed, so you can enter a mathematically and syntactically correct SQL formula.
- From Stage, select the Destination stage.
- Click OK.
- On the Assignment Rules Management dialog box, select stage sets using the arrow keys, and then click OK.
The Destination column is populated with the selected stage sets.
