Oracle Server X7-2 Platform Preparation
Oracle Communications produces a variety of software products that run on the Oracle Server X7-2 platform, including Oracle session delivery applications.
Use your Hardware documentation to install and establish system management via ILOM. Then use the steps below to prepare the Oracle X7-2 for session delivery software installation.
Note:
The ILOM Cable Connection procedure also displays ILOM cabling.- Confirm applicable firmware
on the server.
- To check the firmware versions installed in the server, go to the Oracle Integrated Lights Out Manager (ILOM) web interface, and navigate to System Information, Firmware.
- Software and firmware
versions qualified for use with Oracle Session Delivery products include:
- ILOM—v4.0.2.20.b
- BIOS— 41.02.13.00
- Upgrade or downgrade the firmware on the server as necessary. Go to https://docs.oracle.com/cd/E81115_01/index.html for ILOM upgrade instructions.
- Configure the BIOS settings.
(Settings navigation may differ based on the BIOS version.)
- Observe the boot procedure, logged to the console during bootup, and use the documented key sequence to interrupt the boot and display the BIOS configuration dialogs. For example, pressing the F2 key is a common way to enter BIOS configuration from a terminal application that supports function keys.
- Navigate to the Boot menu and, depending on the software distribution you are using, set the USB or CD as the first device followed by the disk controller. (Navigation: Boot)
- Disable Hyper-Threading. (Navigation: Advanced, Processor Configuration, Hyper-Threading)
- Disable CPU power limit. (Navigation: Advanced / CPU Power Management Configuration)
- Disable C6 Reporting. (Navigation: Advanced / CPU Power Management Configuration, CPU C6 report)
- Change Energy Performance to Performance. For example, set "ENERY_PERF_BIAS_CFG" mode to "PERF". (Navigation: Advanced / CPU Power Management Configuration, Energy Performance)
- To decrease boot up
time, Oracle recommends disabling Intel PXE Boot Agent for both onboard and NIC
ethernet ports. Press F2 and navigate to Advanced, Network Stack Configuration.
Then disable IPv4 PXE support.
Note:
PXE boot is not supported in this release. - Reboot the server.
- Initialize the HDD.
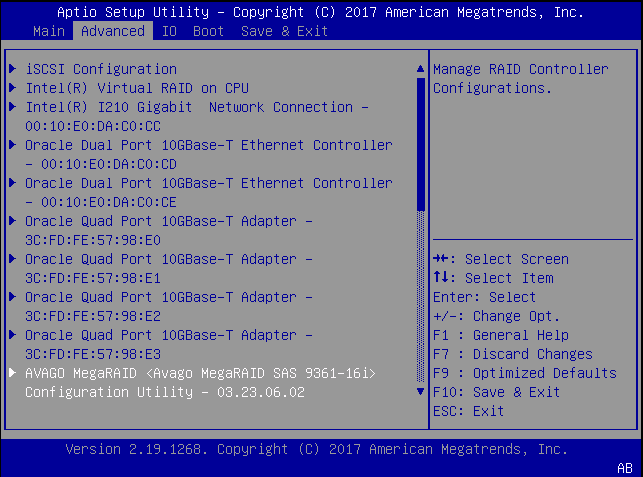
- Open the ILOM remote
system console to observe the system's boot cycle, and interrupt the boot cycle
to enter the MegaRAID configuration utility.
Figure 3-1 Selecting RAID Configuration
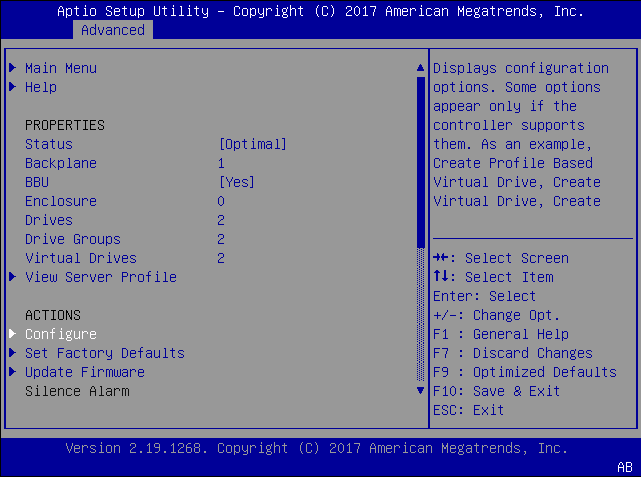
- Navigate the utility to
establish your virtual drive's operation, initially including the
Configure action.
Figure 3-2 Begin RAID Configuration
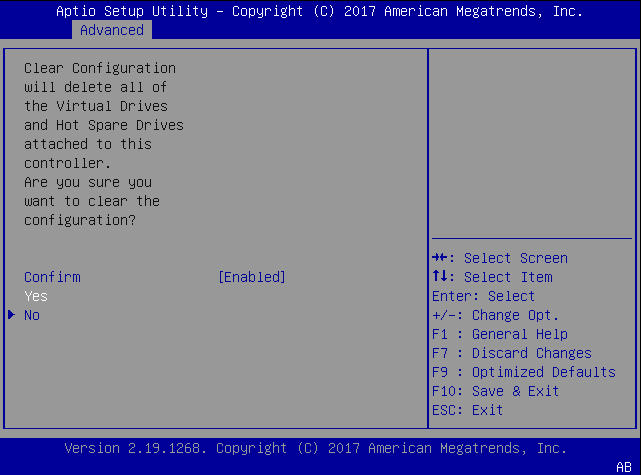
- Clear the configuration,
regardless of the initial state.
Figure 3-3 Clear Any Existing RAID Configuration
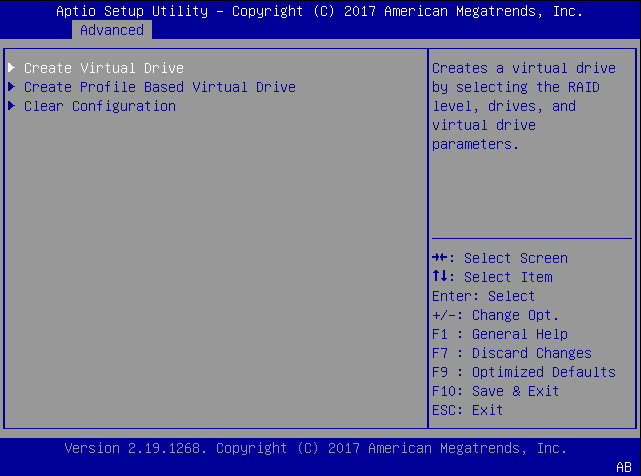
- Access the menu from
which you create a virtual drive.
Figure 3-4 RAID - Create Virtual Drive
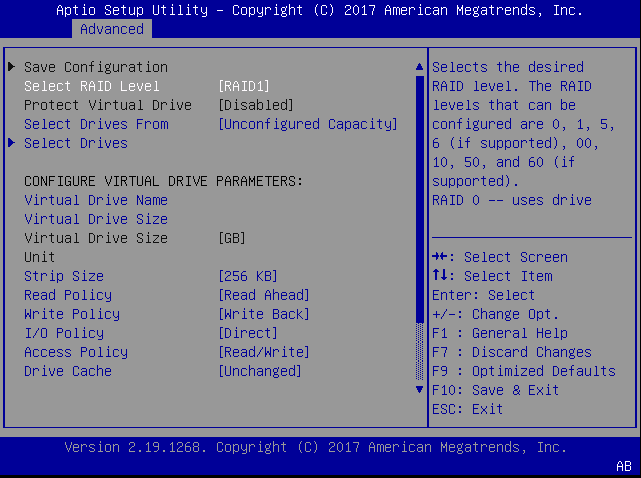
- Set the RAID level to
RAID-1.
Figure 3-5 Set Drive to RAID1
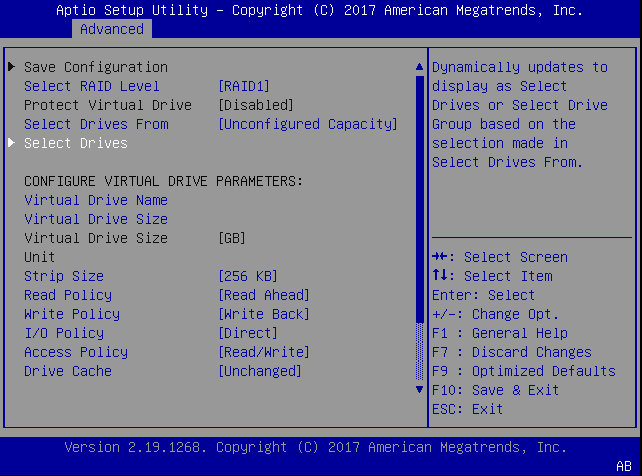
- Select your drives.
Figure 3-6 RAID - Select Drives
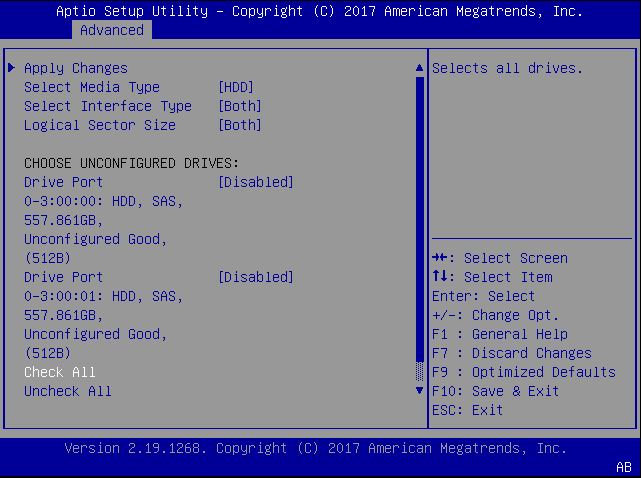
- It is common to select
all drives at this point.
Figure 3-7 Select All Drives
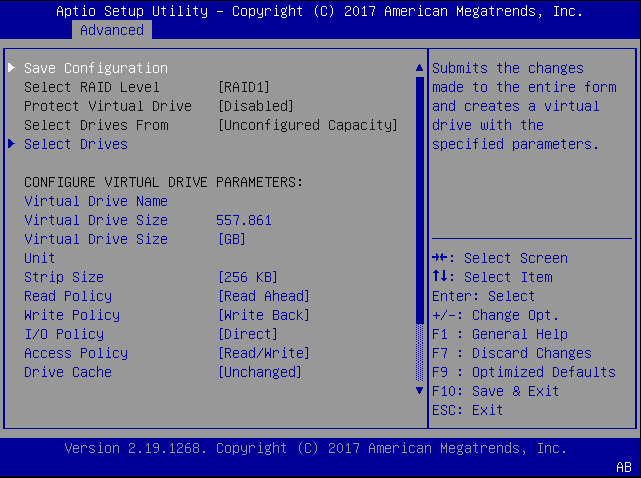
- Save your RAID
configuration.
Figure 3-8 Save RAID Configuration
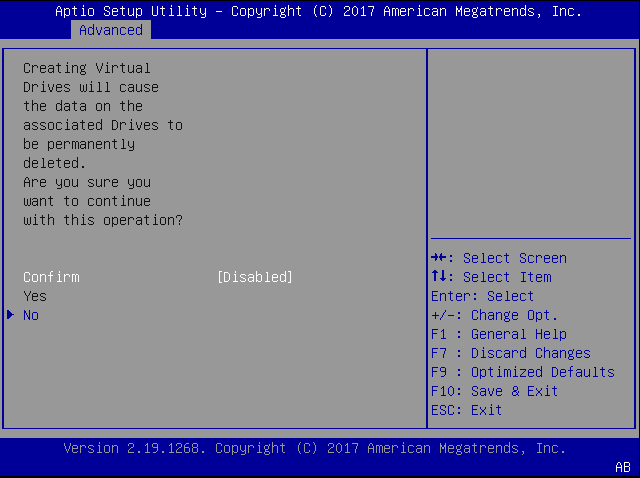
- The system allows you to
Confirm your configuration and continue with initialization.
Figure 3-9 Initialize RAID Configuration
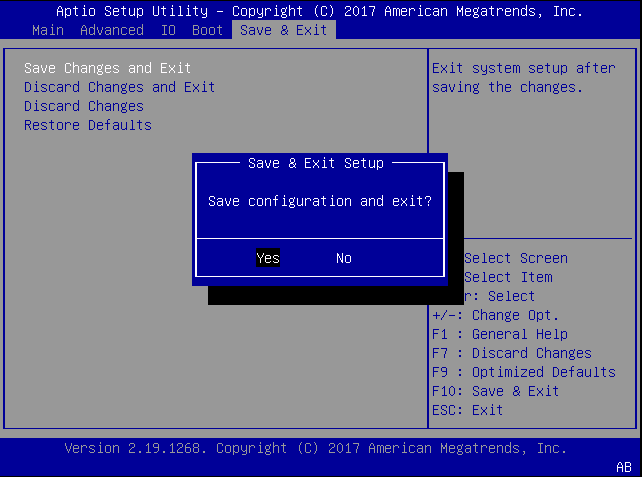
- After initialization is
complete, return to the Main Menu to Save and Exit.
Figure 3-10 Exit RAID Configuration
- Open the ILOM remote
system console to observe the system's boot cycle, and interrupt the boot cycle
to enter the MegaRAID configuration utility.
- Perform a cold shutdown by removing all system power.


