Oracle ADF provides data controls that may be based on a number of sources. In this tutorial you create and use a data control based on a Java bean class. You will use wizards to quickly create an application and a project, and a blank JSF page. To create a simple bean object you will generate a starter Java class, then use the source editor to add two String properties and getter and setter methods on the properties. You then create a service bean and add a business method that returns a list of names and their email addresses.
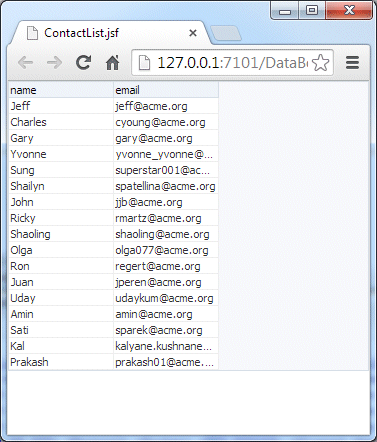
Next you will generate a data control from the service bean. Then you design two simple databound pages by dragging objects from the Data Controls panel. The first page displays the names and email addresses in a table format. The second page allows the end user to enter part of a name in a field, then click a button to display a list of names that contains a match to the value entered. When you test run the pages, the first page in the browser will look like this:
-
Start JDeveloper by selecting Start > Programs > <JDEVELOPER_HOME> > OracleHome > Oracle JDeveloper Studio > Oracle JDeveloper Studio
In the Select Role dialog, select Studio Developer and click OK. -
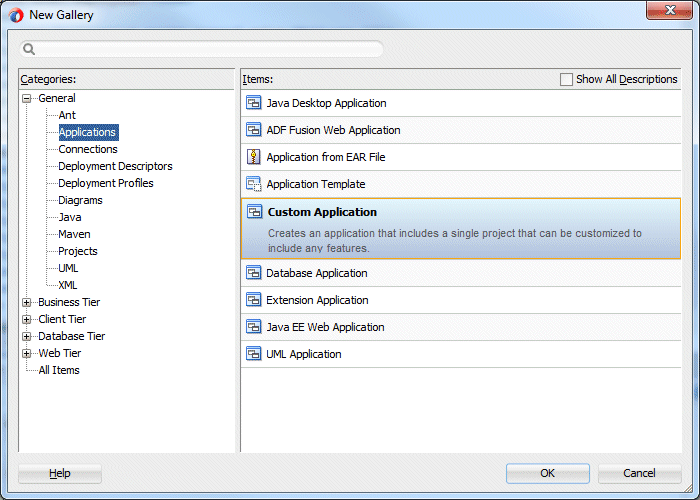
From the main menu, select File > New > From Gallery . In the New Gallery, expand the General category and select Applications. In the Items list, select Custom Application and click OK.
-
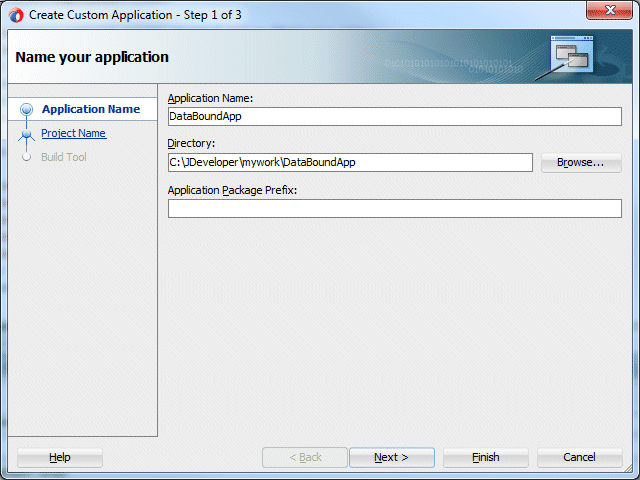
Enter DataBoundApp as the Application Name and click Next.
-
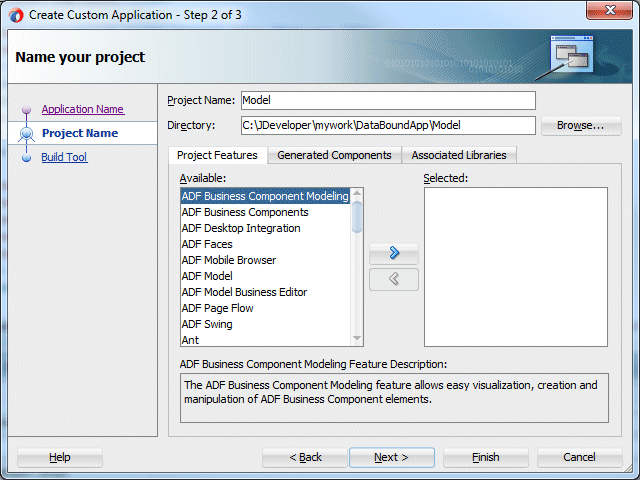
Enter Model as the project name and click Finish.
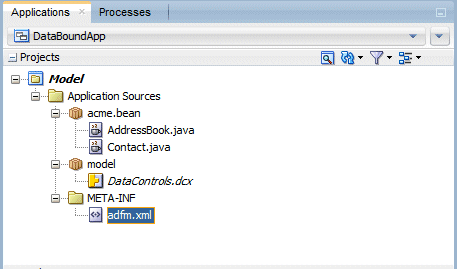
The Projects panel in the Applications window should look like this:
The JDeveloper application is the highest level in the organizational structure. While you are developing your application, it stores information about the objects you are working with. At the same time, it keeps track of your projects and all environment settings.
Based on prebuilt templates, a JDeveloper application allows you to specify a predefined type of environment, depending on the type of application you want to create (web application, Java application, and so on). Application templates provide you with a quick way to create the project structure for standard applications with the appropriate combination of features already specified. The application template also filters the work you do in JDeveloper such that the choices available are focused only on the features you are working with.
In this tutorial, you will use the Custom Application template, which makes available objects associated with all the features that JDeveloper supports in a single project.
Once you have created an application using a suitable template, you can still add new projects to the application and specify what features are to be included. To do this, in the Applications window, right-click the application name and select New Project. In the New Gallery, you can select any type of project in the Items list.
The application template you select determines the initial project structure, that is, the named project folders within the application workspace, and the application libraries that will be added. The project or projects in the application define the associated features.
A JDeveloper project, which is used to logically group files that are related, keeps track of the source files, packages, classes, images, and other elements that your program may need. Projects manage environment variables such as the source and output paths used for compiling and running your program. Projects also maintain compiler, runtime, and debugging options so that you can customize the behavior of those tools per project.
You can add multiple projects to your application to easily access, modify, and reuse your source code. Different projects might contain files representing different tiers of a multi-tier application, for instance, or different subsystems of a complex application. These files can reside in any directory and still be contained within a single project.
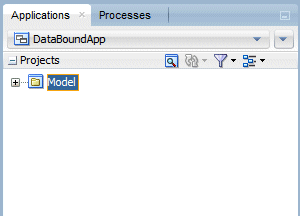
A new application created from a template appears in the Applications window already partitioned into tiered projects, with the associated features set in each project. Projects are displayed as the top level in the hierarchy in the Applications window. The Custom Application template that you used for your application creates one project using a default project name (or the project name you entered).
In the Applications window you can collapse and expand any panel. You adjust the size of panels by dragging the splitter
between two panels. To group and sort items in the Projects panel, use the ![]() Navigator
Display Options dropdown menu. For application operations, you can
click
Navigator
Display Options dropdown menu. For application operations, you can
click ![]() Application Menu and select an
option from the dropdown menu.
Application Menu and select an
option from the dropdown menu.
JDeveloper has the capability of recognizing many different file types, displaying each in its appropriate viewer or editor when you double-click the file in the Applications window. Closing an application or project closes all open editors or viewers for files in that application or project and unloads the files from memory.
Note: Nodes in italics in the Applications window mean that the elements have not yet been saved. A project node is bold when a file in the project is selected.
From the main menu, select Application > Show Overview. The Application Overview window opens in the editor window area.
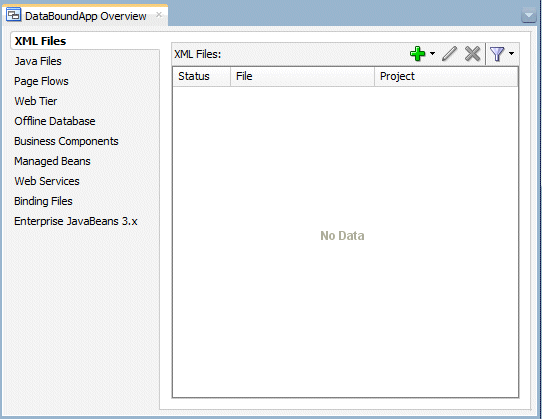
All objects that you create within JDeveloper appear in the Application Overview file summary pages, arranged by object type. As you create new files and artifacts, you can view them filtered by status and project.
You can optionally close the Application Overview window, since you will not be using it to create objects for this application<
-
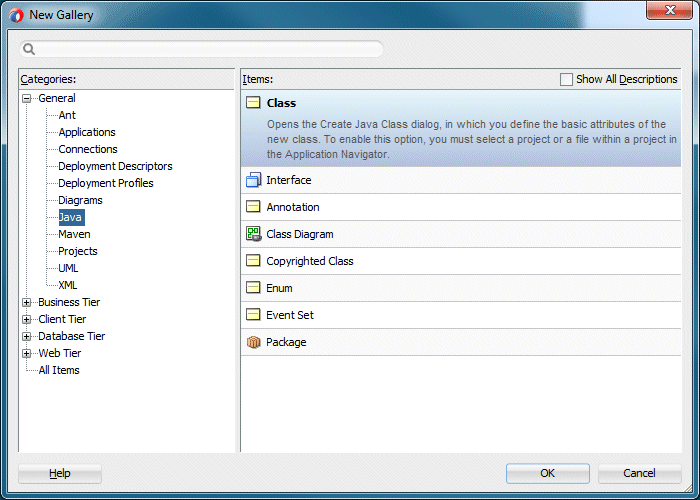
In the Applications window, right-click the Model project you just created and select New > From Gallery. In the New Gallery, select General > Java > Class, then click OK.
-
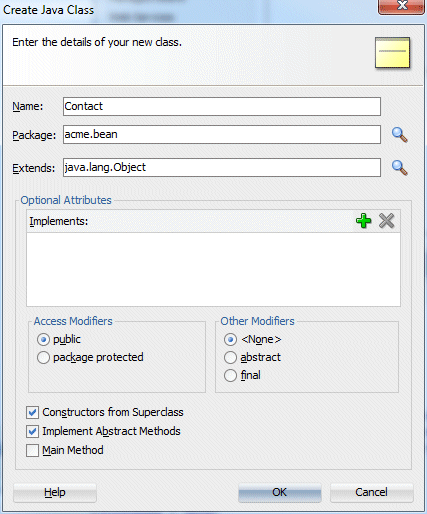
In the Create Java Class dialog, enter Contact as the class name, and acme.bean as the package name. Accept the default values and click OK.
-
In the source editor, add declarations for two private variables. The declarations should go just after the following generated code.
public Contact() {
super();
}
Add two variables using the following code: -
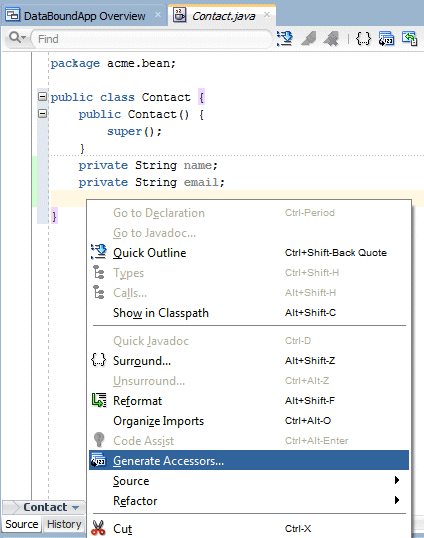
Right-click the file in the editor and select Generate Accessors.
-
Java Code Insight, the Java-specific implementation of completion insight
-
 Code Assist to fix common problems
 -
Import statement assistance and sorting
-
Automatic doc comment templates
-
Customizable sorting and expansion for the Structure window
-
Distinctive highlighting for syntax and semantic errors
-
Customizable code separators
-
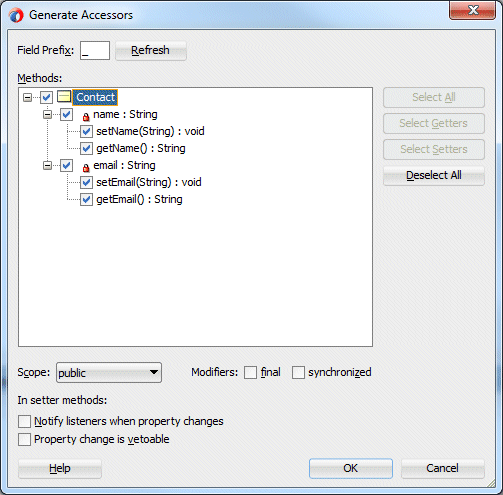
In the Generate Accessors dialog, select Contact. Make sure public is selected in the Scope dropdown list, then click OK.
-
In the source editor, add a constructor that instantiates a new object using values passed as arguments.
After the generated method:
public String getEmail() {
return email;
}
Add the following method: -
Click
 Save All to save your work.
In the Applications window, you should see Contact.java in the acme.bean package in the Application Sources folder.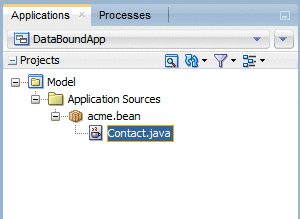
private String email;
In the source editor, other features available to you while you're editing include:
Press F1 in the source editor if you want to learn more about these features.
this.name = name;
this.email = email;
}
The tabs at the top of the editor window are document tabs.
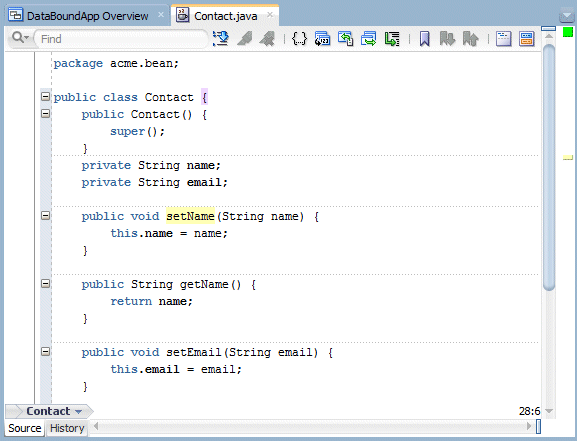
Selecting a document tab gives that file focus, bringing it to the foreground of the window in the current editor. The tabs at the bottom of the editor window for a given file are the editor tabs. Selecting an editor tab opens the file in that editor or viewer.
-
In the Applications window, right-click the Model project and select New > Java Class.
-
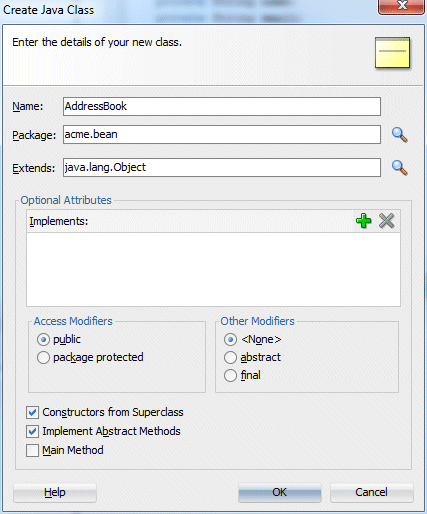
In the Create Java Class dialog, enter AddressBook as the class name. Accept the package name as acme.bean, and the remaining default values, then click OK.
-
In the source editor, add code to create a collection Java class.
After the first line:
package acme.bean;
Delete all the generated code and replace with the following code: -
Click
 Save All to save your work.
import java.util.List;
import java.util.regex.Pattern;
public class AddressBook {
// Return all contacts
List<Contact> contacts = new ArrayList();
public List<Contact> findAllContacts() {
return contacts;
}
// Return all contacts matching name (case-insensitive)
public List<Contact> findContactsByName(String name) {
String namePattern = ".*" + (name != null ? name.toUpperCase() : "") + ".*";
List<Contact> matches = new ArrayList();
for (Contact c : contacts) {
if (Pattern.matches(namePattern, c.getName().toUpperCase())) {
matches.add(c);
}
}
return matches;
}
public AddressBook() {
contacts.add(new Contact("Jeff", "jeff@acme.org"));
contacts.add(new Contact("Charles", "cyoung@acme.org"));
contacts.add(new Contact("Gary", "gary@acme.org"));
contacts.add(new Contact("Yvonne", "yvonne_yvonne@acme.org"));
contacts.add(new Contact("Sung", "superstar001@acme.org"));
contacts.add(new Contact("Shailyn", "spatellina@acme.org"));
contacts.add(new Contact("John", "jjb@acme.org"));
contacts.add(new Contact("Ricky", "rmartz@acme.org"));
contacts.add(new Contact("Shaoling", "shaoling@acme.org"));
contacts.add(new Contact("Olga", "olga077@acme.org"));
contacts.add(new Contact("Ron", "regert@acme.org"));
contacts.add(new Contact("Juan", "jperen@acme.org"));
contacts.add(new Contact("Uday", "udaykum@acme.org"));
contacts.add(new Contact("Amin", "amin@acme.org"));
contacts.add(new Contact("Sati", "sparek@acme.org"));
contacts.add(new Contact("Kal", "kalyane.kushnane@acme.org"));
contacts.add(new Contact("Prakash", "prakash01@acme.org"));
}
}
When you complete the steps for creating a service class, the Applications window should look like this:
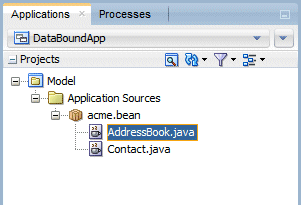
Any JavaBean that publishes business objects and provides methods that manipulate business objects is defined as a business service. Examples of business services include web services, EJB session beans, or any Java class being used as an interface to some functionality. In the example, the AddressBook service class returns a collection of contact names.
-
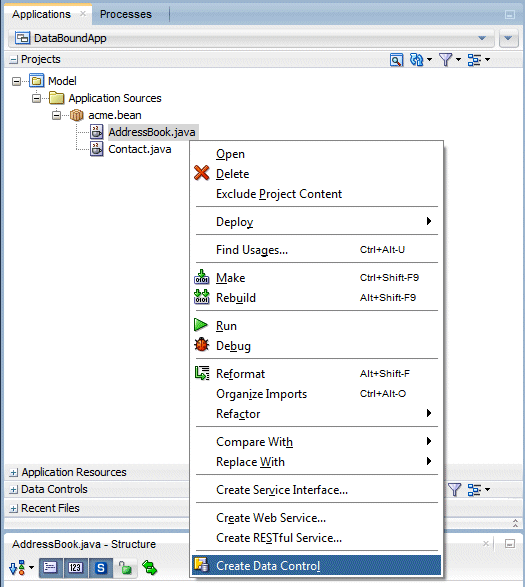
In the Applications window, right-click AddressBook.java and select Create Data Control.
-
JavaBeans, including TopLink-enabled objects
-
ADF Business Components
-
EJB session beans
-
Web services
-
In the Create Bean Data Control dialog, click Next, then Finish to accept the default values.
JDeveloper adds the data control definition file (DataControls.dcx ) to the project, and opens the file in the overview editor.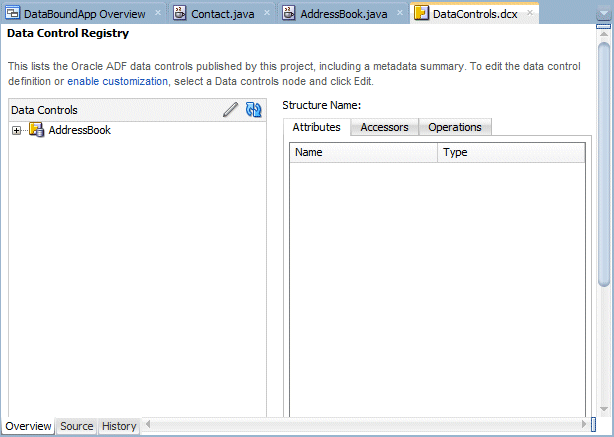
-
In the Applications window, expand the Data Controls panel, then expand AddressBook.
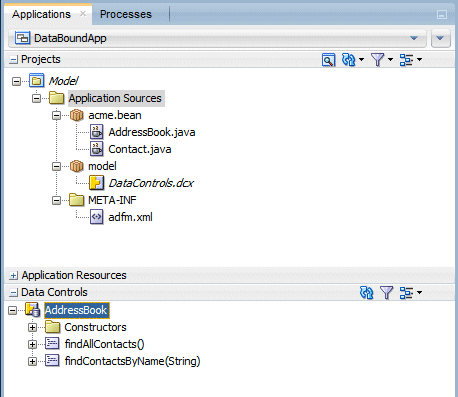
If you don't see the data control you created, click Refresh on the panel toolbar.
 -
Which business services you have registered with the data controls in your model project. The Data Controls panel displays a separate root node for each business service that you register.
-
A bean design time description definition file that is generated when you create the data control for the bean. The bean definition file classifies the bean's property accessors and methods into various categories.
Oracle ADF data controls provide an abstraction of the business service's data model, giving the ADF binding layer access to the service layer. When designing a user interface, you can bind page UI components to data through the ADF data controls, without writing any code.
ADF data controls provide a consistent mechanism for clients and web application controllers to access data and actions defined by these data-provider technologies:
If you use JavaBeans technology as your business service technology, model information will be exposed to the view and controller layers through ADF data control interfaces implemented by thin, Oracle-provided adapter classes.
The DCX definition file identifies the Oracle ADF model layer adapter classes that facilitate the interaction between the client and the available business services.
There is one DCX file per project and the file is created the first time you register a data control on a business service. The DCX file serves as a "table of contents" listing all the data controls in the project. Out of all the possible service classes you might have in your project, it records those that you've asked the design time to make available as data binding objects.
When expanded, the AddressBook node shows the structure of the business service. While the AddressBook data control node itself is not an item you can use, you may select from among the displayed objects it supports.

The hierarchical structure of a business service is determined by:
-
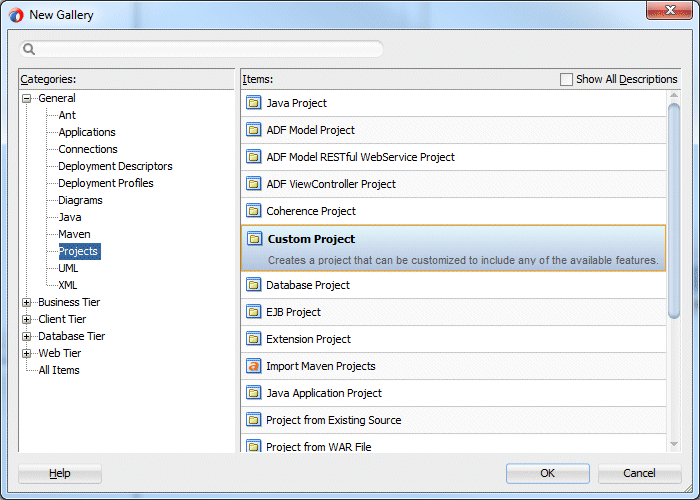
From the main menu, select File > New > Project. In the new Gallery, select General > Projects > Custom Project and click OK.
-
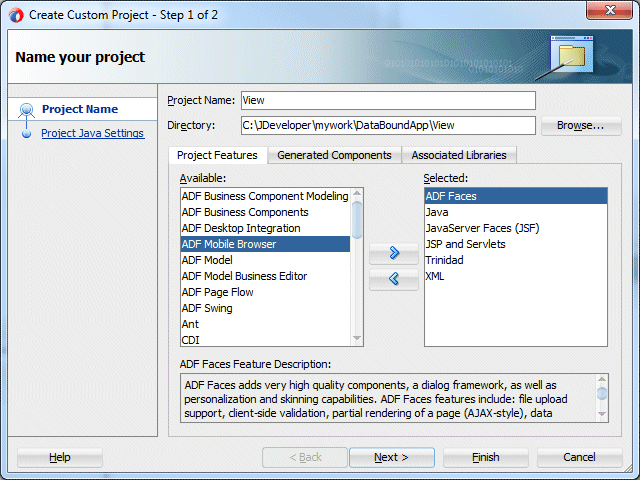
Enter View as the project name. Then select ADF Faces from the Available list and
 shuttle it to the Selected list. Then click Finish.
-
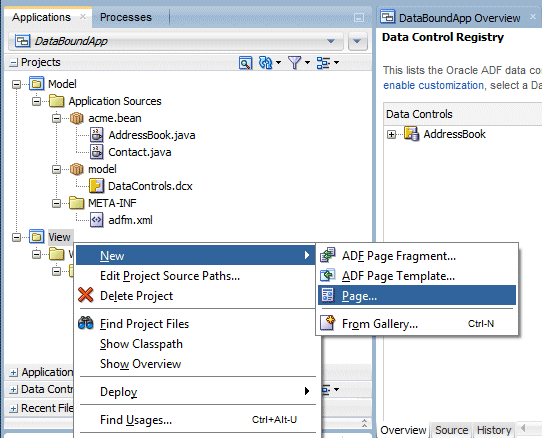
In the Applications window, right-click the View project and select New > Page.
-
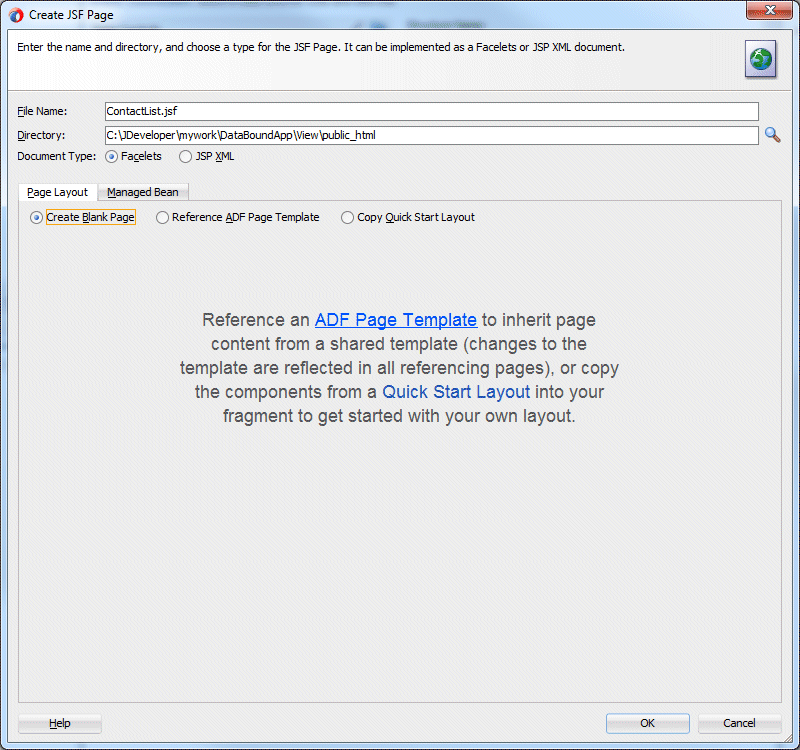
In the Create JSF Page dialog, enter ContactList.jsf as the file name. Make sure Facelets is the selected Document Type and set the Page Layout to Create Blank Page.
-
The New Gallery
-
The JSF navigation diagrammer
-
The ADF task flow diagrammer (available only in the Studio edition of JDeveloper)
-
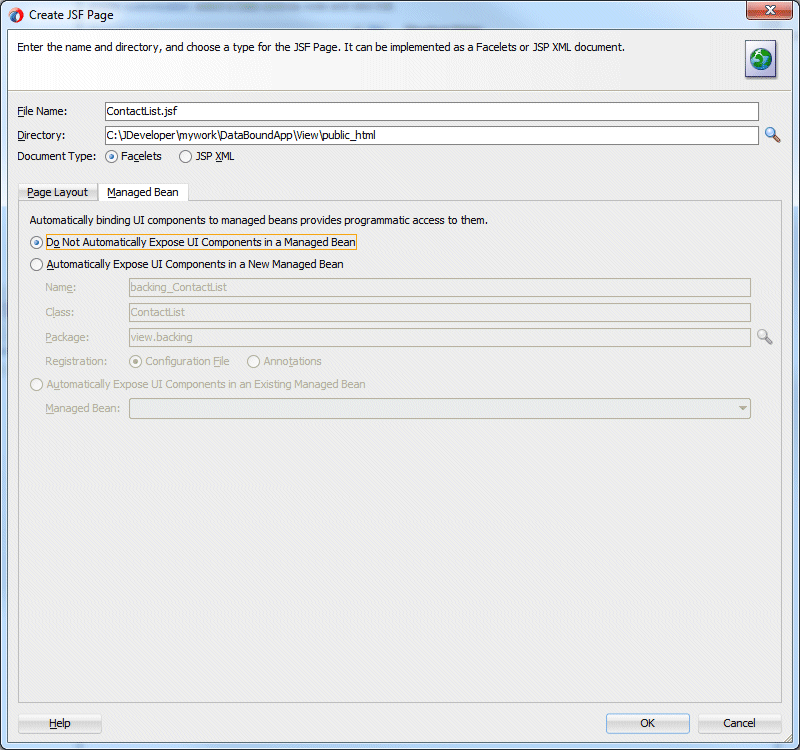
On the Managed Bean tab, select Do Not Automatically Expose UI Components in a Managed Bean. Click OK to create the page.
-
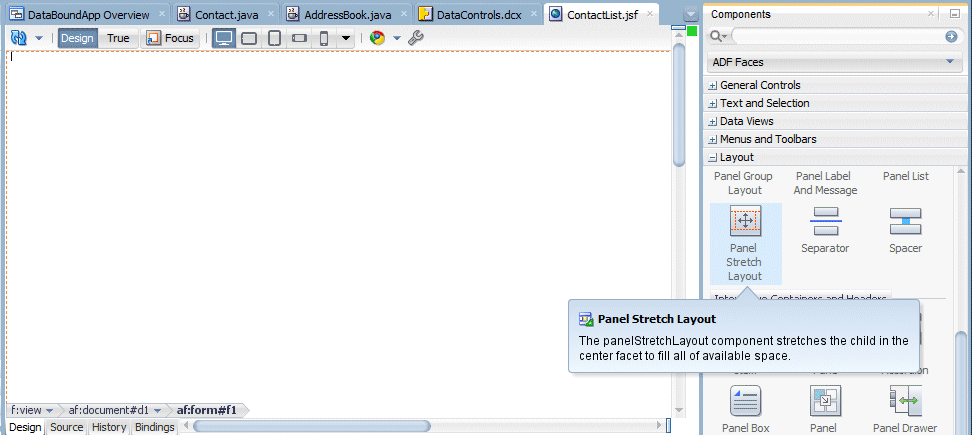
In the Components window, ADF Faces page, Layout panel, drag
 Panel Stretch Layout and drop it on the blank page in the
visual editor.
When you drag the component to the visual editor, you should see a target rectangle with the name Form on the page; this means the component you are dragging will be inserted inside that target component.
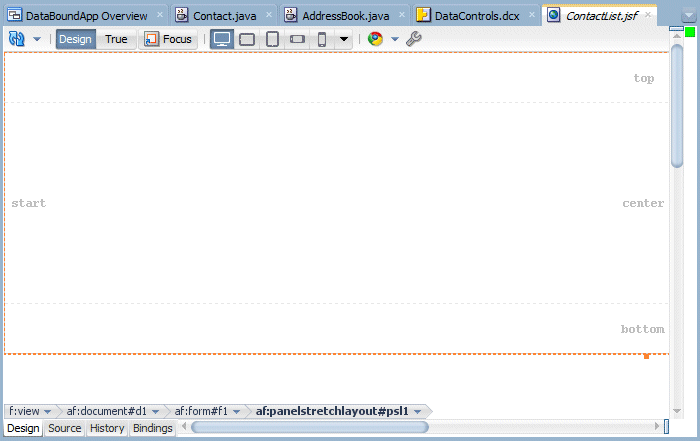
-
Click
 Save All to
save your work.
 -
Web Content folder: Contains the pages you create, along with other files that must be visible to the client browser (such as stylesheet files and images) for your application.
-
/WEB-INF/ folder: Contains the required Web Application Deployment Descriptor (web.xml) and the JSF configuration file (faces-config.xml).
-
web.xml file: The web application deployment descriptor for your application. This is an XML file describing the components that make up your application, along with any initialization parameters and container-managed security constraints that you want the server to enforce for you.
-
faces-config.xml file: Where you register the JSF application's configuration resources, such as validators, converters, managed beans, and navigation rules.
-
trinidad-config.xml file: Where you configure ADF Faces features such as skin family and level of page accessibility support.
Selecting features for a project enables you to filter the choices offered by the New Gallery, so that the choices you see are targeted to the type of work you are doing.
Features are set per project. They are used only within JDeveloper to assist you as you work, and have no effect on the data in the project itself. Adding ADF Faces automatically propagates the required associated features in the Selected pane.
You should see the View project in the Applications window.
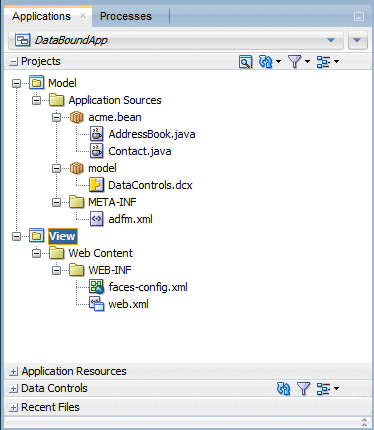
The JSF pages you create for your application using JavaServer Faces can be Facelets documents (which have file extension .jsf) or JSP documents written in XML syntax (which have file extension .jspx).
You can create both types of JSF pages with the Create JSF Page dialog, opening it from:
By default JDeveloper displays the new JSF Facelets page in the visual editor.
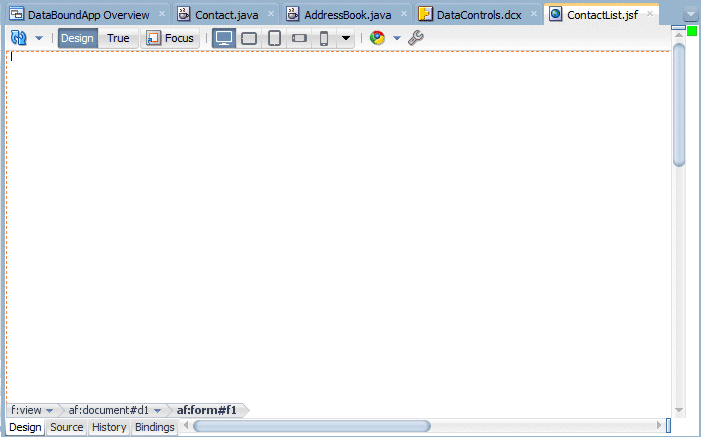
To view the page code, click the Source tab to switch from the visual editor to the XML editor. For example, the following code is generated for the new page:
<!DOCTYPE html PUBLIC "-//W3C//DTD XHTML 1.0 Transitional//EN"
 "http://www.w3.org/TR/xhtml1/DTD/xhtml1-transitional.dtd">
<f:view xmlns:f="http://java.sun.com/jsf/core"
        xmlns:af="http://xmlns.oracle.com/adf/faces/rich">
  <af:document title="ContactList.jsf" id="d1">
    <af:form id="f1"></af:form>
  </af:document>
</f:view>
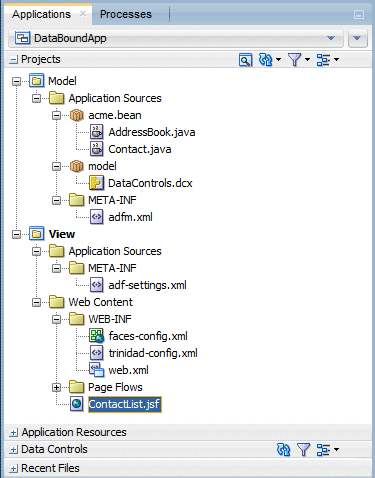
In the project, the folders and files that conform to the Java EE Web module directory structure are:
-
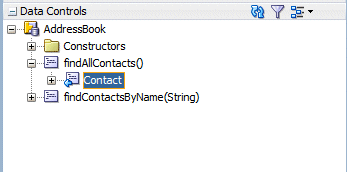
In the Data Controls panel, expand AddressBook, then expand findAllContacts().
-
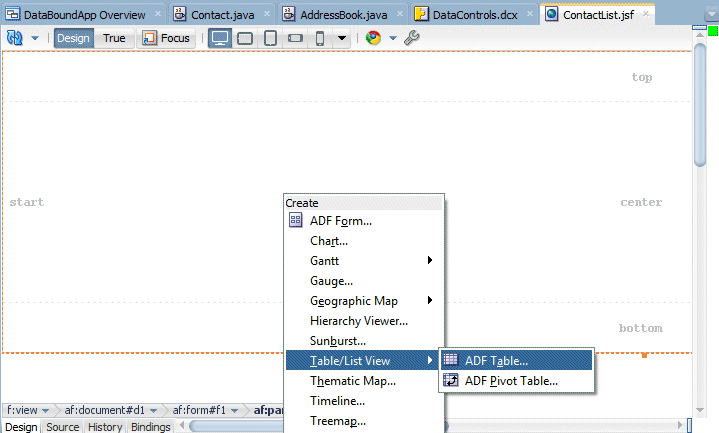
Click and drag Contact to the center facet on the page in the visual editor. From the Create context menu, select Table > Table.
-
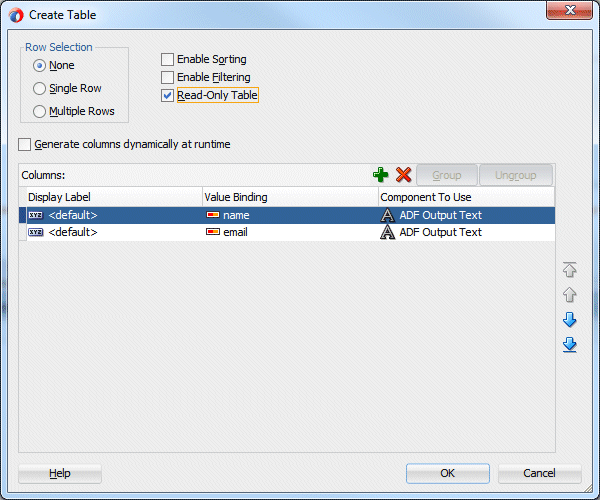
In the Create Table dialog, select Enable Sorting and Read-Only Table. and click OK to create the table.
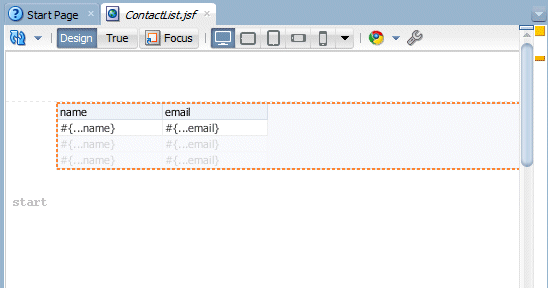
The page in the visual editor should look similar to this:
-
<af:messages> used at the top of an application page to give users important messaging information.
-
<af:table>, used to display tabular data.
-
<af:column>, used to create separate columns in the table.
-
<af:outputText>, which supports styled text.
-
In the Applications window, right-click ContactList.jsf and select Run.
If the Create Default Domain dialog displays, enter the default password, for example weblogic1, in the Password and Confirm Password fields, then click OK.
The page in the browser should look similar to this:

-
Starts Integrated WebLogic Server, if not already running.
-
Compiles and deploys the application to Integrated WebLogic Server.
-
Launches the application in your default browser using the following default address: http://<your_machine_IP_address>:<http_port>/<your_application_name>-<your_project_name>-context-root>/faces/<path_to_the_page>
-
ContactListPageDef.xml: The page definition file for the JSF page. A page definition file defines the Oracle ADF binding objects that populate the data in UI components at runtime, providing the interaction between the UI components on the page in the View project and the business service components in the Model project.
For every page that uses ADF bindings, there must be a corresponding page definition file that defines the binding objects used by that page. So each time you design a new page using the Data Controls panel and the visual editor, JDeveloper will create a new page definition file. You might need to edit the binding definitions in the page definition files if you remove binding expressions from your view pages.
Page definition files provide design time access to all the ADF bindings. At runtime, the binding objects defined by a page definition file are instantiated in a binding container, which is the runtime instance of the page definition file. -
DataBindings.cpx: The file defines the Oracle ADF binding context for the entire application and provides the metadata from which the ADF binding objects are created at runtime. The binding context is a container object that holds a list of available data controls and data binding objects. It maps individual pages to the binding definitions in the page definition files and registers the data controls used by those pages. At runtime, only the data controls listed in the DataBindings.cpx file are available to the current application.
When you insert a component from the Data Controls panel, a new Oracle ADF binding will be defined in the page's UI model and the inserted component will contain references to Oracle ADF bindings, using EL (expression language) syntax.
The code that the Data Controls panel generates in your web page or client document, and the bindings that it creates depend on the type of document displayed in the visual editor and the combination of business service and visual element you select and drop into the open document.
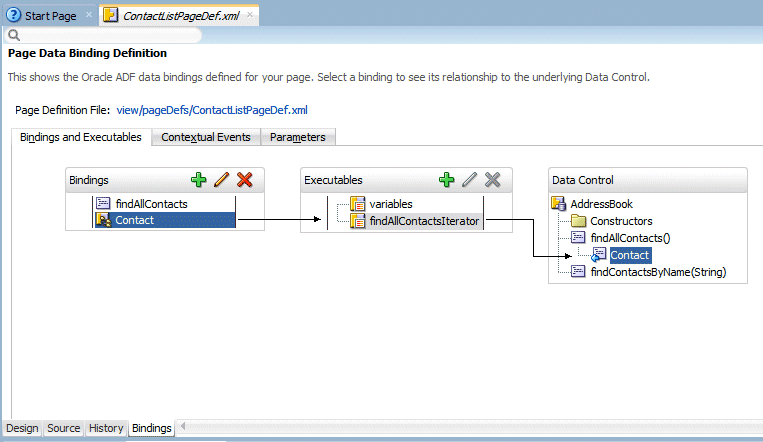
The Contact tree binding object uses the iterator binding object findAllContactsIterator to get its values. The iterator accesses the method findAllContacts() in the AddressBook data control, and returns a collection.
When you create a databound table using the Data Controls panel, JDeveloper adds the following ADF Faces tags to your page:
A typical ADF data binding EL expression uses the following syntax to reference any of the different types of binding objects in the binding container:
#{bindings.BindingObject.propertyName}
where bindings is a variable that identifies that the binding object being referenced by the expression is located in the binding container of the current page. All ADF data binding EL expressions must start with the bindings variable.
Note: You can also refer to bindings using data.<PageDefName>.<binding>. The bindings. notation is just a shortcut to refer to the bindings on a page.
At runtime, the EL expression is evaluated and a value is pulled from the binding object to populate the component with data when the page is displayed.
For example, consider the first column in the databound table. The headerText attribute of the first column has the binding expression #{bindings.Contact.hints.name.label}, which results in the column heading name in the table at runtime.
 Read more... Integrated WebLogic Server is a Java EE runtime service for packaged archive deployment. Based on zero-copy deployment,
Integrated WebLogic Server lets you run and test an application and its projects as a Java EE application in a Java EE container.
No special connection setup is required to use Integrated WebLogic Server. You can run the entire application, a project, or
individual JSF pages.
 When you run a JSF application in the IDE, JDeveloper automatically:
Note: Terminating the application stops and undeploys the application from Integrated WebLogic Server but it does not terminate Integrated WebLogic Server.
When you complete the steps for adding the data control to the JSF page, the View project in the Applications window, should now look like this:
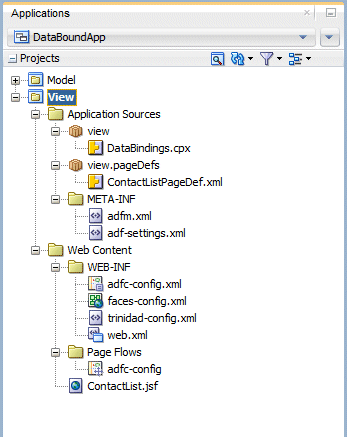
The new files added to the Application Sources folder in the View project include:
-
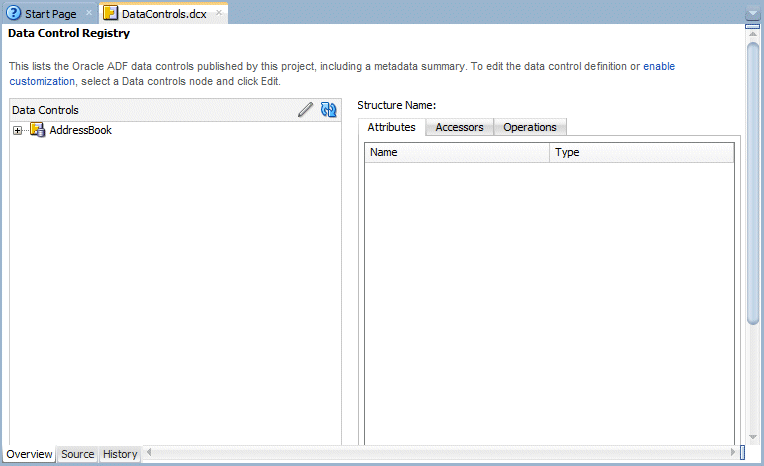
In the editor window, click the DataControls.dcx tab to bring the DCX overview editor forward.
If the DCX file is not already open, double-click DataControls.dcx in the Model project in the Applications window to open the file.
-
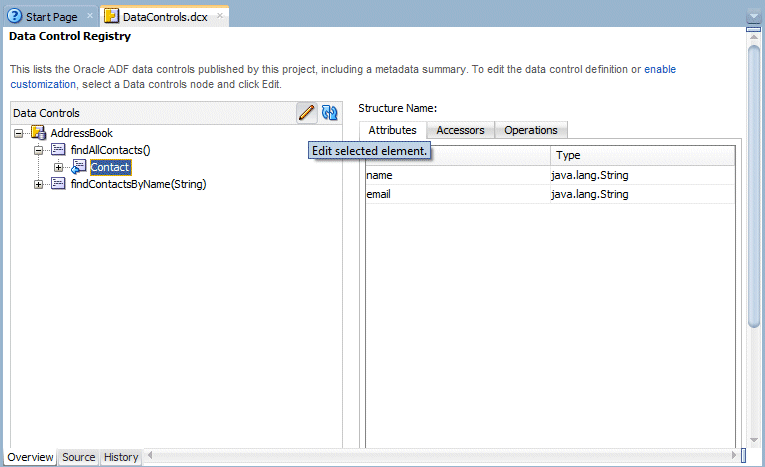
Expand AddressBook > findAllContacts(). Then select Contact and click
 Edit to open another overview editor.
-
In the Contact.xml overview editor, click Attributes on the left.
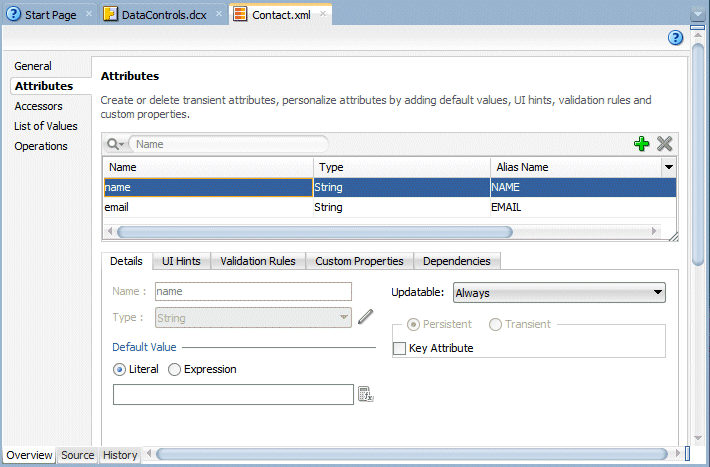
-
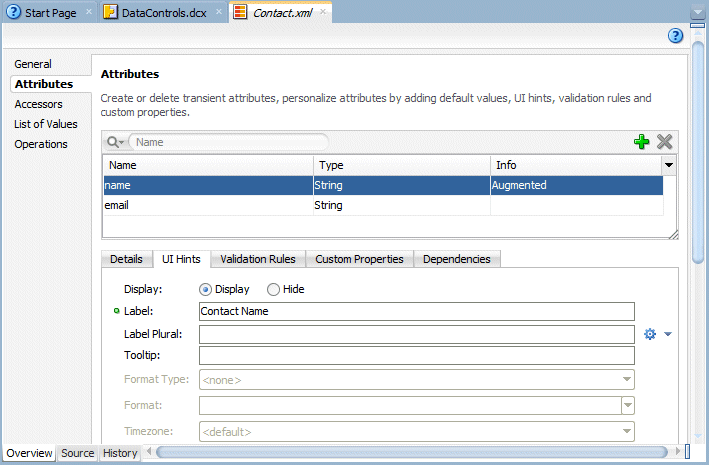
With name selected in the Attributes node, click the UI Hints tab. Then enter Contact Name in the Label field.
-
Display Hint: Determines whether the attribute will be displayed or not.
-
Label: The text used in prompts or table headers that precede the value of a data item.
-
Tooltip: The text used in tooltips or flyover text. In web applications, it appears as the value of the HTML ALT attribute.
-
Format Type: Defines the formatter to use when the data item is displayed. Formatters are basically a collection of format masks that you can define in the <JDeveloper_Install>/jdeveloper/systemn.n.n.../o.BC4J/formatinfo.xml file.
-
Format: The particular format mask used by the selected formatter.
-
Control Type: The control type used to display the data item in the client UI: Edit makes the control editable, Date displays a calendar picker, and Default is interpreted by the client to select the most appropriate control.
-
Display Width: Defines the character width of the control that displays the data item.
-
Display Height: Defines the number of character rows of the control that displays the data item.
-
Form Type: Determines whether the attribute will be displayed in Detail or Summary mode. Detail mode produces a long form, Summary mode a short one. This property is supported for ADF Swing applications only; it is not available for Business Components web applications.
-
Field Order: Defines the numeric order in which you want the attribute to render within a category
-
Category: The identifier to be used by the dynamic rendering user interface to group attributes for display. The user interface will render the attribute with other attributes of the same category. You can use the category hint to aid the user interface to separate a large list of view object attributes into smaller groups related by categories. This control hint will be utilized by any dynamic rendering user interface that displays the attribute.
-
Auto Submit: Triggers a partial submit on value changes in the user interface when set to true (enabled).
-
Repeat the procedure to add a label for the attribute email, using the label text Email Address.
-
In the Applications window, right-click ContactList.jsf and select Run.
You should see the new labels on the page in the browser:
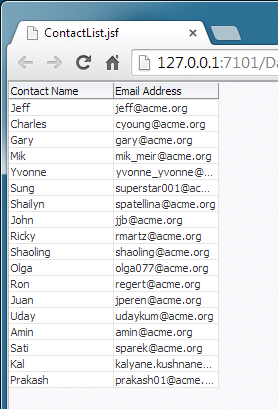
 Read more... This mechanism, known as control hints, permits application developers to centralize
certain UI settings across clients and thereby control many aspects of the way the UI interacts with the data item. Because the
control hints are set at the level of the business service, it can also reduce the amount of UI coding.
 The ADF control hints mechanism supports these control hint properties that you can customize:
The file that defines the value for the control hints you set depends on the specific business service used for the project. In the case of beans-based business services, (including JavaBeans, Enterprise JavaBeans, and Oracle TopLink), by default JDeveloper generates a standard .properties file for the project's text resources and saves the control hint definitions as translatable strings.
Notice in the Applications window that the file ModelBundle.properties has been added to the Model project in the model package:
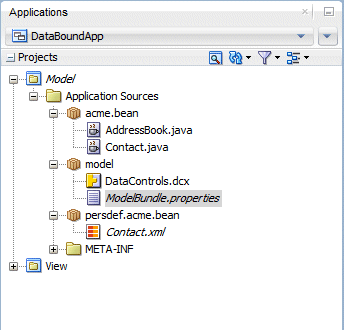
The project-level resource bundle option JDeveloper uses to save control hints is determined by the Resource Bundle page of the Project Properties dialog. By default JDeveloper sets the Resource Bundle Type option to Properties Bundle, which produces a .properties file.
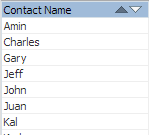
The first time you customize a control hint in the project, JDeveloper creates the ModelBundle.properties file. The ModelBundle.properties file contains translatable key strings for the control hint definitions you added. For example, if you open ModelBundle.properties in the source editor, you should see the following code that identifies the translatable string:
#
acme.bean.Contact.name_LABEL=Contact Name
-
In the Applications window, right-click the View project and select New > Page.
-
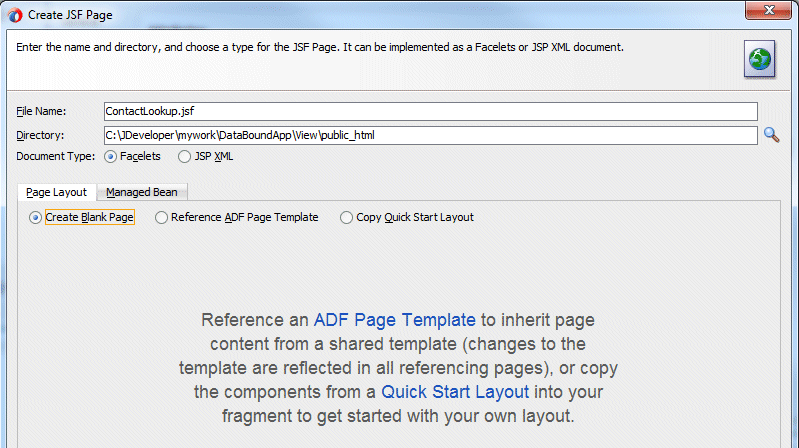
In the Create JSF Page dialog, enter ContactLookup.jsf as the file name. Make sure Facelets is the selected Document Type.
-
On the Page Layout page, select Create Blank Page, and on the Managed Bean tab, select Do Not Automatically Expose UI Components in a Managed Bean. Click OK to create the page.
-
In the Components window, ADF Faces page, Layout panel, drag Decorative Box
 and drop it on the blank page in the
visual editor.
 -
In the Data Controls panel, click
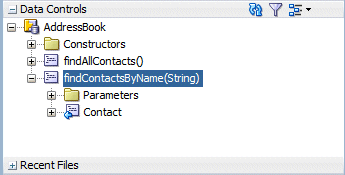
 Refresh on the panel toolbar, expand AddressBook, then expand findContactsByName(String).
-
Drag Contact to the center facet on the page in the visual editor. From the Create context menu, select Table/List View > ADF Table. In the Create Table dialog, select Enable Sorting and Read-Only Table. Accept the remaining default values and click OK.
-
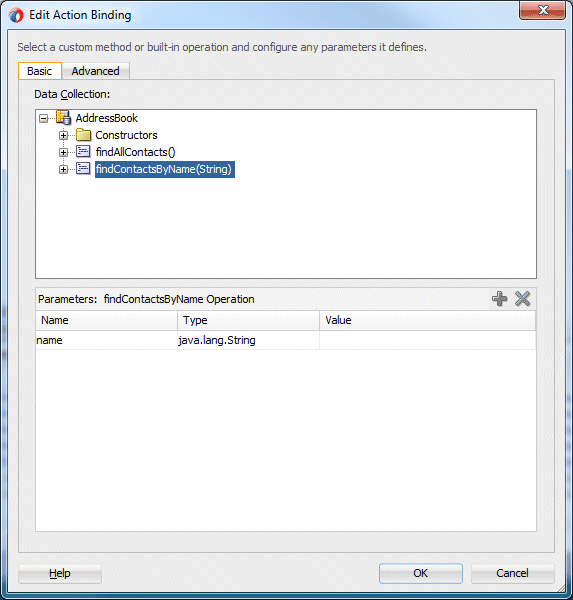
In the Edit Action Binding dialog, accept the default values and click OK.
-
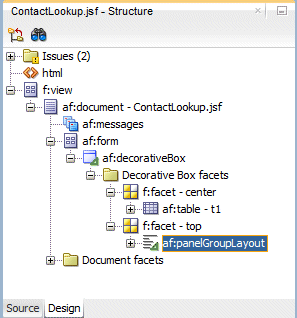
In the Components window, Layout panel, drag and drop Panel Group Layout
 into the top facet on the page.
The Structure window should look like the following image.
-
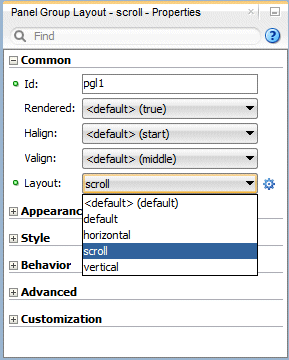
WIth the af:panelGroupLayout selected, find the Properties window, and in the Common section, change the Layout value to scroll.
-
In the Components window, drag another
 Panel Group Layout and drop it into the panel group layout component you just added.
In the Properties window, change the Layout value to horizontal.
 -
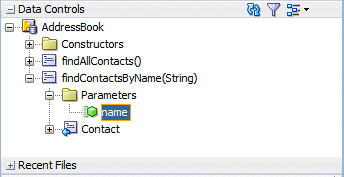
In the Data Controls panel, under findContactsByName(String), expand Parameters.
-
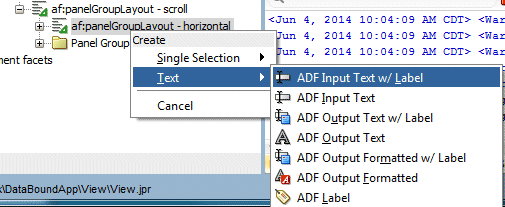
Drag name and drop it into the panel group layout component (horizontal) you just added. From the context menu, select Text > ADF Input Text w/ Label.
-
In the Properties window, Common section, delete the default Label value and replace with Enter part of name: followed by two spaces.
-
In the Data Controls panel, drag findContactsByName(String) and drop it into af:panelGroupLayout - horizontal in the Structure window. From the context menu, select Method > ADF Button.

-
In the Properties window, delete the default Text value and replace with Find.
-
In the Structure window, select af:panelGroupLayout - scroll. In the Properties window, Style section, enter padding:5.0px in the InlineStyle field.
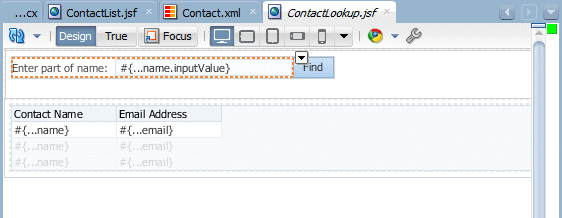
The page should look like this in the visual editor:
-
In the Applications window, right-click ContactLookup.jsf and select Run.
The page in the browser should look similar to this:
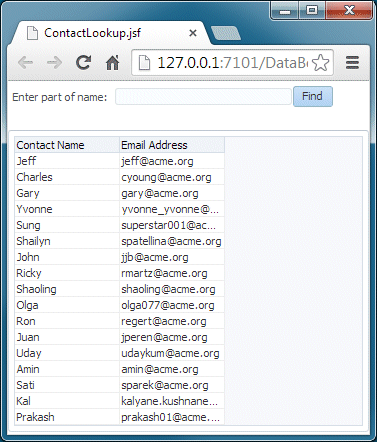
The second panel group layout component with layout="horizontal" is then used to lay out the content components in a horizontal fashion.
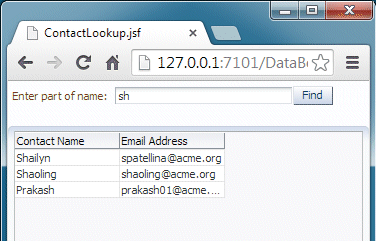
Because you previously entered label text for the Contact email and address attributes using control hints, the label text that is stored in the ModelBundle.properties file is applied to the column headers in this table as well.
- Use JDeveloper wizards and dialogs to create applications, starter pages and starter Java classes
- Use the visual editor, Components window, and Properties window to create UI pages
- Create a data control from a simple JavaBean object
- Use the Data Controls panel to create databound UI components without writing any code
- Set labels at a centralized location for the business service
- Use Integrated WebLogic Server to run an ADF Faces application
- Developing Fusion Web Applications with Oracle Application Development Framework
- Creating and Configuring Bean Data Controls
- Developing Applications with Oracle JDeveloper


