6 Creating Databound Selection Lists
This chapter describes how to add selection lists components to pages. It includes instructions for creating selection components with fixed-value lists or dynamically generated list. It also describes how to add navigation list bindings to let users navigate through a list of objects in a collection.
This chapter includes the following sections:
6.1 Introduction to Selection Lists
Selection lists work the same way as do standard JSF list components. ADF Faces list components, however, provide extra functionality such as support for label and message display, automatic form submission, and partial page rendering.
When the user selects an item from a navigation list, a corresponding component bound to the list also changes its value in response to the selection. For example, when the user selects a product from a shopping list, the table that is bound to the products list updates to display the details of the selected product.
6.2 Creating a Single Selection List
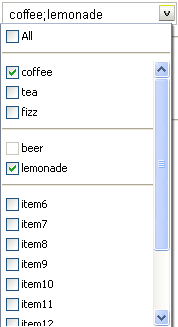
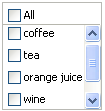
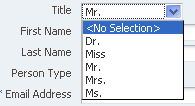
ADF Faces Core includes components for selecting a single value and multiple values from a list. For example, selectOneChoice allows the user to select an item from a dropdown list, and selectManyChoice allow the user to select several items from a list of checkboxes. Selection list components are described in Table 6-1.
Table 6-1 ADF Faces Single and Multiple List Components
| ADF Faces component | Description | Example |
|---|---|---|
|
Select a single value from a list of items. |
 |
|
|
Select a single value from a set of radio buttons. |
||
|
Select a single value from a scrollable list of items. |
|
|
|
Select multiple values from a scrollable list of checkboxes. Each selection displays at the top of the list. |
 |
|
|
Select multiple values from a group of checkboxes. |
|
|
|
Select multiple values from a scrollable list of checkboxes. |
|
You can create selection lists using the SelectOneChoice ADF Faces component. The steps are similar for creating other single-value selection lists, such as SelectOneRadio and SelectOneListbox.
A databound selection list displays values from an accessor returned collection or a static list and updates an attribute in another collection or a method parameter based on the user's selection. When adding a binding to a list, you use an attribute from the data control that will be populated by the selected value in the list.
Note:
Using an ADF Model list binding with thevaluePassThru=true on a selectOneChoice component is not supported. The list binding will return indexes, not values.To create a selection list, you choose a base data source and a list data source in the Edit List Binding dialog:
-
Base data source: Select the accessor returned collection that you want to bind to your control and that contains the attributes to be updated from user selections.
-
List data source: Select the accessor returned collection that contains the attributes to display.
You can create two types of selection lists in the Edit List Binding dialog:
-
Static list: List selections are based on a fixed list that you create manually by entering values one at a time into the editor.
-
Dynamic list: List selections are generated dynamically based on one or more databound attribute values.
6.2.1 How to Create a Single Selection List Containing Fixed Values
You can create a selection list containing selections that you code yourself, rather than retrieving the values from another data source.
Prepare a list of values that you will enter into the component as a fixed list.
To create a list bound to a fixed list of values:
-
From the Data Controls panel, drag and drop the attribute onto the JSF page and choose Create > Single Selections > ADF Select One Choice.
The Edit List Binding dialog displays. The accessor returned collection containing the attribute you dropped on the JSF page is selected by default in the Base Data Source list.
To select a different accessor returned collection, click the Add icon next to the list.
-
Select the Fixed List radio button.
The Fixed List option lets end users choose a value from a static list that you define.
-
In the Base Data Source Attribute list, choose an attribute.
The Base Data Source Attribute list contains all of the attributes in the collection you selected in the Base Data Source list. For example, if you selected
CountryCodesas the Base Data Source, you can chooseCountryNamein the list. -
In the Set of Values box, enter each value you want to appear in the list. Press the Enter key to set a value before typing the next value. For example, you could add the country codes
India,Japan, andRussia.The order in which you enter the values is the order in which the list items are displayed in the
SelectOneChoicecontrol at runtime.The
SelectOneChoicecomponent supports anullvalue. If the user has not selected an item, the label of the item is shown as blank, and the value of the component defaults to an empty string. Instead of using blank or an empty string, you can specify a string to represent thenullvalue. By default, the new string appears at the top of the list. -
Click OK.
6.2.2 How to Create a Single Selection List Containing Dynamically Generated Values
You can populate a selection list component with values dynamically at runtime.
Define two data sources: one for the list data source that provides the dynamic list of values, and the other for the base data source that is to be updated based on the user's selection.
To create a selection list bound containing dynamically generated values:
-
From the Data Controls panel, drag and drop the attribute onto the JSF page and choose Create > Single Selections > ADF Select One Choice.
The Edit List Binding dialog displays. The accessor returned collection containing the attribute you dropped on the JSF page is selected by default in the Base Data Source list.
To select a different accessor returned collection, click the Add icon next to the list.
-
Select the Dynamic List radio button.
The Dynamic List option lets you specify one or more base data source attributes that will be updated from another set of bound values.
-
Click the Add button next to List Data Source.
-
In the Add Data Source dialog, select the accessor returned collection that will populate the values in the selection list.
Note:
The list and base collections do not have to form a master-detail relationship, but the attribute in the list collection must have the same type as the base collection attributes. -
Accept the default iterator name and click OK.
The Data Mapping section of the Edit List Binding dialog updates with a default data value and list attribute. The Data Value control contains the attribute on the accessor returned collection that is updated when the user selects an item in the selection list. The List Attribute Control contains the attribute that populates the values in the selection list.
-
You can accept the default mapping or select different attributes items from the Data Value and List Attribute lists to update the mapping.
To add a second mapping, click Add.
-
Click OK.
6.2.3 What Happens When You Create a Fixed Selection List
When you add a fixed selection list, JDeveloper adds source code to the JSF page and list and iterator binding objects to the page definition file.
Example 6-1 shows the page source code after you add a fixed SelectOneChoice component to it.
Example 6-1 Fixed SelectOneChoice List in JSF Page Source Code
<af:selectOneChoice value="#{bindings.city.inputValue}"
                    label="#{bindings.city.label}">
     <f:selectItems value="#{bindings.city.items}"/>
</af:selectOneChoice>
The f:selectItems tag, which provides the list of items for selection, is bound to the items property on the CountryId list binding object in the binding container
In the page definition file, JDeveloper adds the definitions for the iterator binding objects into the executables element, and the list binding object into the bindings element, as shown in Example 6-2.
Example 6-2 List Binding Object for the Fixed Selection List in the Page Definition File
  <executables>
    <variableIterator id="variables"/>
    <iterator Binds="root" RangeSize="25" DataControl="SupplierFacadeLocal"
              id="SupplierFacadeLocalIterator"/>
    <accessorIterator MasterBinding="SupplierFacadeLocalIterator"
                      Binds="addressesFindAll" RangeSize="25"
                      DataControl="SupplierFacadeLocal"
                      BeanClass="oracle.fodemo.supplier.model.Addresses"
                      id="addressesFindAllIterator"/>
  </executables>
  <bindings>
    <list IterBinding="addressesFindAllIterator" id="city" DTSupportsMRU="true"
          StaticList="true">
      <AttrNames>
        <Item Value="city"/>
      </AttrNames>
      <ValueList>
        <Item Value="redwood city"/>
        <Item Value="fremont"/>
        <Item Value="stockton"/>
      </ValueList>
    </list>
  </bindings>
6.2.4 What Happens When You Create a Dynamic Selection List
When you add a dynamic selection list to a page, JDeveloper adds source code to the JSF page, and list and iterator binding objects to the page definition file.
Example 6-3 shows the page source code after you add a dynamic SelectOneChoice component to it.
Example 6-3 Dynamic SelectOneChoice List in JSF Page Source Code
<af:selectOneChoice value="#{bindings.orderId.inputValue}"
                    label="#{bindings.orderId.label}"
                    required="#{bindings.orderId.hints.mandatory}"
                    shortDesc="#{bindings.orderId.hints.tooltip}"
                    id="soc1">
     <f:selectItems value="#{bindings.orderId.items}" id="si1"/>
</af:selectOneChoice>
The f:selectItems tag, which provides the list of items for selection, is bound to the items property on the orderId list binding object in the binding container.
In the page definition file, JDeveloper adds the definitions for the iterator binding objects into the executables element, and the list binding object into the bindings element, as shown in Figure 6-1.
Example 6-4 List Binding Object for the Dynamic Selection List in the Page Definition File
  <executables>
    <variableIterator id="variables"/>
    <iterator Binds="root" RangeSize="25" DataControl="FODFacadeLocal"
              id="FODFacadeLocalIterator"/>
    <accessorIterator MasterBinding="FODFacadeLocalIterator"
                      Binds="orders1FindAll" RangeSize="25"
                      DataControl="FODFacadeLocal"
                      BeanClass="oracle.model.Orders1"
                      id="orders1FindAllIterator"/>
    <iterator Binds="root" RangeSize="25" DataControl="FODFacadeLocal"
              id="FODFacadeLocalIterator1"/>
    <accessorIterator MasterBinding="FODFacadeLocalIterator1"
                      Binds="ordersFindAll" RangeSize="-1"
                      DataControl="FODFacadeLocal"
                      BeanClass="oracle.model.Orders"
                      id="ordersFindAllIterator"/>
  </executables>
  <bindings>
    <list IterBinding="orders1FindAllIterator" id="orderId"
          DTSupportsMRU="true" StaticList="false"
          ListIter="ordersFindAllIterator">
      <AttrNames>
        <Item Value="orderId"/>
      </AttrNames>
      <ListAttrNames>
        <Item Value="orderId"/>
      </ListAttrNames>
      <ListDisplayAttrNames>
        <Item Value="orderId"/>
      </ListDisplayAttrNames>
    </list>
  </bindings>
By default, JDeveloper sets the RangeSize attribute on the iterator element for the ordersFindAll iterator binding to a value of -1 thus allowing the iterator to furnish the full list of valid products for selection. In the list element, the id attribute specifies the name of the list binding object. The IterBinding attribute references the iterator that iterates over the order1FindAll collection. The ListIter attribute references the iterator that iterates over the ordersFindAll collection. The AttrNames element specifies the base data source attributes returned by the base iterator. The ListAttrNames element defines the list data source attributes that are mapped to the base data source attributes. The ListDisplayAttrNames element specifies the list data source attribute that populates the values users see in the list at runtime.
6.3 Creating a List with Navigation List Binding
Navigation list binding lets users navigate through the objects in a collection. As the user changes the current object selection using the navigation list component, any other component that is also bound to the same collection through its attributes will display from the newly selected object.
In addition, if the collection whose current row you change is the master collection in a data model master-detail relationship, the row set in the detail collection is automatically updated to show the appropriate data for the new current master row.
Create an accessor returned collection in the Data Controls panel.
To create a list that uses navigation list binding:
-
From the Data Controls panel, drag and drop an accessor returned collection to the page and choose Create > Navigation > ADF Navigation Lists.
-
In the Edit List Binding dialog, from the Base Data Source dropdown list, select the collection whose members will be used to create the list.
This should be the collection you dragged from the Data Controls panel. If the collection does not appear in the dropdown menu, click the Add button to select the collection you want.
-
From the Display Attribute dropdown list, select a single attribute, all the attributes, or choose Select Multiple to launch a selection dialog.
In the Select Multiple Display Attributes dialog, shuttle the attributes you want to display from the Available Attributes pane to the Attributes to Display pane. Click OK to close the dialog.
-
Click OK.


