Step 5. Exploring Persistence Settings
Time to complete this step: 15 minutes
The persistence.xml file defines the context for JPA persistence. In this step, you will use the JPA Persistence Configuration Editor to explore the persistence.xml file for your JPA web project.
The tasks in this step are:
To Use the JPA Persistence Configuration Editor to View the Persistence Configuration File
The JPA Persistence Configuration Editor provides a graphical interface that allows you to modify connection information, mapped classes, and JPA properties that are managed by your persistence.xml file. Optionally, you can also use the editor to edit the persistence.xml source file.
- On the AppXplorer view, right-click JPA
Configuration and select Open.
This will open
the persistence.xml configuration file in the JPA
Persistence Configuration Editor.
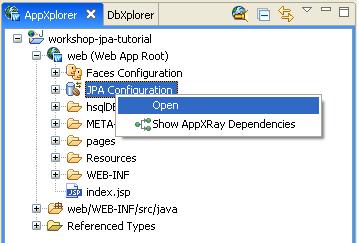
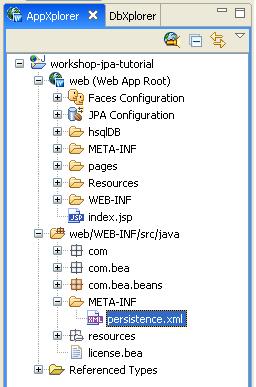
- You can also open the persistence.xml file by double-clicking it in the AppXplorer view.
The persistence.xml file is located at this path:
<project>/web/WEB-INF/src/java/META-INF
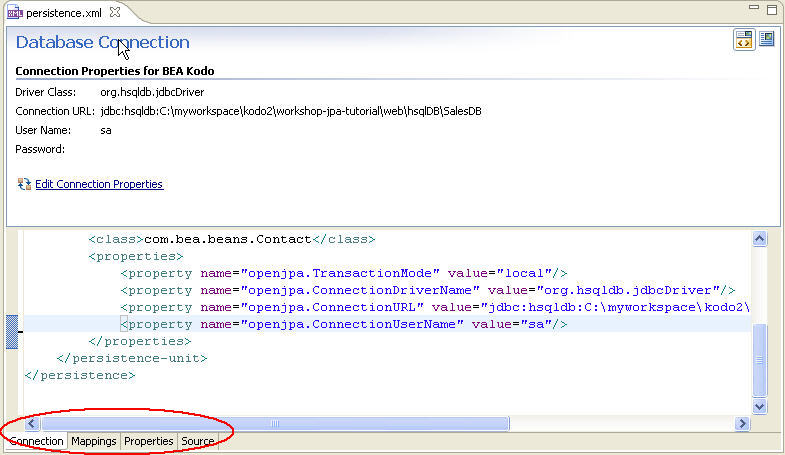
- The JPA Persistence Configuration Editor is organized in four category tabs:
- Connection — Edit the database connection information.
- Mappings — Edit information about mapped classes.
- Properties — Edit vendor-specific properties.
- Source — Edit the persistence.xml source directly.
To View the Connection Properties (Optional)
The Connection tab displays the current connection properties
and allows you to modify the existing connection.
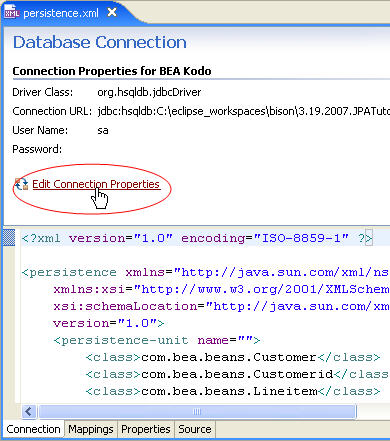
- To update the BEA Kodo
connection information, click Edit Connection Properties.
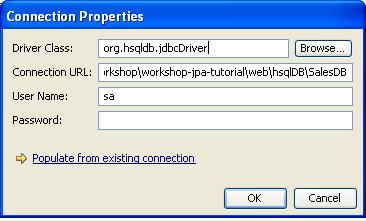
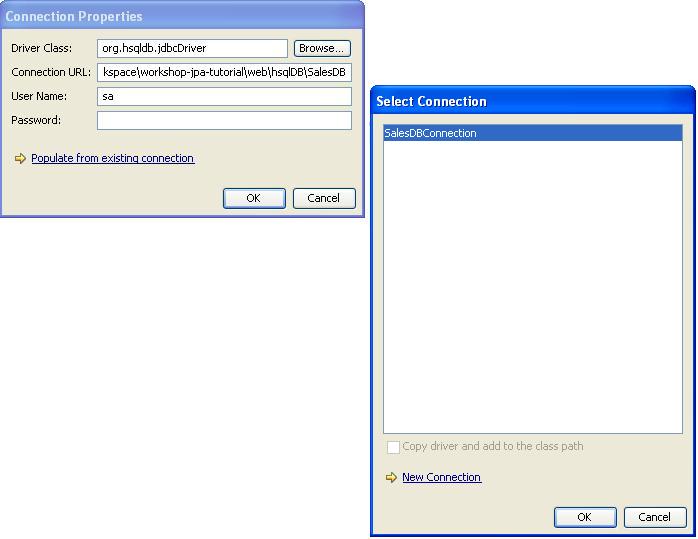
- By clicking Populate from existing connection, you can
use a connection that you've already set up using DbXplorer. Optionally, you can copy the database driver library and add it to your
classpath, where it will be available to your persistence code.
To View JPA Mapping Files (Optional)
You can use the Mappings tab to view and modify mapped classes.
- Click the Mappings tab in the JPA Configuration Editor.
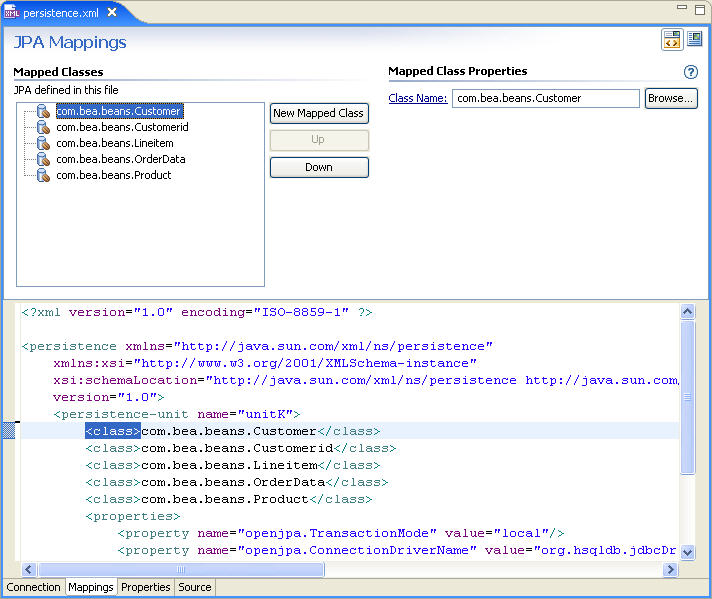
The editor displays the list of Mapped Classes.
- To edit the JPA entity beans, select a mapped class
from the list and the editor displays the corresponding Mapped Class
Properties.
Click Class Name to view the source code for the selected mapped
class.
- The editor also allows you to add a new mapped class by clicking New
Mapped Class and browsing to the class.
To View Configuration Properties (Optional)
In the JPA Configurations Editor, the Properties tab displays
the current JPA configuration properties and their values through the form editor.
- Click the Properties tab in the JPA Configurations Editor.
- Selecting a configuration property will display the Configuration Property
name and value, allowing you to edit them.
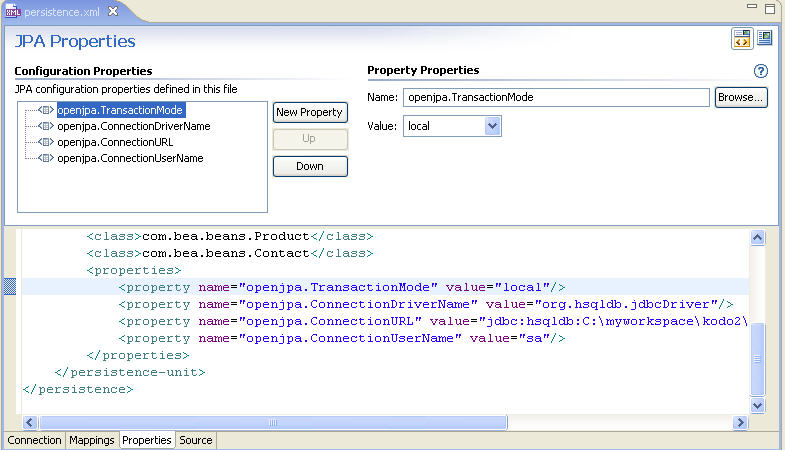
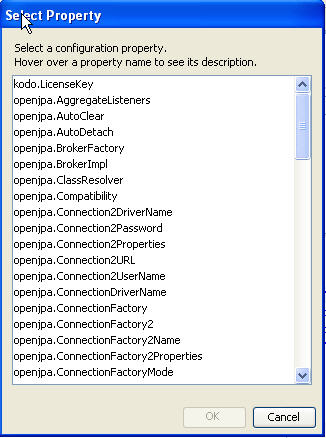
- To add additional properties, click the New Property button
and specify the Name and Value or click the
 button to browse through a list of properties. The Select Property dialog
displays all the list of Kodo properties with a description.
To Understand Validation and Code Completion (Optional)
The AppXRay provides validation and code completion in the
JPA Configurations Editor. When you're editing in the Source tab, you're helped
by code completion.
- Switch to the Source tab of the JPA Configurations Editor.
- Edit the line
<class>com.bea.beans.Customer</class>
to
<class>com.bea.beans.Customer_New</class>
- As we have specified an invalid mapping file which does not exist either
in the project or at the specified location, the Editor shows a warning.
Reset the class to com.bea.beans.Customer. Save
persistence.xml.
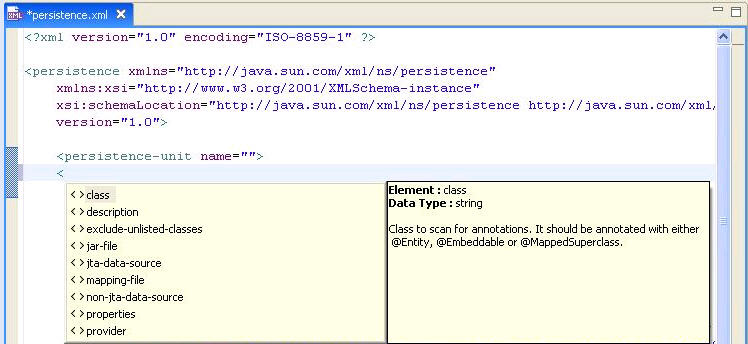
- When you're editing in the Source tab, you're helped by code completion
when you press CTRL+SPACE.
- You can create a new child element of <persistence-unit> by typing
a open angle bracket and seleting from the code completion drop down that
appears, as shown below.
Click one of the following arrows to navigate through the tutorial:
Still need help? Post a question on the Workshop
newsgroup.


