Workshop provides a powerful and flexible object relational
mapping interface for popular persistence services like BEA Kodo JPA. Depending
on the development scenario, O/R mappings can be generated through different
mechanisms:
Reverse Engineering the Schema to create object relational mappings
To Generate Annotated POJOs from a Schema using the JPA ORM Generation Wizard
In this step, we will use Workshop to automatically generate JPA entity
beans from an existing database schema by reverse engineering the schema. Workshop will generate Java classes with the appropriate accessors and JPA annotations.
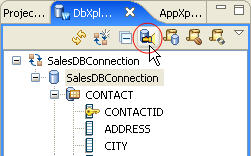
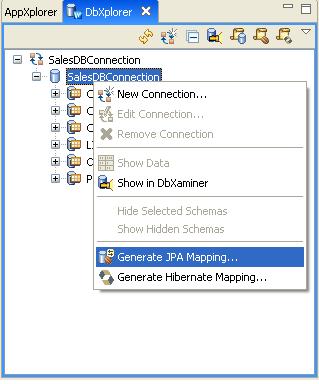
In the DbXplorer view, right-click the schema SalesDBConnection
and select Generate JPA Mapping.
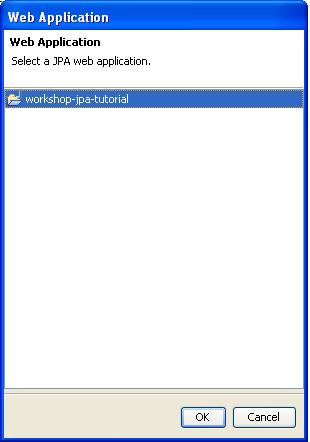
Select the JPA-based Web application project, workshop-jpa-tutorial,
from the Web Application dialog. Workshop considers a web
application to be a JPA application if it has the persistence file persistence.xml
under the web/classes/META-INF folder.
Click OK.
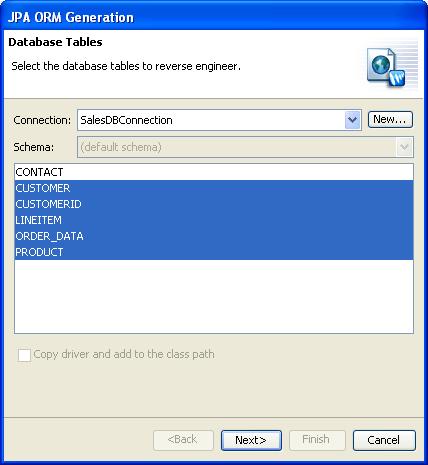
Select the database tables from the JPA ORM Generation
dialog as shown below.
Do not select the CONTACT database
table. Later on in this tutorial you will use the CONTACT database table to
manually create a POJO class Contact
and annotate this class for JPA in order to better understand the top-down
development approach.
Optionally, you can also select the checkbox Copy driver and add to the class
path. It instructs the JPA ORM Generation
Wizard to add the JDBC driver for the Hypersonic Database to
the project classpath. Currently the driver already exists in the project
buildpath.
Click Next.
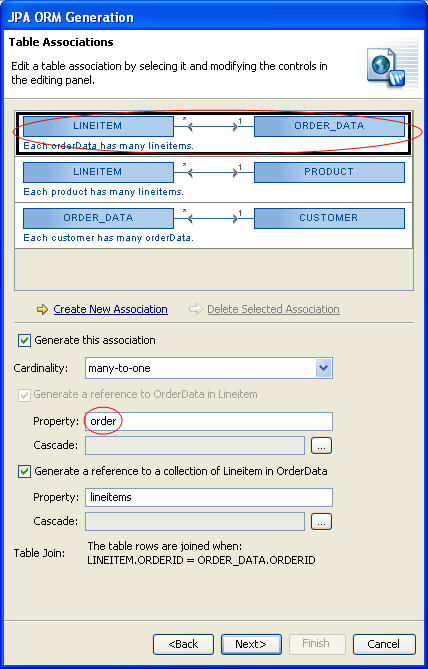
The Table Associations dialog displays entity relationships
as observed in the database schema from the foreign key definitions. The dialog allows you to edit a table association by selecting
each association and modifying its options in the editing panel.
Select the association between LINEITEM and ORDER_DATA.
Change the value of the first Property field from orderData to order.
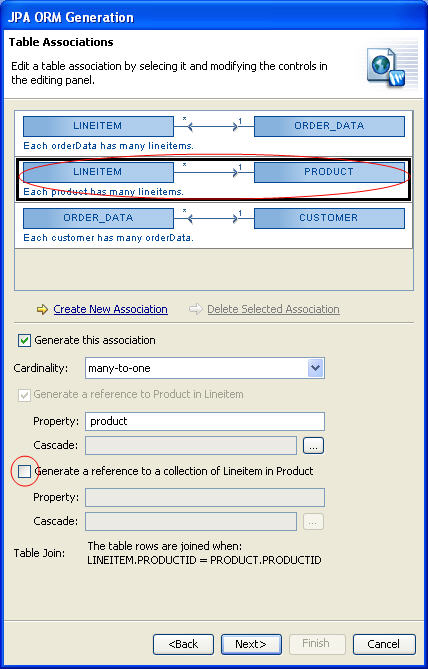
Select the association between LINEITEM and PRODUCT.
We want to define many-to-one unidirectional relationship between LINEITEM and
PRODUCT. Uncheck the checkbox Generating
a reference to a set of LineItems in Product.
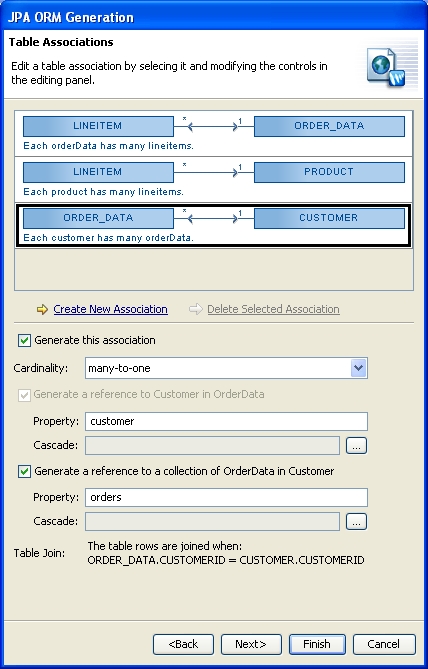
Select the association between ORDER_DATA and CUSTOMER.
Change the value of the second Property field from orderData to orders.
Click Next.
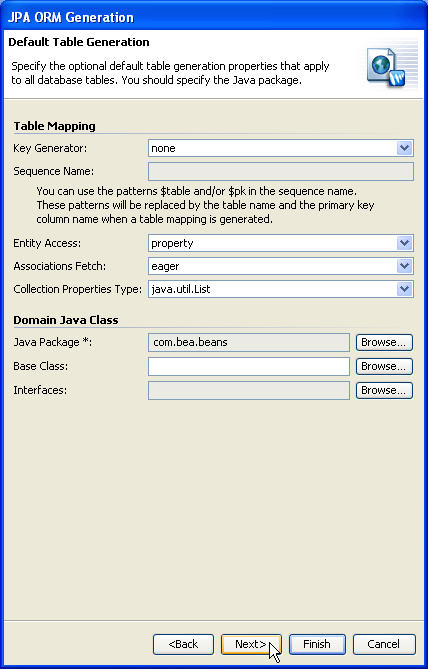
In the Default Table Association dialog,
confirm that none is selected in the Key Generator field.
For Collection Properties Type, verify that java.util.List is selected.
A Java Package is required
for generating the entity beans. Click Browse in the Java Package field to view the Choose Java Package dialog. Select the com.bea.beans package and click OK.
Click Next.
The Tables and Columns dialog allows you to customize the tables and columns mapping generation. We will not customize the tables in this tutorial. Click Next.
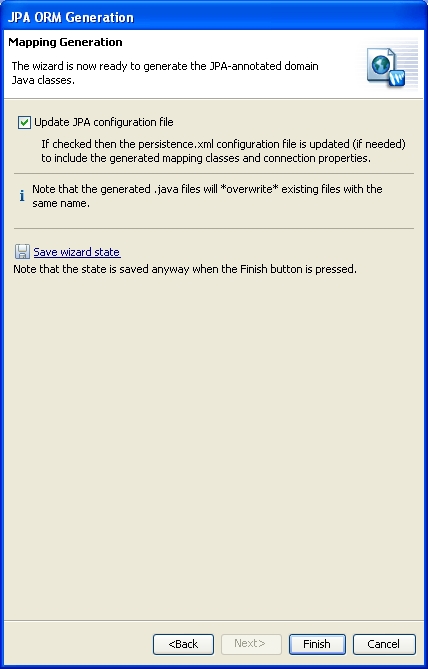
In the JPA ORM Generation dialog,ensure that the Update
JPA configuration file checkbox is selected, as it is by default.
This will ensure that the persistence.xml file is updated to include
the mapping information you've just defined.
Click Finish.
Workshop will generate all of the annotated Entity Java Beans
based on the properties supplied to the ORM Generation wizard.
You can access the entites through the AppXplorer view under the JPA Persistence Configuration branch of the project. In the AppXplorer view,
go to the JPA Persistence Configuration branch under
the workshop-jpa-tutorial
project. You can find the object model under the package com.bea.beans
of the branch web/WEB-INF/src/java.
To view the set of Persistence entities generated by Workshop, navigate to the persistence.xml file within your web project.
Workshop identifies the persistent entity- based class names of entities
specified in persistence.xml file.
To Review Generated Classes with Annotations
When we create entity mappings, we define each property as having one of
six property types: basic, id, many-to-one, one-to-one, one-to-many, and
many-to-many. When you generate entities from a database, Workshop
annotates the generated source code with JPA annotations that designate which
type a given property is. In this section we will review some basic JPA annotations.
Review
the following annotations in the class Customer.
Double-click the file workshop-jpa-tutorial > web/WEB-INF/src/java
> com.bea.beans > Customer.java to view its source.
Basic Properties - A basic property handles a standard
value that is persisted as-is to the database.
The @Basic annotation
is followed by the @Column annotation defining an attribute name which
is the name of the column to which the property is bound; the attribute
nullable is false to specify that the column cannot store null values;
the column length attribute specifies the maximum length.
@Basic()
@Column(name="NAME", nullable=false, length=255)
public String getName() {
return this.name;
}
public void setName(String name) {
this.name = name;
}
One-to-Many Properties - A one-to-many property
designates a relationship in which one A entity references multiple
B entities, and no two A entities reference the same B entity.
Here
a Customer entity references multiple OrderData entities, but an OrderData
entity can have only one Customer entity reference.
The one-to-many
annotation defines an attribute mappedBy which is the name of the many-to-one
field in OrderData entity that maps this bidirectional relation.
@OneToMany(mappedBy="customer",
fetch=FetchType.EAGER)
public java.util.Set<OrderData> getOrders() {
return this.orders;
}
public void setOrders(java.util.Set<OrderData> orders)
{
this.orders = orders;
}
Id properties - An Id property designates an identifier,
such as a primary key. All entity beans must declare one or more fields
which together form the persistent identity of an instance.
An Id annotation
is followed by a @Column annotation defining the attribute unique which
is true to specify that the column is UNIQUE in the SQL sense (can
have only unique values).
Id()
@Column(name="CUSTOMERID", unique=true, nullable=false)
public Integer getCustomerid() {
return this.customerid;
}
public void setCustomerid(Integer customerid) {
this.customerid = customerid;
}
Double-click the class file OrderData.java.
Many-to-one Properties - A many-to-one property designates
a relationship in which an entity A references a single entity B, and
other A's might also reference the same B; there is a many-to-one relation
from A to B.
The many-to-one annotation defines an attribute fetch
which is a enum that specifies whether to load the field's persisted data
before the entity object is returned by the persistence provider (FetchType.EAGER)
or later, when the property is accessed (FetchType.LAZY).
The many- to-one annotation is followed by an @JoinColumn annotation defining the column
name which is the name of the column to which the property is bound and
a referencedColumnName attribute which is the name of the primary key column
being joined to.
@ManyToOne(fetch=FetchType.EAGER)
@JoinColumn(name="CUSTOMERID", referencedColumnName="CUSTOMERID")
public Customer getCustomer() {
return this.customer;
}
public void setCustomer(Customer customer) {
this.customer = customer;
}
To Run an EJBQL Query to Test Your Mappings
In this step, you will become familiar with the EJBQL Editor. The EJBQL Editor lets
you define and execute an EJBQL query.
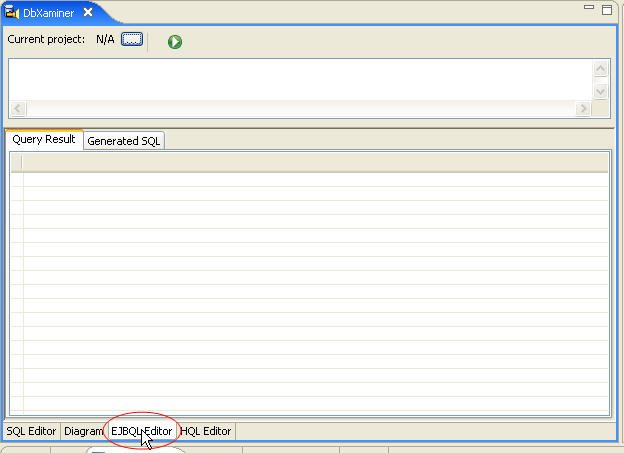
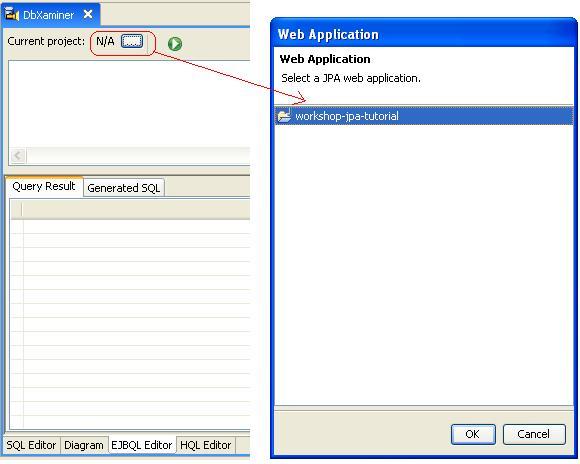
On the DbXplorer view, click the Open DbXaminer button.
In the DbXaminer view, click the EJBQL Editor
tab.
Browse to select the workshop-jpa-tutorial web
application as the Current project:.
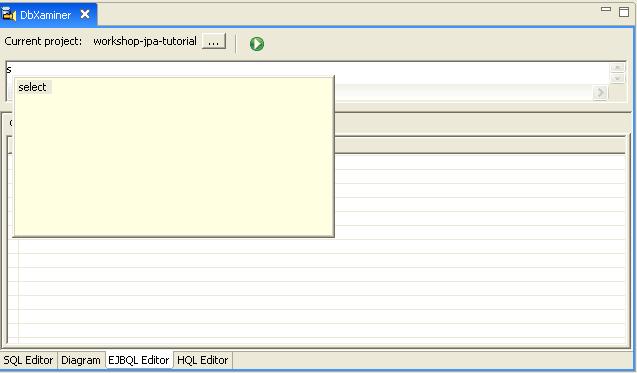
When defining an EJBQL query in the EJBQL Editor, Workshop provides code completion for EJBQL keywords and the persistent entities
by pressing CTRL+SPACE. Here, we will define an EJBQL SELECT
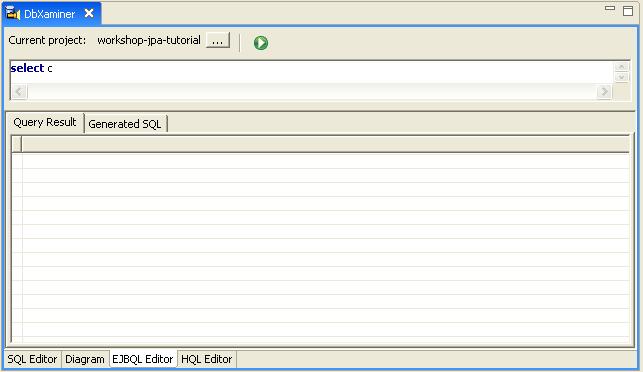
query using the code completion facility. In the EJBQL Editor, enter S
and press CTRL+SPACE. It displays a list of EJBQL keywords
starting with letter S.
Double-click the keyword select.
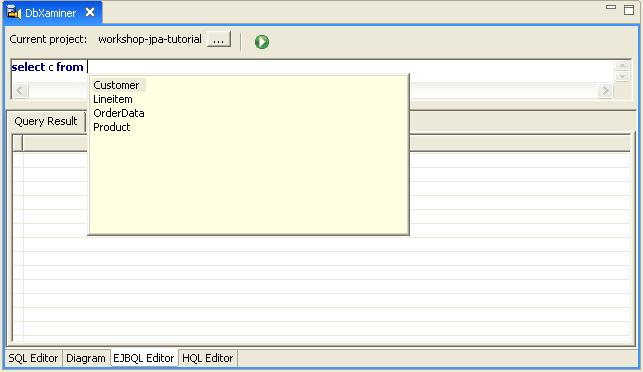
Enter a space and specify c as an alias to get the data
for the properties of persistent object Customer.
Enter from (You can use code completion for the from
keyword) and space.
Press CTRL+SPACE to get a list of persistent entities
and select the Customer object.
Enter space and specify an alias c for Customer entity.
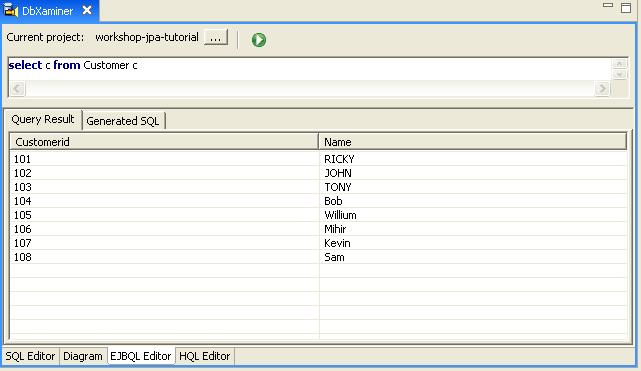
Now, we have defined the EJBQL SELECT query. You can execute them by either
clicking the Execute Query button or by using the hotkey,
CTRL+ENTER.
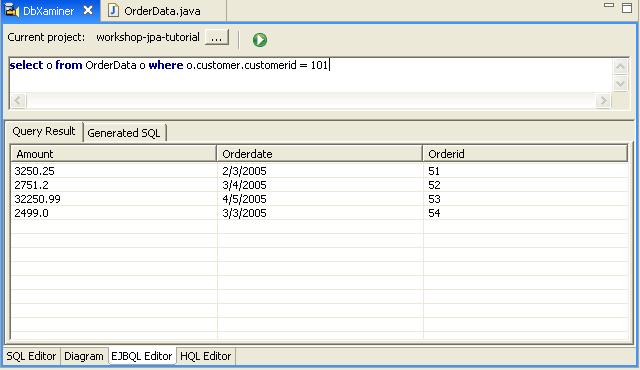
Similarly execute an EJBQL SELECT query on persistent object OrderData
for a customer having a particular customerid.
Click one of the following arrows to navigate through the tutorial: