eDocs Home > BEA AquaLogic Data Services Platform Documentation > Data Services Developer's Guide > Contents
How To Configure the Retail Dataspace Sample Application
This topic describes how to set up the Retail Dataspace Sample Application after completing the installation of ALDSP.
Prerequisites
A prerequisite to configuring the retail dataspace sample application is to have the ALDSP Data Services Studio installed on a supported platform.
| Choose the guide for the version you are running: |
About Data Services Studio and Eclipse
This tutorial uses the version of Eclipse that is installed with ALDSP.
| The Eclipse framework often provides multiple ways of achieving same result. In many cases there is no "correct" or "better" way. In other words, there are often many paths to the same results. |
Start Data Services Studio
| In version 3.2 Data Services studio is part of Workspace Studio 1.1. If you are using ALDSP 3.2 configuration instructions are available here. |
Open the Data Services Studio using the following Windows Start menu command:
Start > All Programs > BEA Products > AquaLogic Data Services Platform 3.0 > Data Services Studio
| In some cases the AquaLogic Data Services Platform 3.0 option may not be nested in the BEA Products section. If this is the case just proceed; it is not a problem. |
Select a Workspace
ALDSP projects are called dataspace projects. These projects in turn are located in a workspace folder.
The first step in creating a dataspace is to select a workspace.
- Use the default location:
C:\bea92mp2\aldsp_3.0\samples\workspaces\aldsp
- Click OK.
Selecting a Workspace
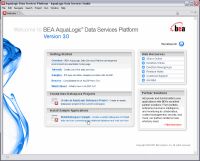
If this is the first time you have opened Studio, the ALDSP Welcome screen appears.
Data Services Studio Welcome Page
In the Install Sample Application section click on:
Retail Dataspace Sample
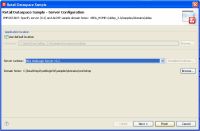
Retail Dataspace Sample Dialog
| Important Make sure your domain changed from the Workshop sample domain to the ALDSP samples domain, as shown in the steps in the table below. |
Configure the ALDSP-enabled Server Environment
Some simple domain server configuration is required. These steps are described in the following table. (The path information in the table below may be truncated in your browser. Click and select to view the entire path.
Configuring Actions
| Step | Dialog | Field |
Action |
Comment |
|---|---|---|---|---|
| 1. | Retail Database Sample - Server Configuration |
Server runtime: | click Installed Runtimes... |
|
| 2. | Installed Server Runtime Environments | click Add... | ||
| 3. |
New Server Runtime | Type of runtime: |
select BEA WebLogic Server v9.2 |
|
| 4. |
|
|||
| 5. |
Define a WebLogic Runtime | WebLogic Home: |
|
|
| 6. |
Browse For Folder | Folder |
locate and select the WebLogic home directory: <BEA_HOME>/weblogic92 |
Example: c:\bea92mp2\weblogic92 |
| 7. |
|
|||
| 8. |
Define a WebLogic Runtime |
|
||
| 9. |
Installed Server Runtime Environments |
|
||
| 10. |
Retail Dataspace Sample - Server Configuration |
Domain home: |
|
The Workshop domain is to be replaced by the ALDSP sample domain. |
| 11. |
Browse For Folder |
Select domain home | Locate and click on the ALDSP Sample domain: <ALDSP_HOME>/samples/domains/aldsp |
Example: c:\bea92mp2\aldsp30\samples\domains\aldsp |
| 12. |
|
|||
| 13. | Retail Dataspace Sample - Server Configuration |
|
Workspace is built (this may take a few minutes). |
Your server should now be properly configured for ALDSP and ready to be started.
Start the Server
An ALDSP-enabled server is a version of WebLogic Server with additional functionality to support ALDSP deployment and runtime. The ALDSP server must be running in order to access sample data and to deploy your project.
To start your server from Studio:
- Locate the Servers window. If it isn't visible, use the following option command:
Window > Show View > Servers
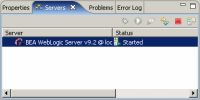
- In the Server window locate BEA WebLogic Server v 9.2@localhost (this may be the only server listed). Its status is: stopped.
- Right-click on the server name and select Start. (The start-up operation can take several minutes.) Notice the running log of server startup actions in the Console window.
Server Window
- After your project has automatically deployed (assuming default settings of Data Services Studio), the dataspace deployment status dialog is displayed. Click:

See Also
- Install the ALDSP Sample Retail Application
- Create Your First Data Services


